
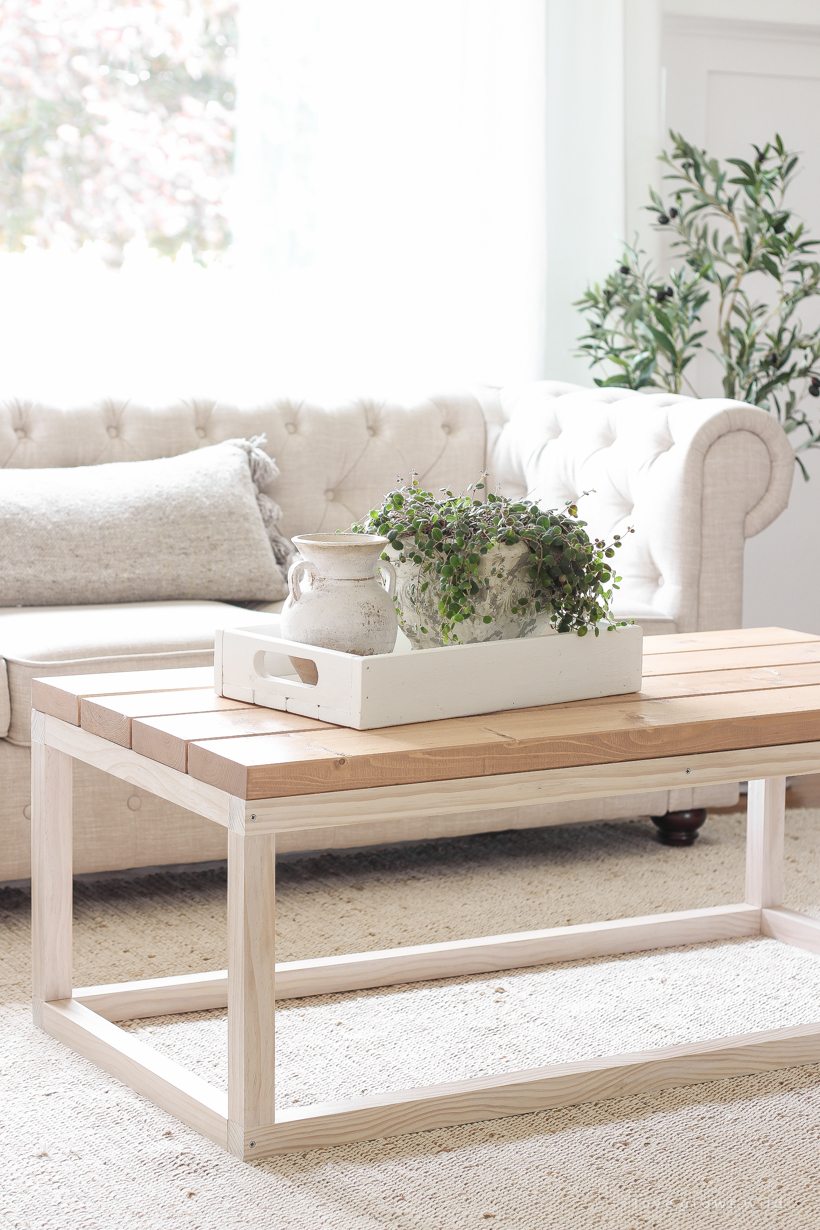
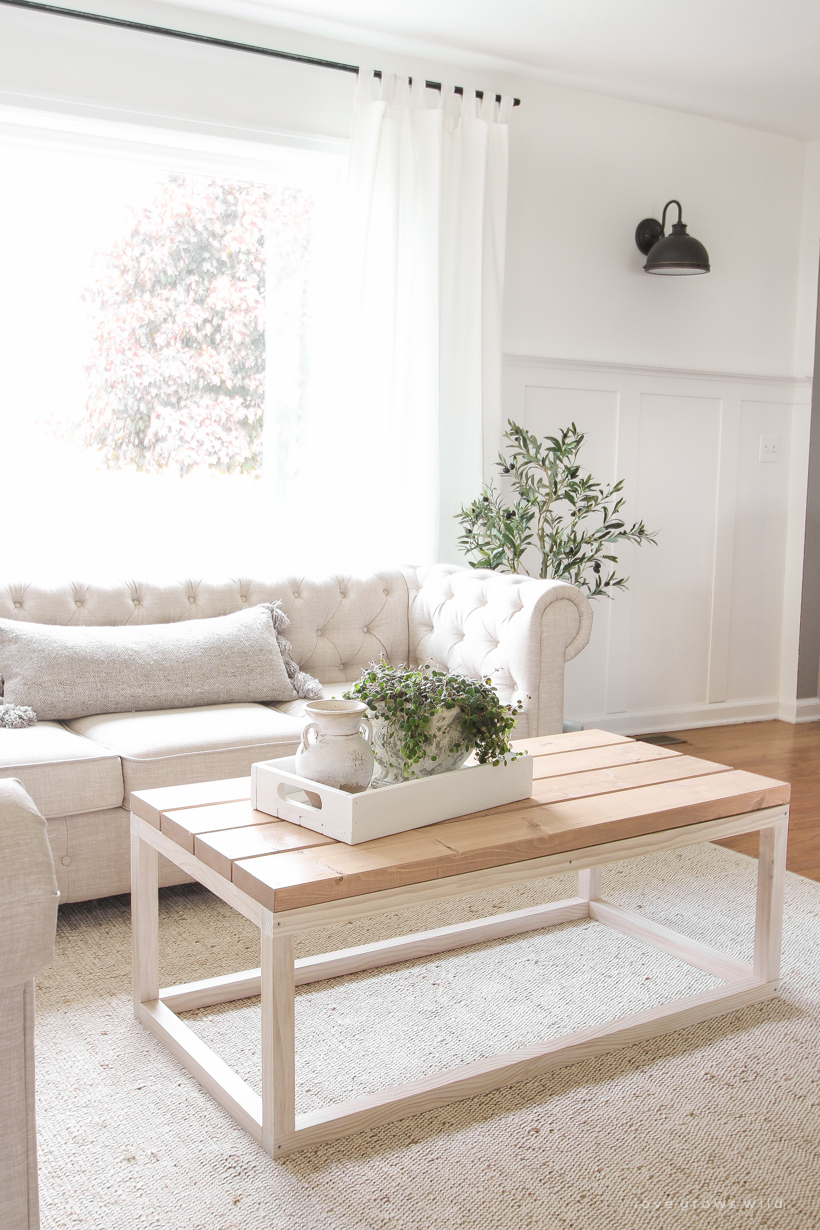
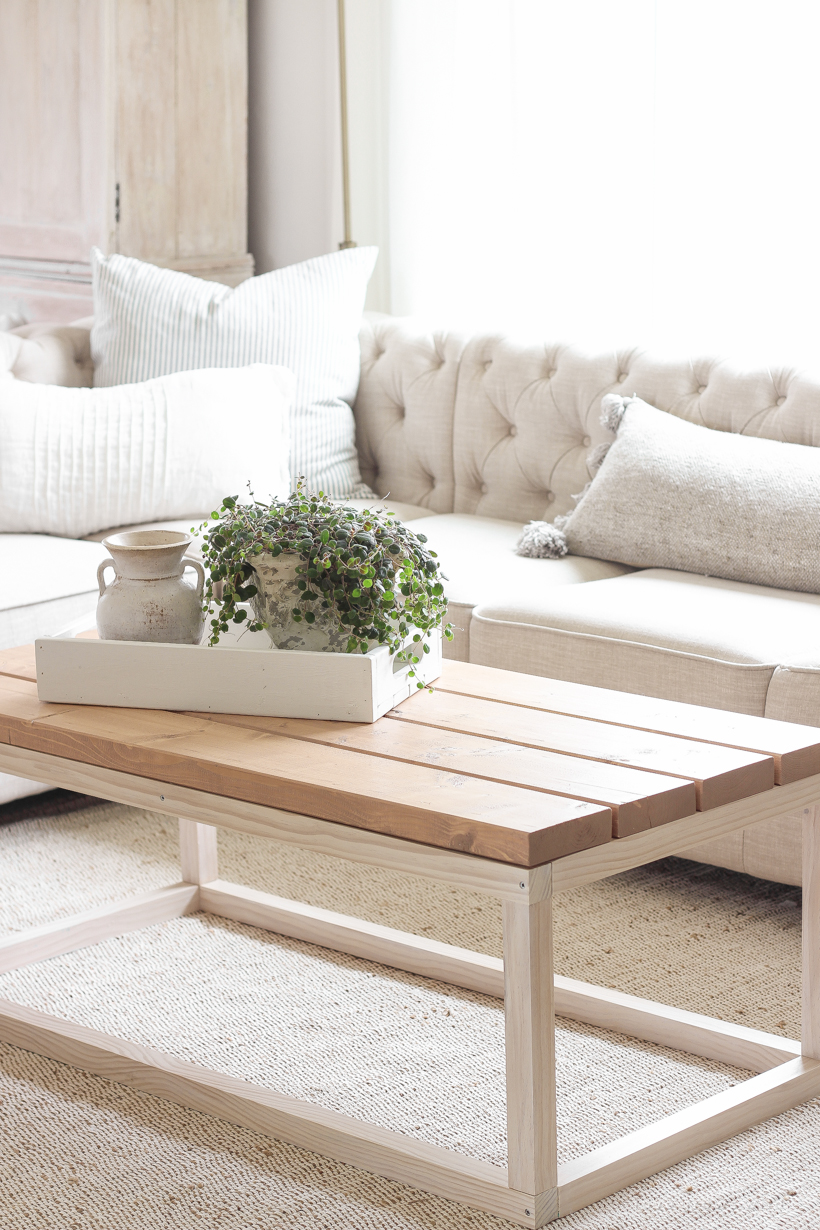
In partnership with Minwax // I have the hardest time picking out coffee tables I like and have wanted to do something different in our living room for awhile now. I had something a little more clean and modern with pretty wood tones in my mind, so I rolled up my sleeves and got to work building my version of this popular coffee table style that I absolutely adore.
I hated to spend more money on a coffee table when I already had a perfectly good one, so I went the DIY route after seeing the table my friend Little Glass Jar made, and I am SO happy I did. This entire table that fits our sectional sofa perfectly cost just $53.76 in lumber, plus another $52 in stain and a topcoat since I wanted to try some new stain colors for this project. If you add up the screws and foam brushes I bought, plus all the other materials, my total cost was just $112.00 for a brand new, beautiful coffee table!
Of course I wouldn’t leave you hanging without sharing a tutorial, so let’s dive in and build a coffee table today!
Simple DIY Coffee Table
finished table dimensions: 46″ length x 23″ width x 17 3/4″ height
project completion time: approximately 2 hours to cut boards and build + 1 day to sand and apply stain and topcoat (including drying time)
SUPPLIES:
tape measure
saw
drill
countersink drill bit
wood glue
2 1/2″ screws
sander
stain/paint finish of choice – I used:
Minwax Water Based Pre-Stain Wood Conditioner
Minwax Water Based Wood Stain mixed in: Desert Sand and Pure White
Minwax Water Based Polycrylic
CUT LIST:
4 – 2 x 2’s cut to 46″ (base – long sides)
4 – 2 x 2’s cut to 13″ (legs)
5 – 2 x 2’s cut to 20″ (base – short sides + middle support)
4 – 2 x 6’s cut to 46″ (top)
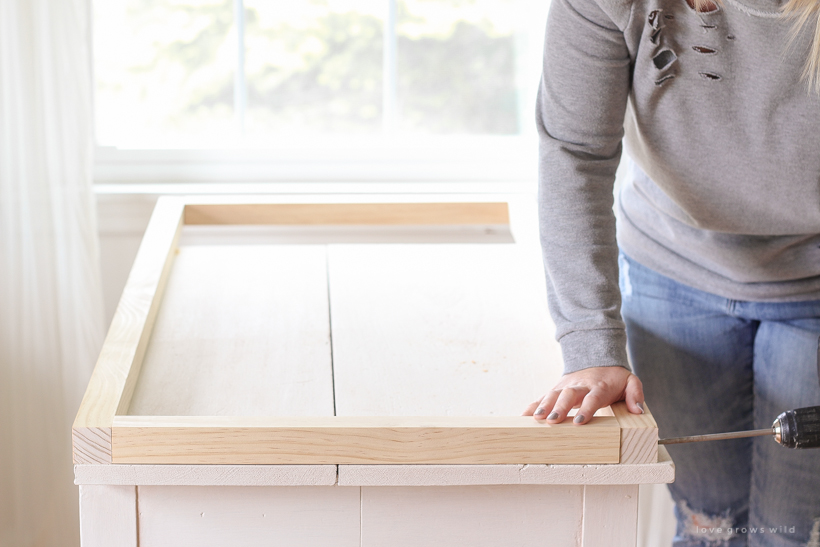
STEP 1
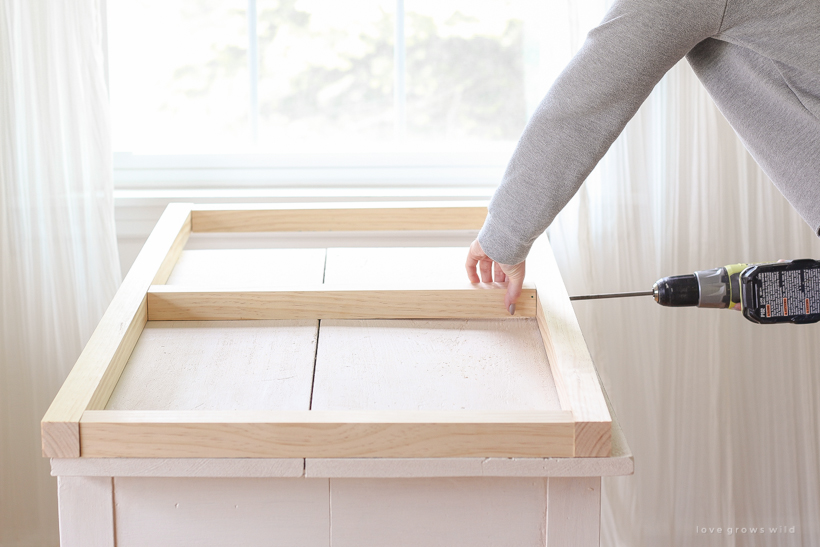
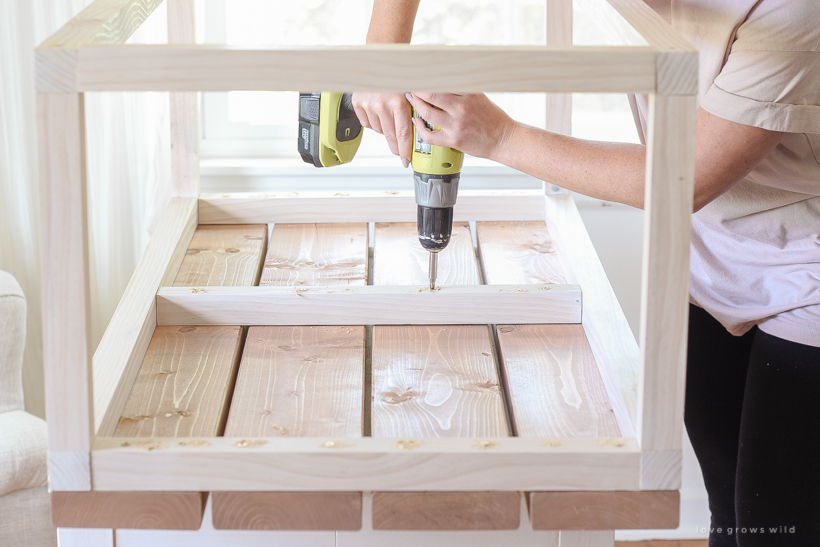
Attach two of the 46″ base pieces to two of the 20″ base pieces to create a box using wood glue and 2 1/2″ screws. This will be the bottom of the table base.
Important Notes:
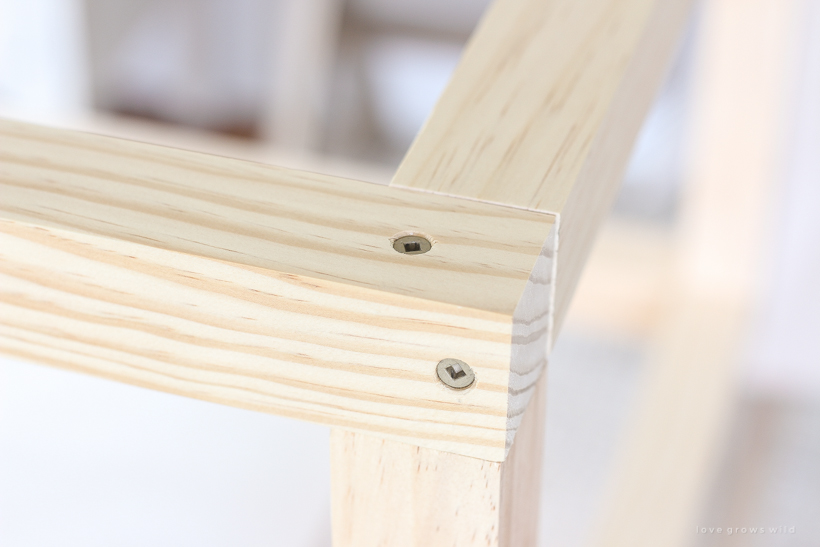
- Use a countersink drill bit to pre-drill ALL holes before inserting screws to avoid splitting the wood and also to make the screw heads sit flush with the wood.
- In step 3 when you attach the legs to the table base, you will end up with two screws being placed very close to each other. To work around that, make sure the screws you use in steps 1 and 2 are offset to one side to allow room for the screws you will use later on. Reference the photo in step 3 to see where I placed my screws.
STEP 2
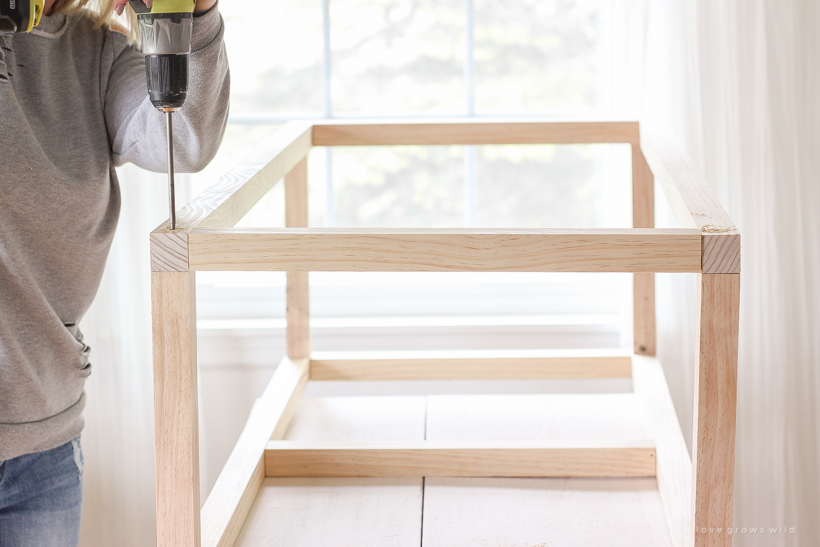
Repeat step 1 to create a second box. This time, add another 20″ 2 x 2 to the middle to act as a support for the 2 x 6’s that will go on top.
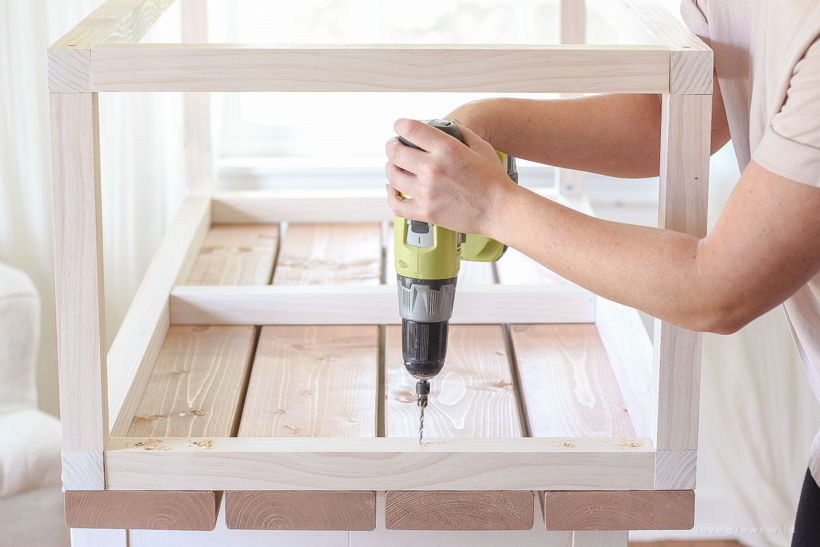
STEP 3
Connect the two table base pieces you just built by adding the 13″ legs in between on the corners.
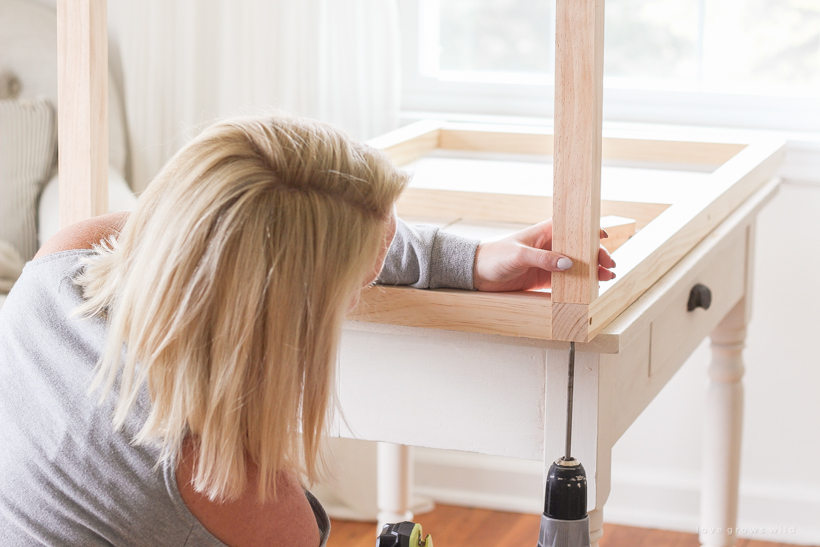
Important Note:
The photo below shows how I offset my screws to the sides to allow room for both.
STEP 4
It will be easier to stain the table base and top 2 x 6 boards separately before you finish assembling the table, especially if you use two different stain colors like I did.
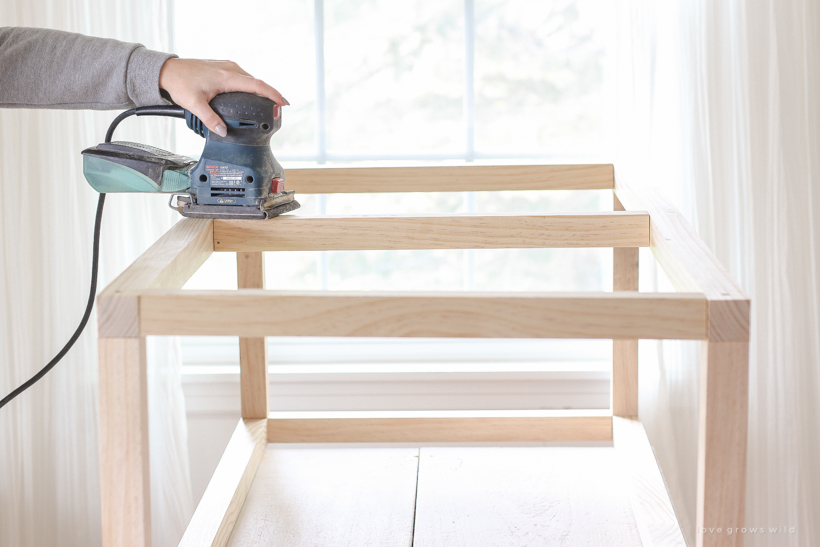
First, sand the wood with 150 grit or higher sandpaper to achieve a smooth, even surface before staining. Thoroughly remove all dust from the wood by using a vacuum with a hose attachment, then wiping clean with a damp cloth.
STEP 5
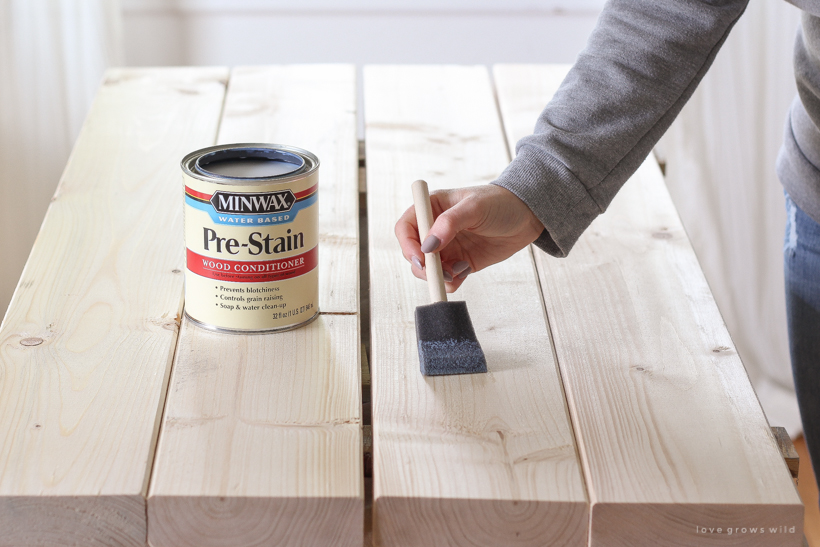
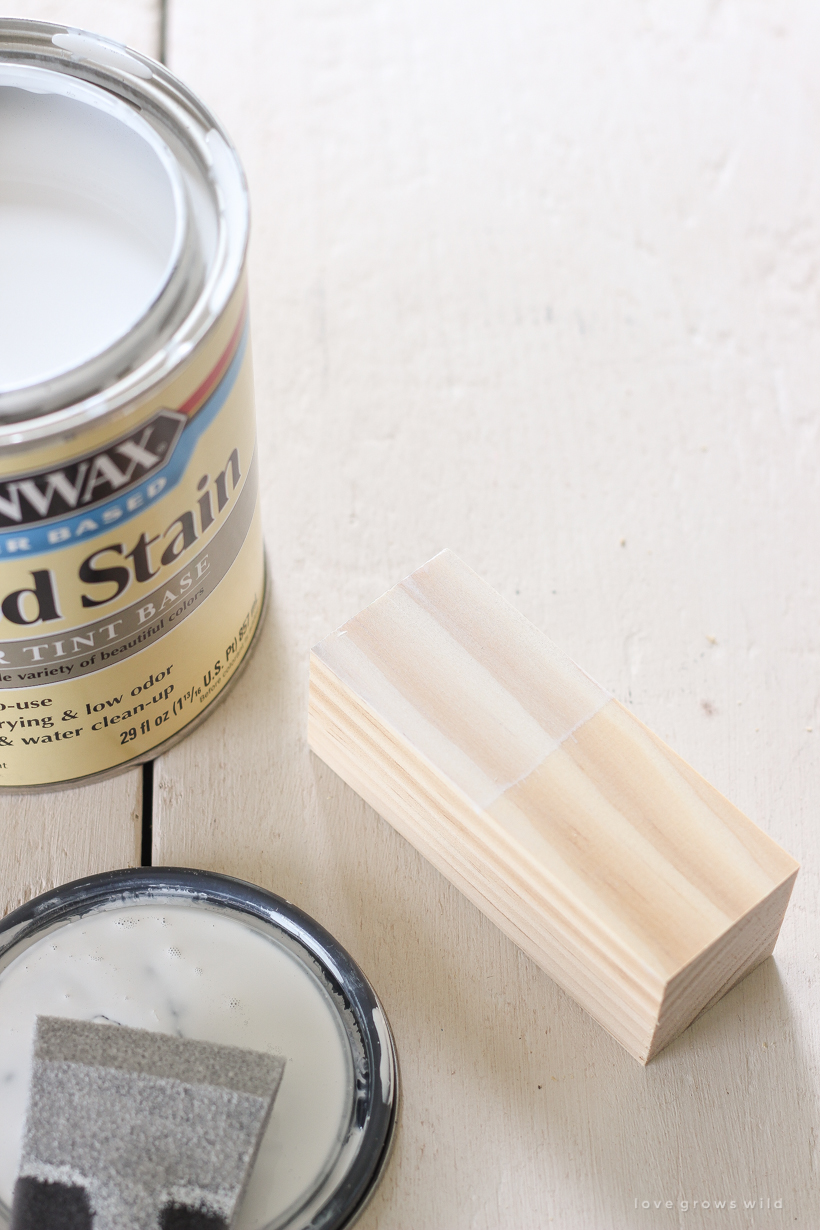
First apply Minwax Pre-Stain Wood Conditioner to both the table base and top 2 x 6 boards.
I’ve learned over the years that starting with a wood conditioner helps the stain soak into the wood more evenly and prevents any blotchiness or streaking. I think of it like a makeup primer… it’s a necessary first step to prep and even out the surface for whatever you’re about to apply on top. I like to use a foam brush to apply the wood conditioner because it’s cheap and disposable when you’re done, but because all the finishes I’m using today are water based, cleaning brushes with soap and water would be very simple.
Apply the Pre-Stain Wood Conditioner and allow it to penetrate the wood for just 1-5 minutes, then remove excess conditioner that has not soaked into the wood with a clean rag.
STEP 6
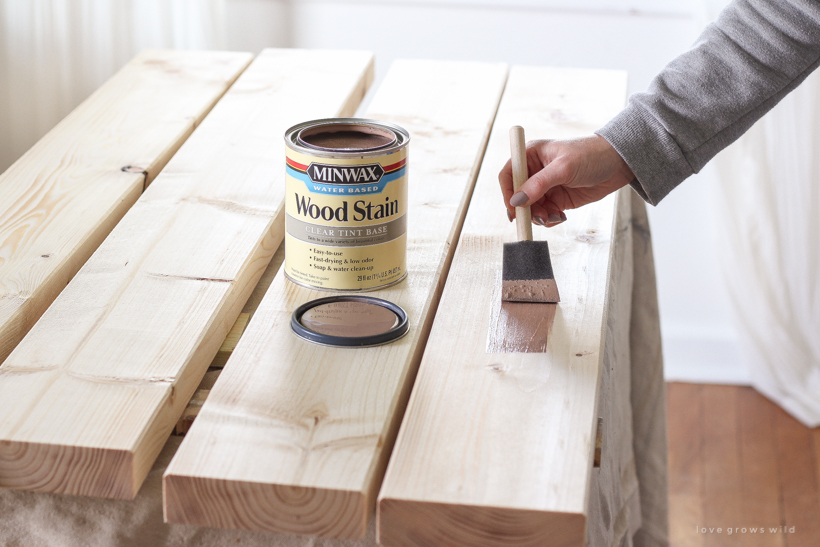
Apply Minwax Water Based Wood Stain to all of the wood. I had the color Desert Sand mixed for the top 2 x 6 boards and the color Pure White mixed for the table base. What I love about the water based stain is 1) how easy clean up is… 2) how little odor the stain has… 3) the colors. You can get everything from bold, colorful shades to neutral wood tones to light, creamy cottage and ocean-inspired stains.
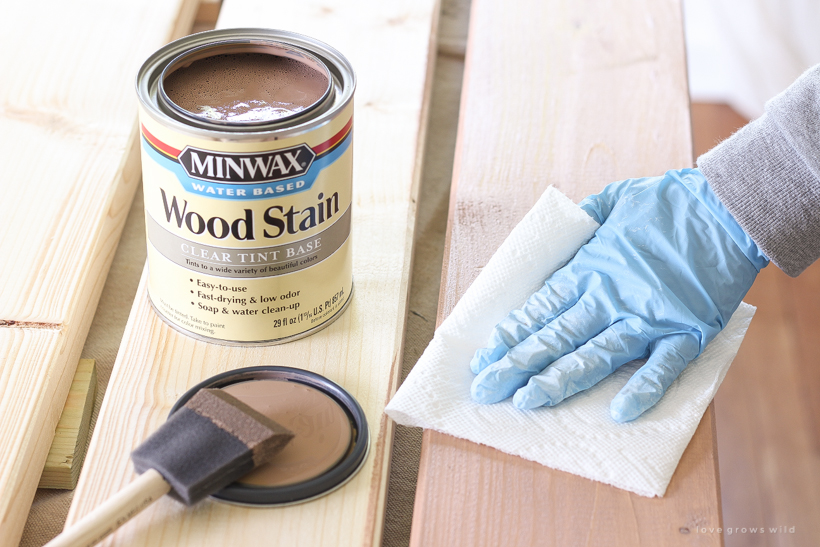
Apply the stain using a foam brush, and allow it to penetrate the wood no longer than 3 minutes. It is very fast-drying, so work in small sections! Wipe the wood with a clean cloth to remove any stain that has not soaked into the wood. Allow the stain to dry 24 hours before applying a protective finish.
Tip: I always wear a pair of gloves when wiping off the excess stain to keep my hands clean. The water based stain is easy to remove, but it’s just easier to wear a pair of gloves!
Before Stain | After Stain
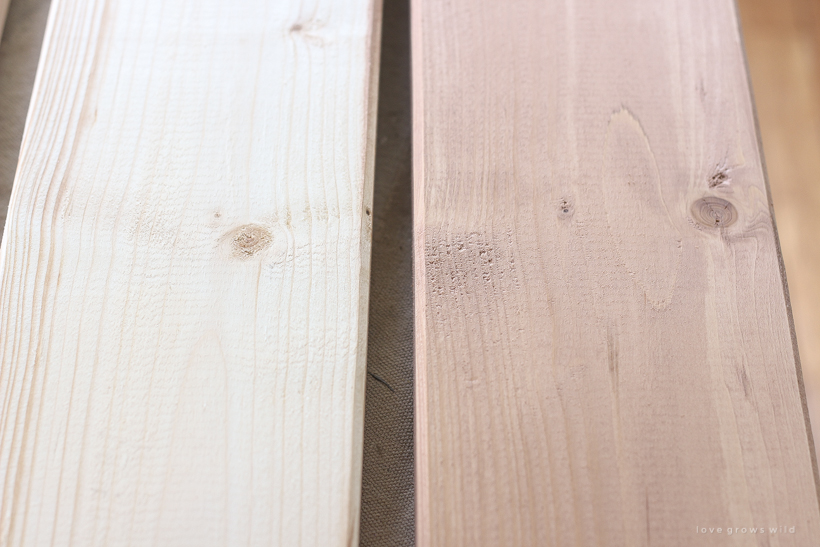
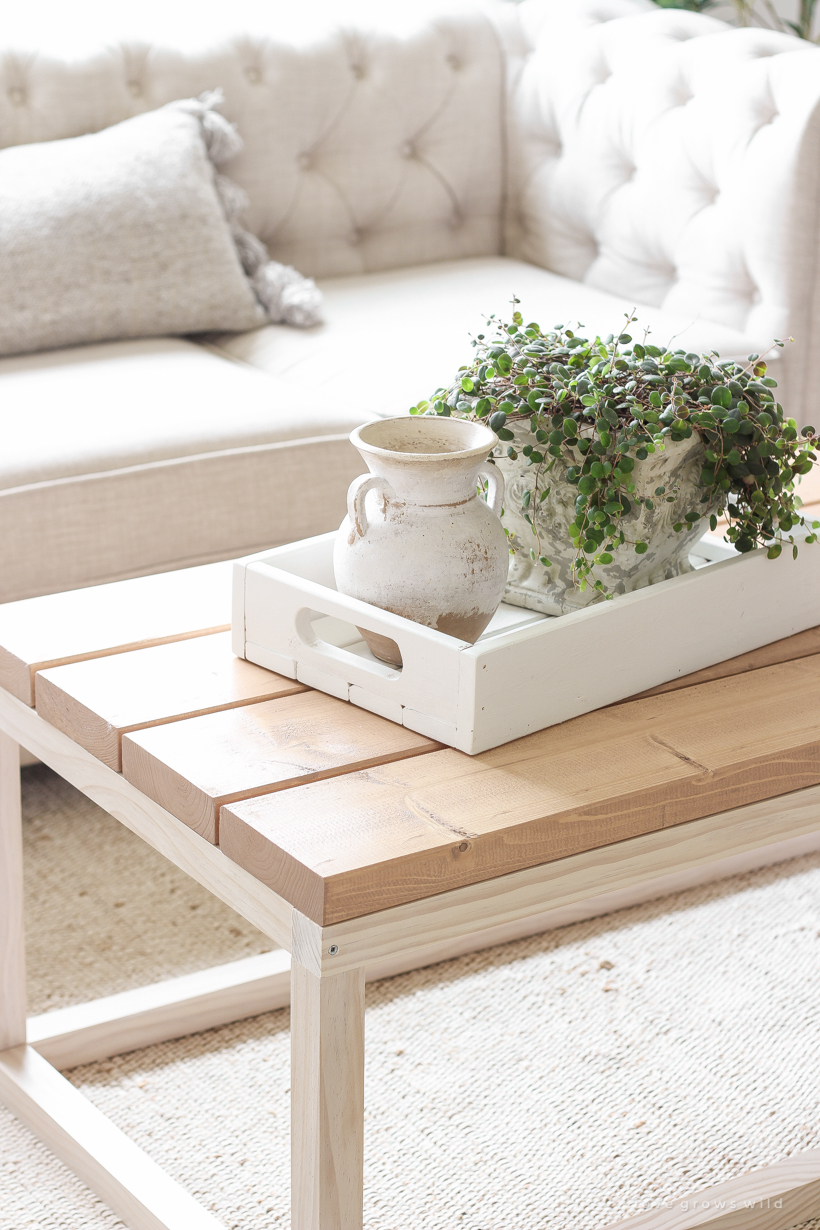
The Pure White stain might be my absolute favorite. It gives a whitewashed appearance and beautifully softens the wood grain while toning down the yellow of the raw wood.
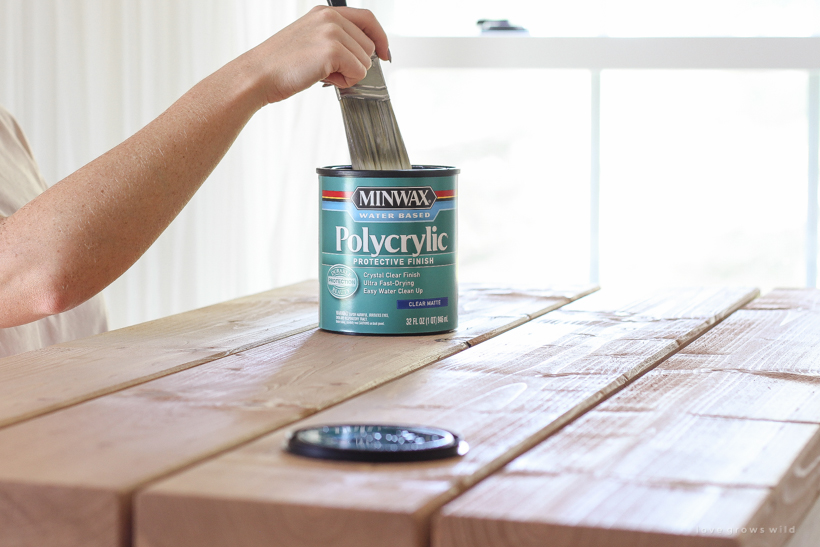
STEP 7
After the stain has dried 24 hours, apply a thin coat of Minwax Water Based Polycrylic (I used the clear matte finish) using a brush. Allow to dry at least 2 hours, then sand with a very fine 220 grit sandpaper and remove all dust. Apply a second and third coat, drying and sanding in between each layer. The wood will need 3 hours to dry before handling and 24 hours before it will be fully cured.
If you’ve ever used a polyurethane on top of white paint and saw the yellow stains that appeared once the poly dried, you know how important it is to make sure you’re using the right topcoat. Because I wanted a light white stain on the bottom of the table, I made sure to use Minwax Polycrylic that has a crystal clear finish when dry, and I love it!
STEP 8
Attach the top 2 x 6 boards to the table base from the underside to hide all screws.
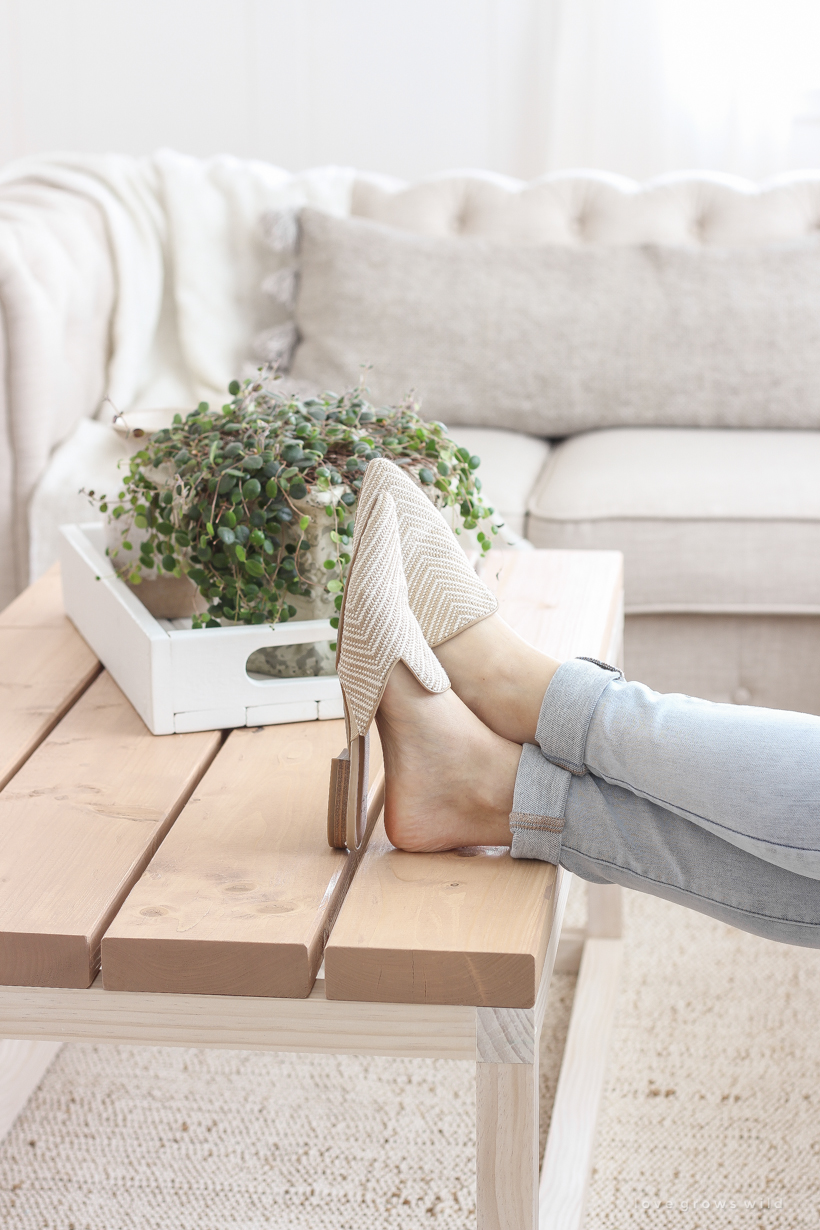
I found it easiest to line up the two outer boards with the edge of the table base first and attach those, then space the two middle boards evenly and attach those second. There will be about a 1/2″ gap between the boards.
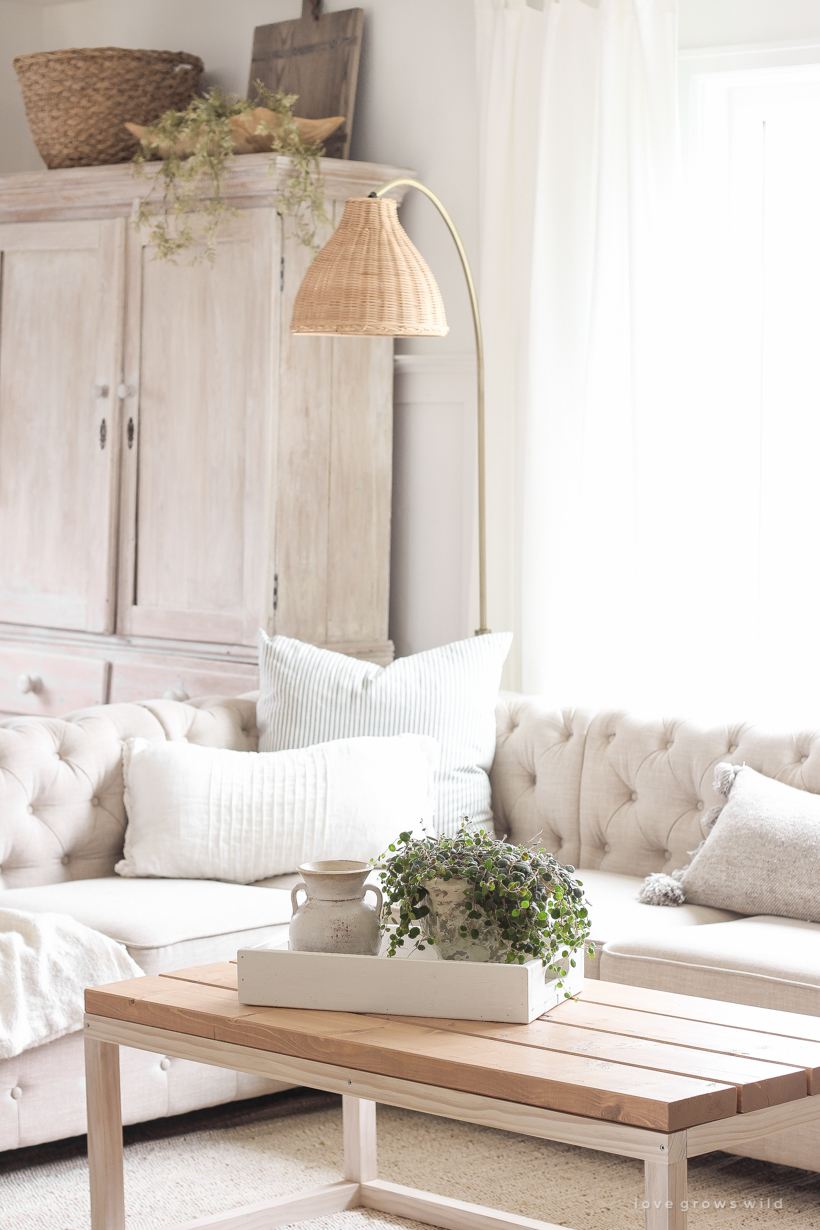
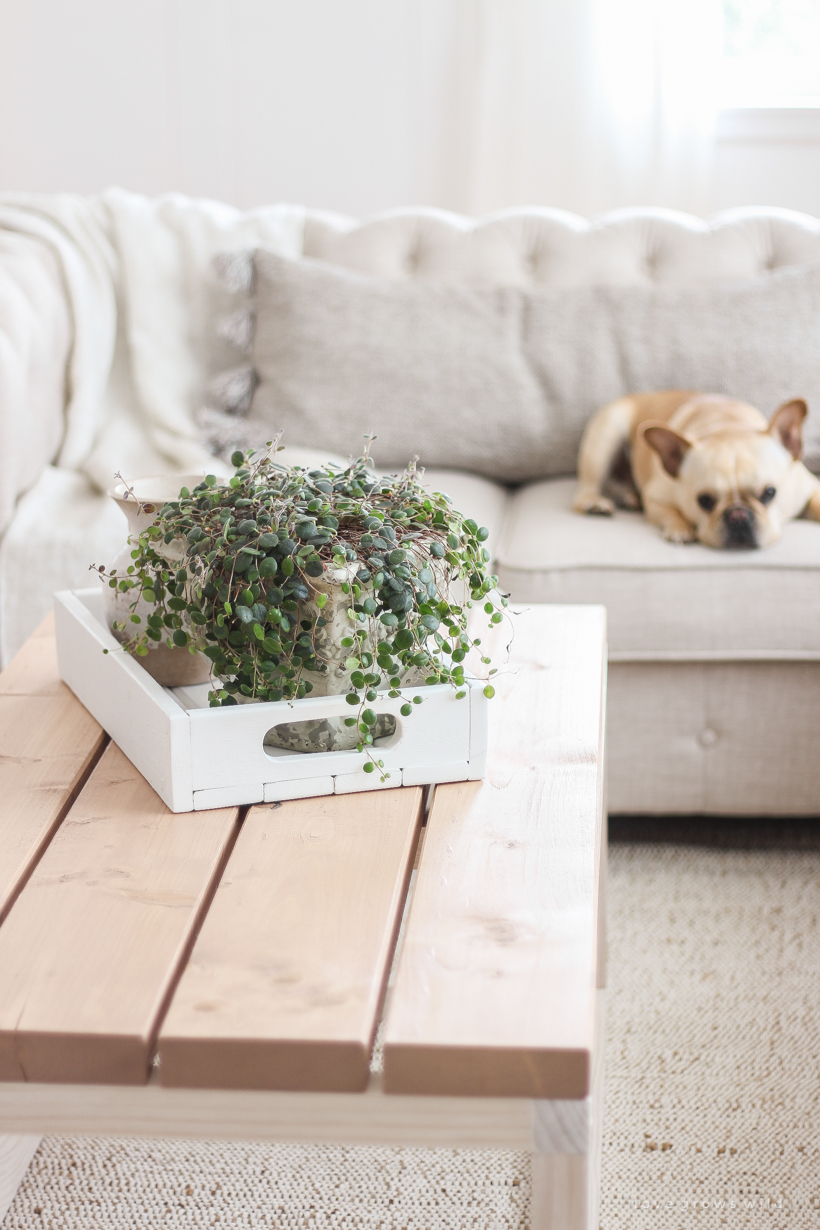
I love the warmth and simplicity this new table brings to the space, and I was able to custom build it to the perfect size for my sectional, which sits a little lower than normal sofas do. I also love that this whole project was created with just a saw and drill and no other special tools were required. Anyone could build this!
So what do you guys think of the new coffee table? How do you feel about the stain colors, and have you used Minwax Water Based Stain before? It’s so easy to apply and clean up afterwards! I’ll have a few more living room updates to hopefully share with you soon!
I partnered with Minwax on this post, but as always the thoughts and opinions shared are 100% my own. Thank you for supporting our blog and brand partners!

Love this project. It’s beautiful in your home. Great tips!
Thank you!
Such a beautiful coffee table! Love the color and the step by step instructions. It goes so well with your decor. Thanks for sharing! ??
Did you also make the tray?
I actually painted this tray that was already made while in Waco, TX. 🙂
2nd try at comment. 1st disappeared. Love your instructions and photos. The other woodworking sites I follow should take heed and copy your example. Retired in2009, sold all my tools, moved into a 5th wheel, traveled this great country. Just bought a house in Ocala, moving in September. Excited to get back to building and doing again, even at 80 years old. Going to use your bench, table and coffee table plans. Also building a deck with a pergola. Thanks for all you do.
I’m at a loss for words, Bill. Thank you so much for taking the time to comment, and I hope you enjoy your new home! Best of luck in all your building plans… the deck and pergola sounds amazing!
It’s a beautiful table! I am inspired for my daughter and I try it ourselves! I love the rug as well. Do you happen to know where you purchased it?
Thank you! This is where I got the rug: https://rstyle.me/+90o2vSUWYoogVdTMd5tk5w
Still have and love it!! 🙂