
The complete guide to adding board and batten to your home! Keep reading for a full tutorial, supply list, and our best tips for giving your home a beautiful upgrade.
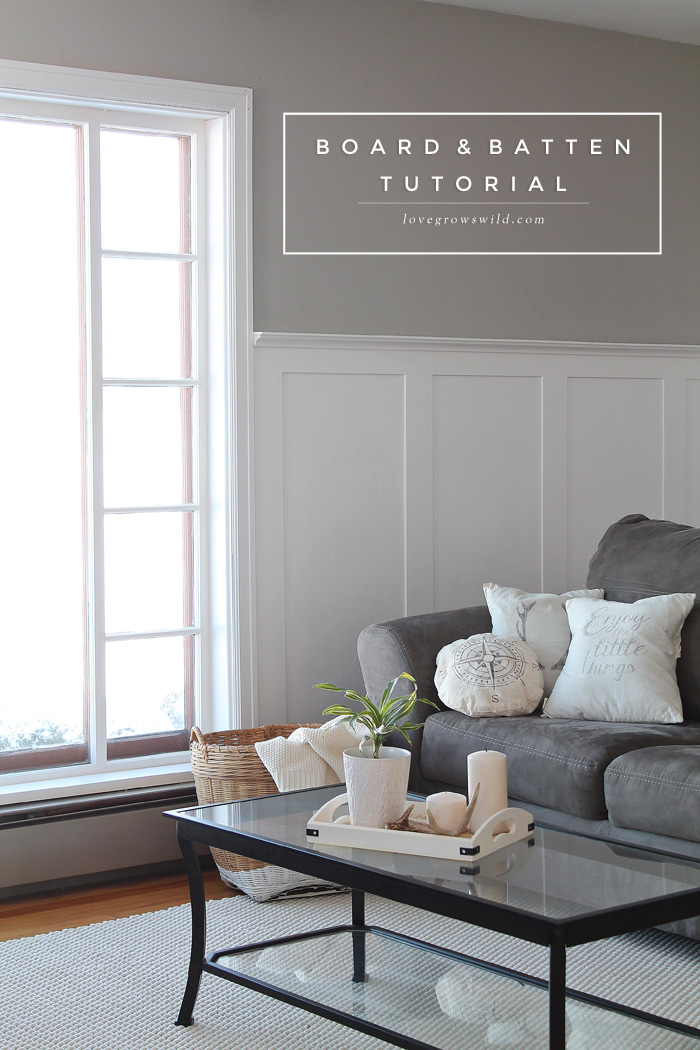

The big day is here! Today I get to share with you our experience of adding board and batten to our living room/dining room. If you watched our video tour a few weeks back and follow along on Instagram, you’ve been seeing sneak peeks of this big project for weeks now, and I know you’ve been waiting to see how we did it all! I finally cleaned up all the sawdust and paint cans to snap a few pictures for you guys, so let’s dive right into the tutorial.
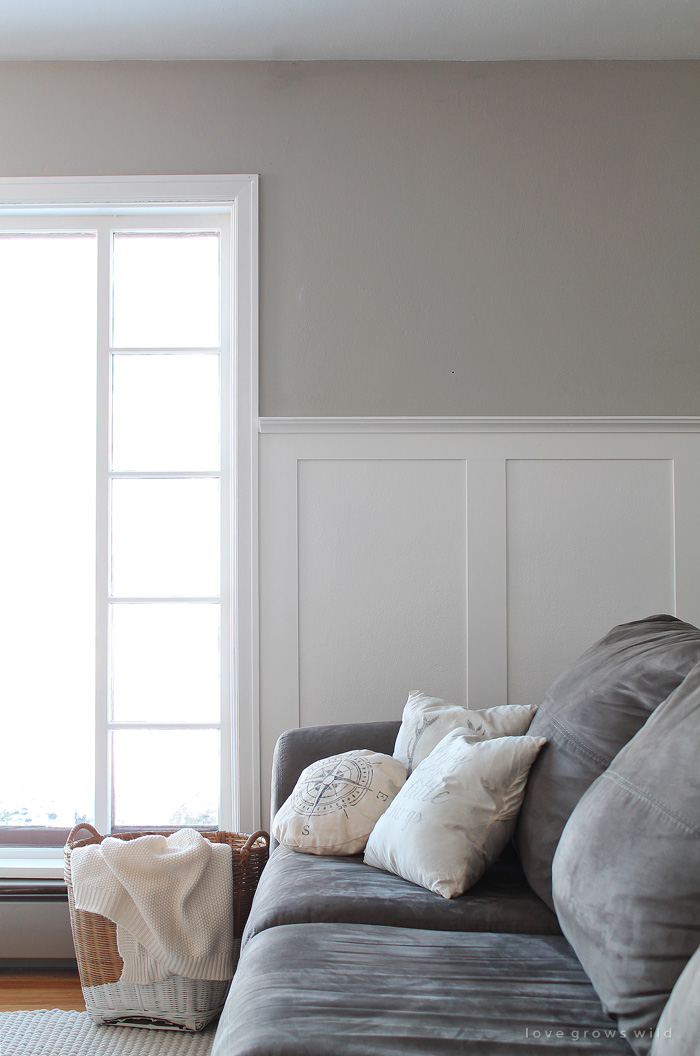
We decided to board and batten our walls to: a) add some architectural detail and b) lighten up the bottom half of the wall while leaving the top half with some color. It took my husband and I about 8 or 9 days (working on and off) to do both the living room and dining room from the first cut of wood to the last coat of paint. If you wanted to just do one focal wall in a room, I would imagine this could be easily completed in just a day or two, but we did the entire space for a BIG impact!
Supplies needed:
1/4″ MDF cut into 4″ wide x 4′ long pieces (for the battens)
1/4″ MDF cut into 2″ wide x 4′ long pieces (for the top ledge)
cove moulding (we used 9/16″ x 1 3/4″ pine)
miter saw
brad nailer
level
tape measure
liquid nails
paintable caulk
caulking tool
paper towels
spackling paste
putty knife
sanding block
primer
paint
paint brush
paint roller

Notes:
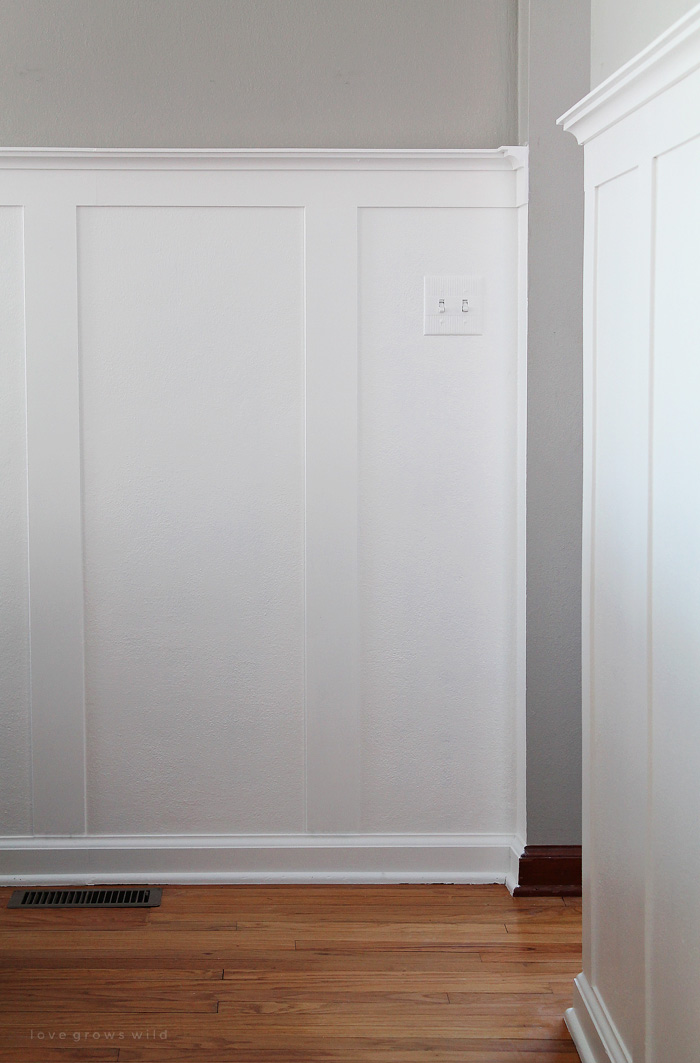
Okay, I wanted to go over a few things before we get started. We went with 1/4″ MDF for two reasons: 1) It’s economical. We ended up using almost 14 – 2’x4′ sheets of MDF at $5.97, which only cost us $83.58 for the entire living and dining room. 2) We didn’t want to rip out and replace our existing baseboards, so we went with the slim 1/4″ MDF which is almost exactly the same width as the top of our baseboards. If you want your board and batten to be deeper and more defined, go with 1/2″ MDF and either replace your existing baseboards to match the battens OR try this trick I saw from Teal and Lime.
Sheets of 1/4″ MDF can be harder to find, so call around to your local hardware stores and make sure they carry it before you go. Home Depot had 2’x4′ sheets, and they cut them down into 4″ wide planks while we were there. Having them cut the MDF is a HUGE time saver, in my opinion!
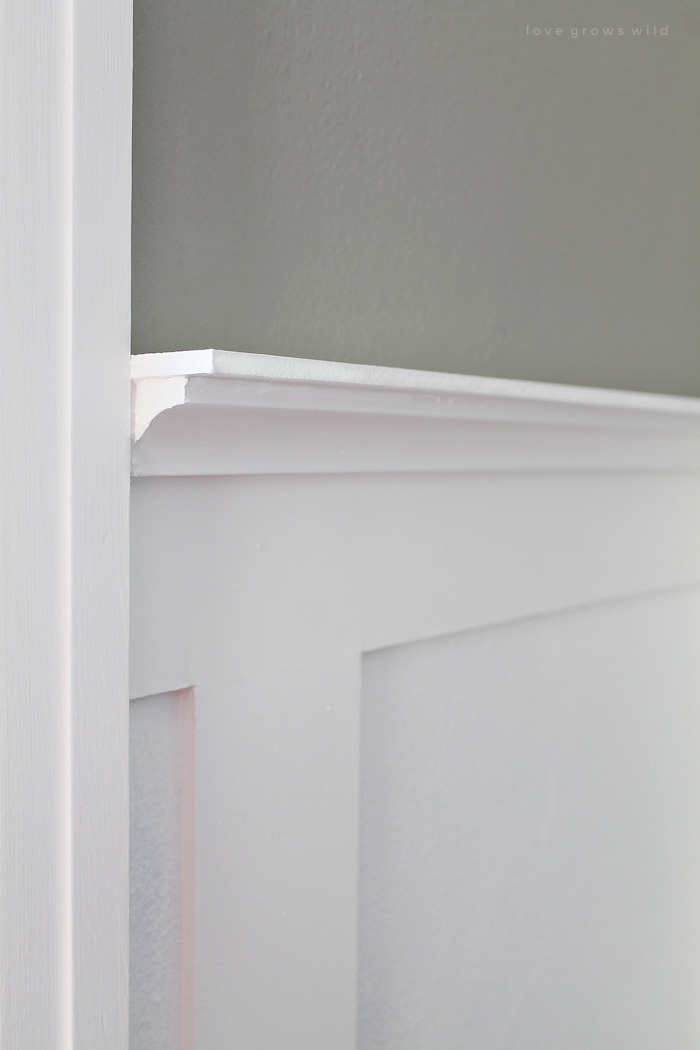
We finished the top of our board and batten with a little ledge made from MDF and cove moulding. I LOVE the cove moulding detail, but it is on the pricier side (we paid anywhere from $7.29-$11.84 per 8′ section) and can be a pain to cut your corners with. We’re super happy with how ours turned out, but if you want to go with a less expensive and easier option, buy quarter round instead.
Instructions:
Step One – Install the board and batten
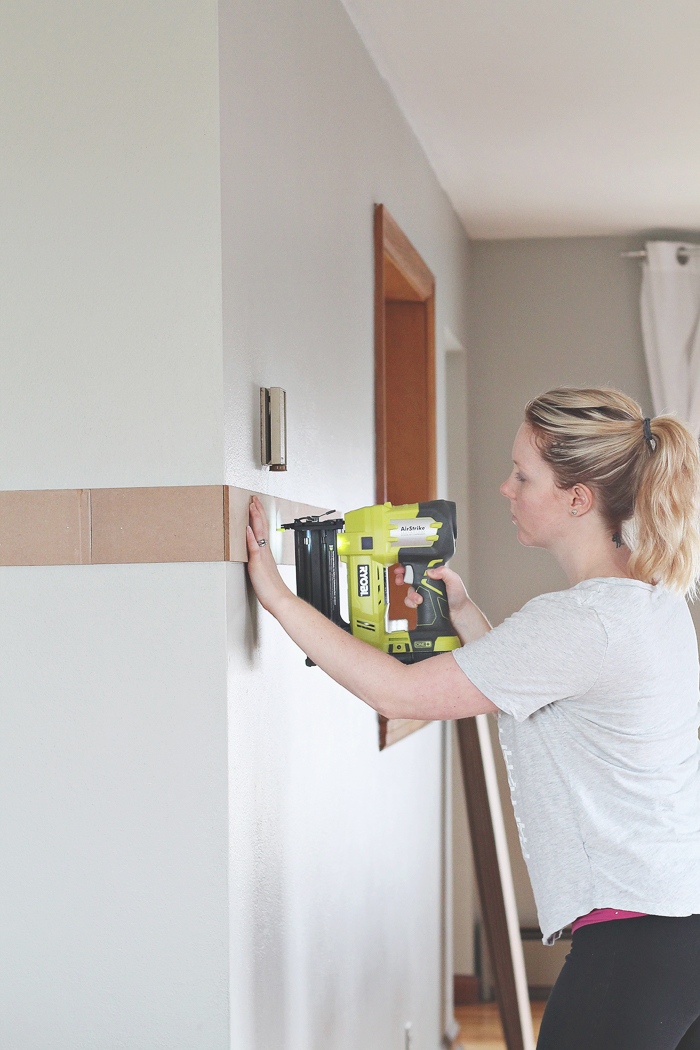
First, install the top horizontal board. Our battens (vertical boards) were 4′ long, so we measured 4′ up from the top of the baseboards and used a level to make sure our top board was perfectly straight. I recommend applying liquid nails to the back of the boards and using a brad nailer to attach the board to the wall.
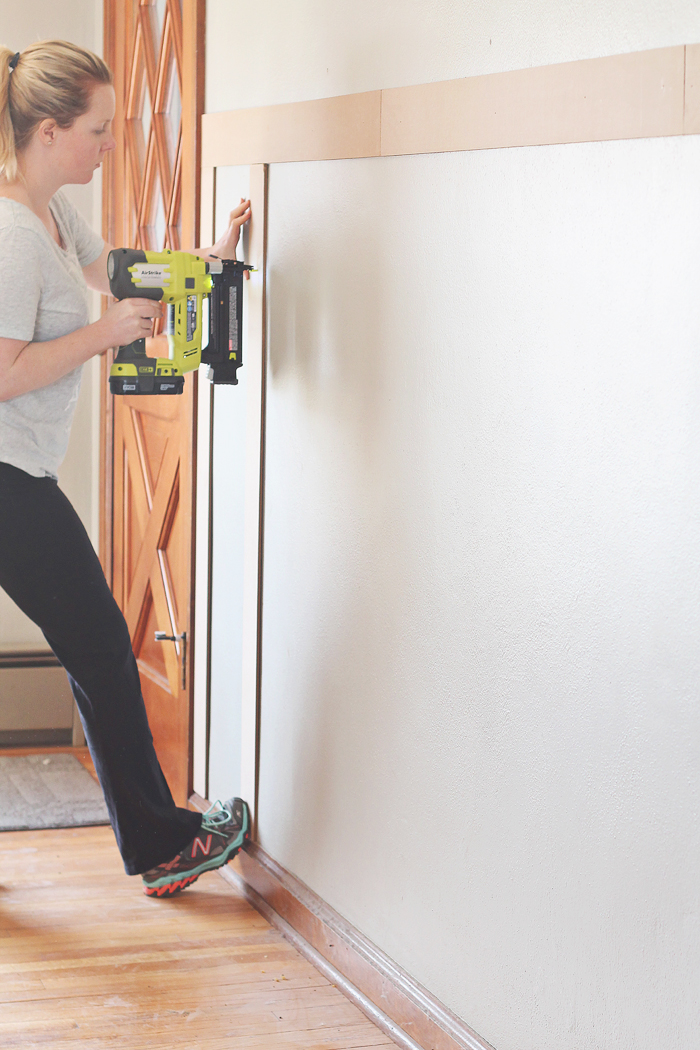
Next, add your vertical boards underneath the top board. Again, you’ll want to use a level, liquid nails, and the brad nailer. The hardest part of the whole process is figuring out your spacing between battens. I used this great tutorial from Remodelaholic, which gives detailed instructions for spacing, but here’s the basic equation I used:
Take your total wall length and divide that by the approximate spacing you would like between the battens. That number will be how many spaces you have on your wall. Add 1 to your number of spaces to get the number of battens on the wall. Now multiply your batten width by the number of battens. Subtract that number from your total wall length. Divide that number by the number of spaces you calculated earlier, and THAT number will be your exact spacing between each batten.
For example:
100″ (total wall length) / 20″ (approximate spacing) = 5 (spaces)
5 (spaces) + 1 = 6 (battens)
4″ (batten width) x 6 (battens) = 24″ (total batten width)
100″ (total wall length) – 24″ (total batten width) = 76″ (wall length minus the battens)
76″ (wall length minus the battens) / 5 (spaces) = 15.2″ (spacing between each batten)
If you’re doing multiple walls, the spacing will vary slightly on each wall, but it won’t be noticeable. Our spacing fluctuated from about 15 1/2″ – 17″.
Step Two – Add the top ledge and moulding
Install the moulding flush with the top of the horizontal boards using the brad nailer. Then use a small bead of liquid nails and the brad nailer to install the 2″ wide MDF on top, creating a small ledge.
Step Three – Caulk edges and spackle nail holes
Once everything is installed, you’ll want to caulk all edges where the boards meet the wall. I find that using a caulking tool (like the one listed in the supplies) makes this job much faster, cleaner, and easier. Then use a spackling paste to fill in all your nail holes and seams between the boards. Once dry, sand the spackle down to a smooth finish.
Step Four – Prime and paint
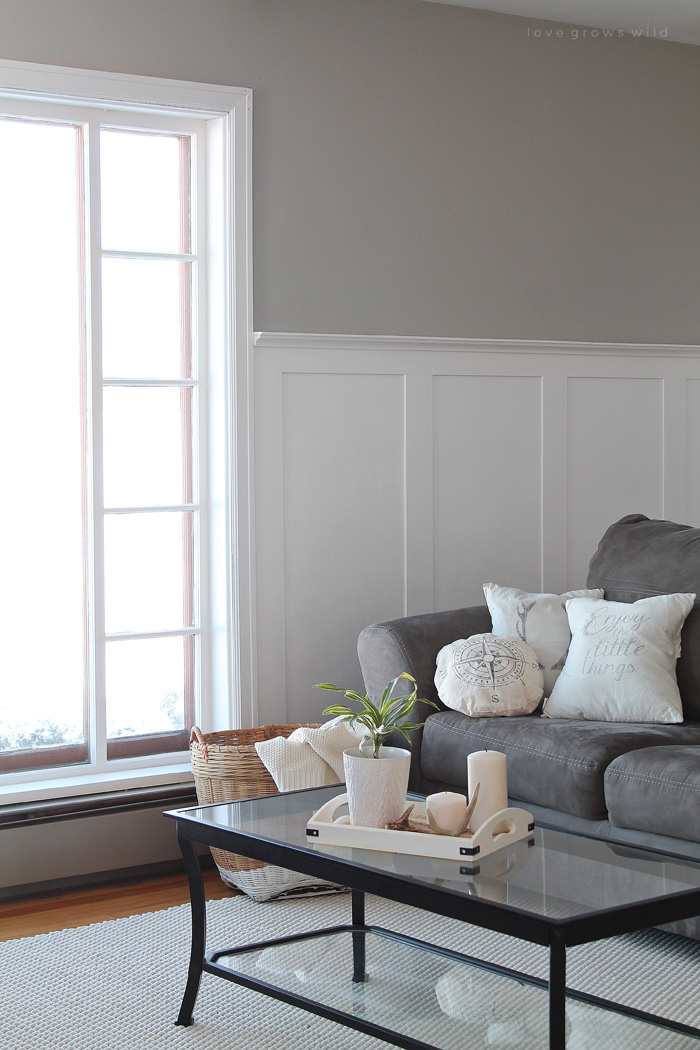
You’ll need to clean all the battens and walls first before you paint. I used a vacuum to suck up all the dust first, then wiped everything down with a damp rag. Apply at least one coat of primer, then finish with your choice of paint. We used Kilz primer and Valspar’s Du Jour on the board and batten portion of the wall, and Valspar’s Woodlawn Colonial Gray on top.
To give you an idea of price, this project cost us about $190 in MDF and trim, another $40 in miscellaneous supplies (caulk, spackle, etc.), plus the cost of paint. We already had some paint and primer on hand, so we bought less than 2 gallons for this project. That’s under $300 for a HUGE transformation of our entire living room and dining room!
It is SO much brighter in here now with the lighter paint, and the board and batten detail really brings the room to life. I cannot wait to show you more of this space in the next couple weeks! You are not even going to recognize this room when we’re all done.
Tell me what you think!
Do you like the board and batten? Does it make the room feel brighter? I’d love to hear your thoughts! If you have any questions, just leave me a comment below!
Like what you see? Subscribe to Love Grows Wild so you’ll never miss a post!
Follow along on Pinterest, Google+, Instagram, and Facebook for more fun!
Feeling inspired? Check out these project ideas:
LET’S KEEP IN TOUCH!
Subscribe to Blog | Browse my Shop | Follow on Facebook | Follow on Twitter
Follow on Google+ | Follow on Pinterest | Follow on Instagram

Wow, Liz! That looks absolutely beautiful!! I love board and batten…it adds so much character to a space!
Oh my goodness! I absolutely LOOOOVE it Liz! SO gorgeous! And I’m sure it really brightens up your rooms! I’ve been dying to do this to our front entryway, hallway and mudroom so I’ll definitely be pinning this for later! Thanks for the great tutorial girl!
Looks amazing! Thanks for the tutorial, this is definitely on my ‘to do’ list!
Love it! I’m wanting to do this in our entryway…definitely will keep this tutorial in mind 😉
It looks STUNNING!! Thanks for the great tutorial, I’ll be doing a few walls in our home very soon! I’m surprised it cost so little! Pinning for sure!
It looks great! We’re adding batten board to our bathroom but using the pre-made board from Menard’s because it’s so affordable. Have you heard good things about it?
hammerandheelsblog.com
I haven’t checked that out yet! I’ll have to do some research now. 🙂
I just stared following your blog and I must say, you never disappoint. I am glad to see the step-by-step instructions for the board and batton. I want to try this. Did you find painting afterwards easier than before?
I’m so happy to hear that, Windi! I did find it easier to paint after, just because there are so many nail holes and seams that need to be caulked or filled/sanded after installation. We debated painting the wall white before adding all the trim, but I think we were just a little to anxious to get started to bother with paint first. 🙂
Liz, I’m speechless! This looks absolutely stunning. I’m so amazed with what you’ve done with this old Indiana farmhouse! I’m definitely sending your blog to a few friends of mine who need inspiration right now. It’s been a while since I’ve stopped by. It looks like you’ve been busy! Take advantage of that extra set of hands now…. Spring is coming! Our planter is currently in the shop getting tinkered with so I’ve officially lost my extra hands I think 🙂
Stay warm lady! Looks like another cold week ahead.
Keep up the amazing work!
I’m using up every last second I can before my “help” is gone to the planter! If it ever warms up, planting season will be here before we know it. Best of luck to you guys this season!
omg! I love it! Nice job!
Wow, it looks beautiful, as does the rest of the room! Great tutorial too, thank you so much for clearing up the whole baseboard issue…I always wondered what to do at the bottom there and this was such a help! Love the look and have been trying to figure out where I can put it in our house! Now I have to go check out the rest of your blog and I can already tell I’m going to get sucked in:)
Stop it, this turned out SO WELL! I am seriously contemplating which room needs this done in our house right now 🙂 Thanks for sharing!!
xo,
af
http://SunkissedSophisticate.com
The board and batten look great! Planning to try this in our own home. Just found you through the “Inspire Me Monday” link up! 🙂
Pinned before even reading the post. I love this! I think the scale is just perfect, and the molding rounds it offnicely. Our living room is extremely dark. This gives me an idea to brighten it.
My husband installed similar wall treatment in our mudroom, so it should go faster this time around.
Enjoying exploring your blog (found via Moonlight and Mason Jars party)!
So happy to have you here, Mila! 🙂
I love it! We are getting ready to buy a house and I want to do this in our new living room! However, I am confused about the top. Do I nail the cove molding about the batten or on it towards the top? Please advise. Also, does the batten get painted before or after?? Thanks this is so beautiful!
Hey Lisa! The cove moulding gets installed on top of the horizontal board, flush with the top of it. We nailed the bottom half of the moulding into the batten board. And we chose to paint everything (walls and battens) after installation. I hope this helps!
It looks amazing! We can’t wait to get started.
I noticed in your one photo that you have baseboard heat.
Was it a challenge to install board and batten on walls with base board heat
And walls without? We have two walls with the baseboard heat, and two without.
Also, what was your overall height of the board and batten?
Thanks!!!
Nicole
Hey Nicole! Yes… we have those annoying baseboard heaters. The joys of an older home, right? 🙂 It was actually really simple working around them. Our battens were each 4 feet tall, so whenever we came to a heater, we just measured and chopped off the extra length with a saw. I hope this helps!
Hi Liz.
I’m new to your blog.
What height did you do?
I just love it, it’s beautiful.
Thanks, Christine
Hi Christine! Welcome to Love Grows Wild! 🙂
The battens were each 4′ tall, and I placed them above my existing baseboards, which added a few inches. I hope this helps!
Your walls look terrific. Great job.
I am planing to put board and batten along my stairway and I’m trying to decide if I should use MDF or wood. Can you tell its not wood after its painted? Does it look or feel different?
Thanks.
Thank you!! If you are going to paint the battens, I honestly wouldn’t waste the money on wood. MDF looks just the same once it’s painted!
Looks incredible– very well done. So clean.
Real quick question… I wanted to do this in my little boy’s room (10 months old) but my concern is that the base board that is currently in there slopes up to be almost flush with the wall.
Did your batten pop out over your base boards, or are they flush with it? I am worried about my 1/4″ batten coming out beyond the base boards. Any thoughts on that?
Thank you!
Michael
Hey Michael! We struggled with that too. The battens do come out slightly over the baseboards, but not enough to bother us. It’s near the floor and not very noticeable, but you can certainly either trim down your baseboards to a thicker part or angle the end of your batten to sit flush with the top of the baseboards. We chose to just leave it as is! I hope this helps. 🙂
The room is beautiful. I would love to do this in my dining/kitchen area.
Thank you for a great tutorial. You did a super job.
I love it! It looks amazing! Can you tell me what colors did you use?
Of course! We used Dove White on the board and batten and Woodlawn Colonial Gray (by Valspar) for the top of the walls!
It is beautiful! Just wondering if your walls are textured? I want to do this in my hallway but worry that it might look strange if the wall with the board and batten is textured. Please advise.
Hey Angie! Yes, our walls are slightly textured, and I had the same worry you did at first. Since we painted everything the same color though, I think it still turned out beautifully!
My walls are textured too; so much so that it would look bad. I’ve seen people on other blogs etc. use skin type boards, like those used for dry erase and flip them over. Beadboard can be flipped so smooth side is showing……
Curious to know the height of your ceiling and height you chose for the wainscot (horizontal piece,etc) We have 9 foot ceilings in our dining room and my wife is only 5ft tall. She was concerned that trying a tall (picture height) board and batten look may overwhelm her but that going short would look odd too. Many people say to keep a 1/3 or 2/3 ratio on that but your pics may be deceiving because it looks great without keeping that ratio? Thanks for any help! I’ve removed all the old wallpaper repaired the walls and am about to prime and buy the boards… But the project is on hold till we can find a good height, etc!
I’m totally binging on your blog! It’s so inspiring!! I’m so glad I just found you via Pinterest (while looking for home office inspiration) That was … an hour ago?! Haha Thanks for sharing all of your beautiful home and ideas with us.
Hi! Love this look so much we are about to copy it. RE: the cove molding: did you use the type in the photo or a solid corner cove molding? We bought what was in the picture, but husband is returning it because he wants the 2 inch board to rest atop the entire cove molding piece with no gap. Is that how you did? If not, how did you nail the 2 inch piece in to either the molding or the wall?
Hello! I’m curious as to where you got your couch! I love it 🙂
We bought it from Ashley Furniture years ago! 🙂
A word to the wise, always paint every surface including end grain and rear of mdf with a good coat of oil primer ( never latex ). Failure to coat all surfaces can result in swelling and a delaminating effect as humidity and moisture are not mdf’s friend. In an un/under insulated home this can be disastrous. Beautiful job. Now I’m done spraying, I have to install 5 rooms.
Looks amazing! We are about to tackle board and batten for our masterbedroom. My question to you is; what finish does your paint have, satin, semigloss etc..? I have semigloss on all trim around our house but not sure how that will do on the wall part.
Beautiful job! Just wondering what the height of your ceilings were — my ceilings are low so I’m wondering if I should adjust the height of the board and batten. I love the height on yours though…