
This post is so exciting for me to write! I had this vision for our master bedroom, and it’s coming to life even better than I imagined. After we got the plank walls put up, we moved our bed over to this little nook on the left side of the window, and it’s such a cozy space now. It has just enough room for our new bed and a pair of nightstands and feels amazing to crawl into our bed every night now. I’ve always had this idea in my head of adding curtains somehow to make this space even more cozy and intimate, and last week we finally made it happen!
You guys… I am DYING over the new “wood beam” and lace curtains!

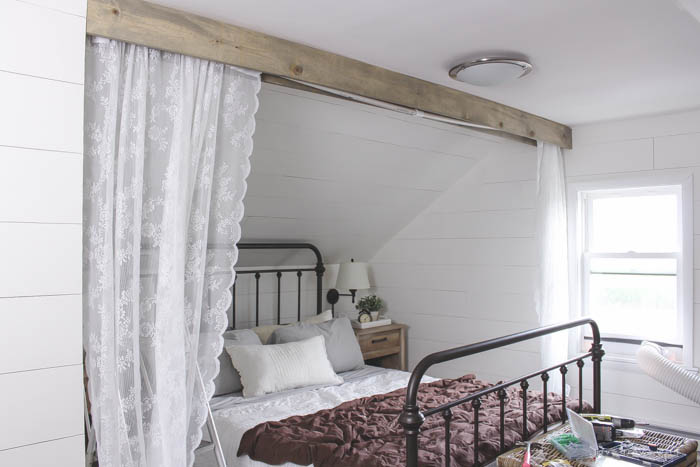
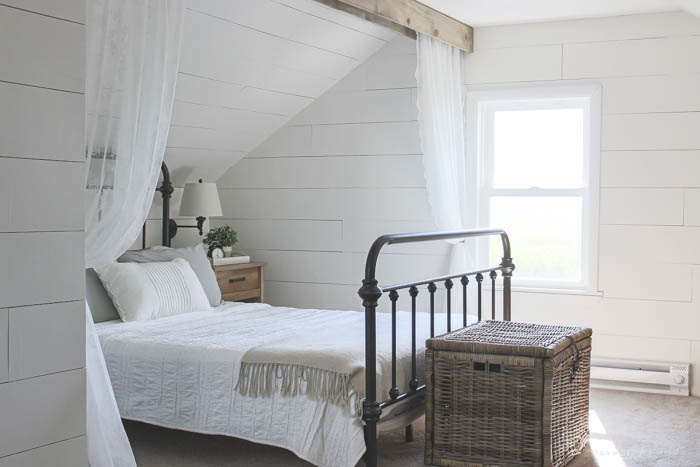
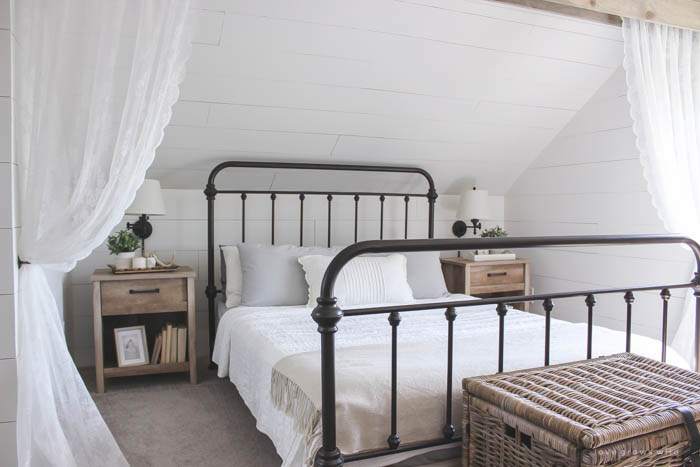
So after we finished the gorgeous plank walls and brought in some new furniture, here’s what the room looked like:
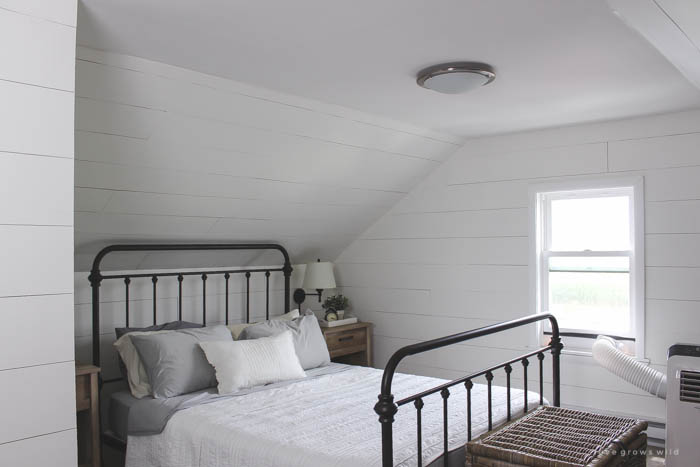
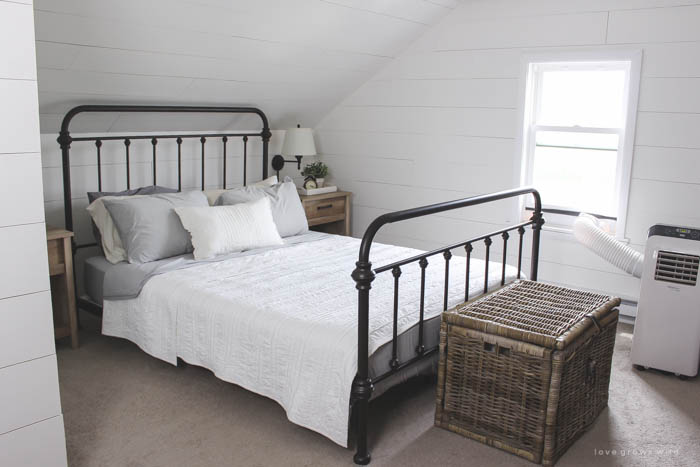
Such a huge improvement already, right? To get this project started, I adapted a few ideas from one of my favorite bloggers, Jenna Sue. This girl has added amazing faux wood beams in her home and recently did a bathroom makeover with lace curtains around a clawfoot tub that seriously left my jaw on the floor. It was to die for, you guys!
For the wood beam, Jeremy and I first cut a 1×4 to stretch from wall to wall in the sleeping nook. This board gets screwed into the ceiling and acts as the support for the sides of the beam. We pre-drilled holes through the board and into the ceiling about every foot or so.

Then we went back and finished drilling the holes in the ceiling and added a drywall anchor. Ideally, you could just use long screws and drill right into studs behind the drywall, but our house seems to have no rhyme or reason to the stud placement so Jeremy decided it would just be easier to use anchors.

After the anchors were added, we put the board back on the ceiling, lined up the holes in the board over the anchors, and added screws to secure the board in place.

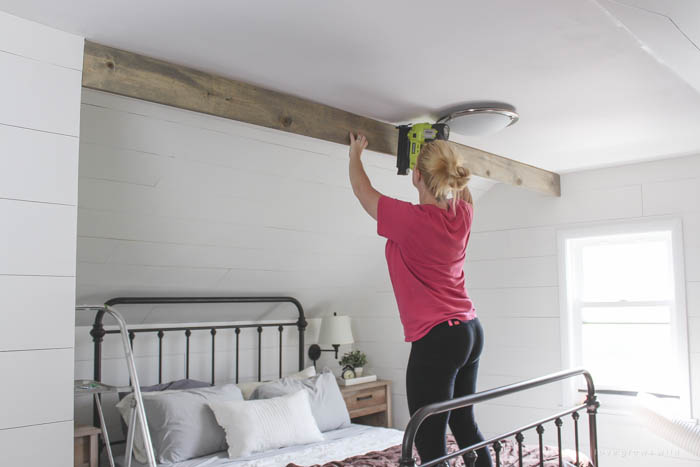
Then I cut two 1×6 boards to the same length as the 1×4 and stained them with Minwax Classic Gray. Once they were dry, we placed them on the side of the 1×4 with the long side of the board facing out and the short side flush against the ceiling. Then I used my brad nailer to nail the top of the 1×6 to the side of the 1×4.
A few notes…
- We cut our boards to have a nice, tight fit against the wall, so they pretty much held themselves up there even before the nails were added. I think that having a tight fit helps the 1×6 stay in place and not want to wiggle, since it’s only attached at the top.
- When nailing in the boards, we quickly found out that our ceilings are definitely not straight! Part of the ceiling bows in the middle, which left a gap between the 1×6 and the ceiling in some areas. If the beams were going to be painted, I would just caulk the seam and call it a day, but because they are stained, I decided to leave the slight gap and go with a rustic look. That’s the best part of farmhouse style, right? The houses are supposed to be old and crooked and imperfect! You can only see a slight shadow on the ceiling from the gap, so it’s not that noticeable anyway. Just be aware that you might face the same issue with your ceiling.
If we were doing a normal wood beam, we would add a bottom 1×4 and be finished. But I wanted to leave the bottom open so I could hang a curtain up inside of the beam. We looked at a few options for a curtain rod and settled on PVC pipe. I’ve used electrical conduit before, but they didn’t have any pieces that were long enough, so we grabbed two pieces of 3/4″ PVC and a connector and trimmed it down to fit our nook. You’re not going to see the rod anyway, so I didn’t care how it looked, and PVC is super cheap. I also grabbed a package of closet pole brackets to hang the rod.


The brackets were screwed into the wall as close to the 1×4 as I could get them.
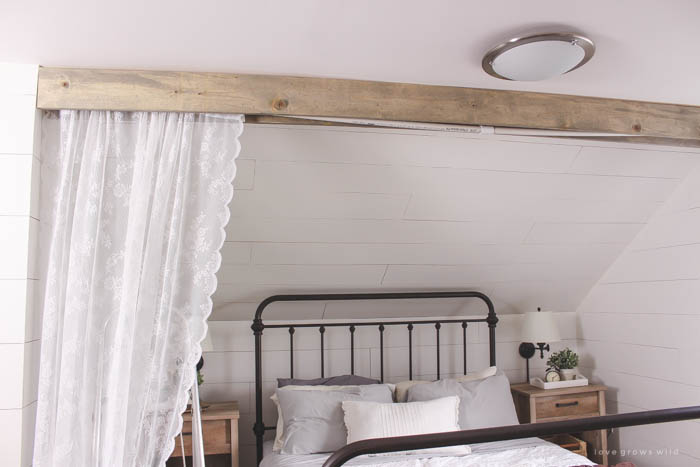
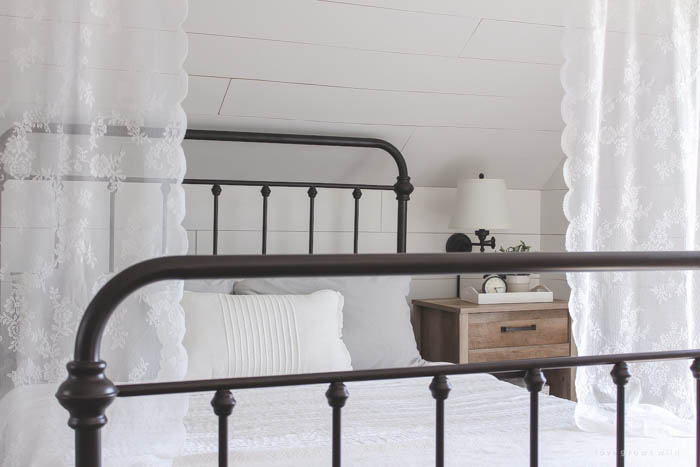
Then I put these lace curtains from Ikea on the PVC pipe and hung it up inside the wood beam.

We had already guessed that the PVC pipe would sag in the middle, but I was hoping it wouldn’t hang down as low as it did.
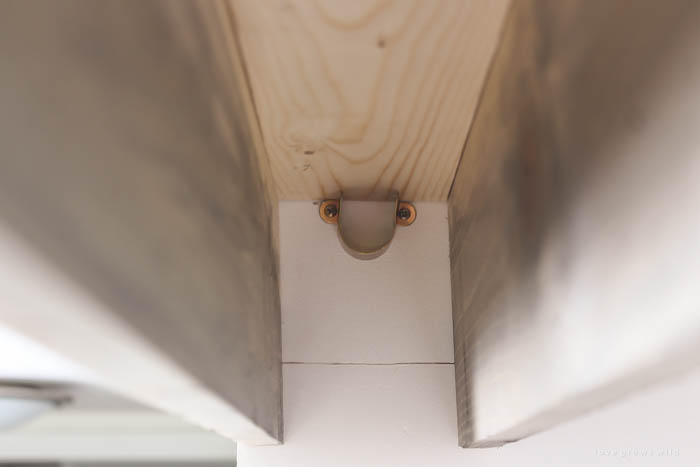
So I went back to the store and grabbed one of these brackets:

I screwed the bracket to the 1×4 right in the middle, and it held the PVC pipe up perfectly. Problem solved!

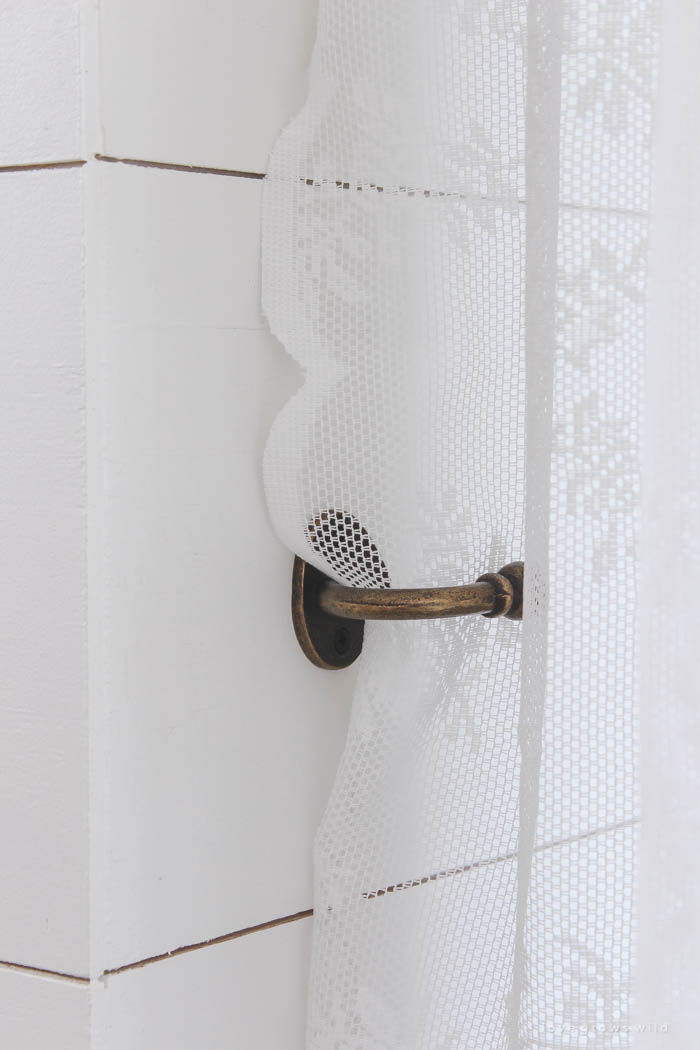
I wanted to be able to draw the curtains to the side so we don’t trip over them in the middle of the night and pull the whole thing down (because that would TOTALLY happen to me!), so I picked up some pretty metal hooks from Hobby Lobby and screwed them into the wall. I have to admit… it hurts a little making holes in my new beautiful planked walls! But for these pretty antique gold hooks it was totally worth it.
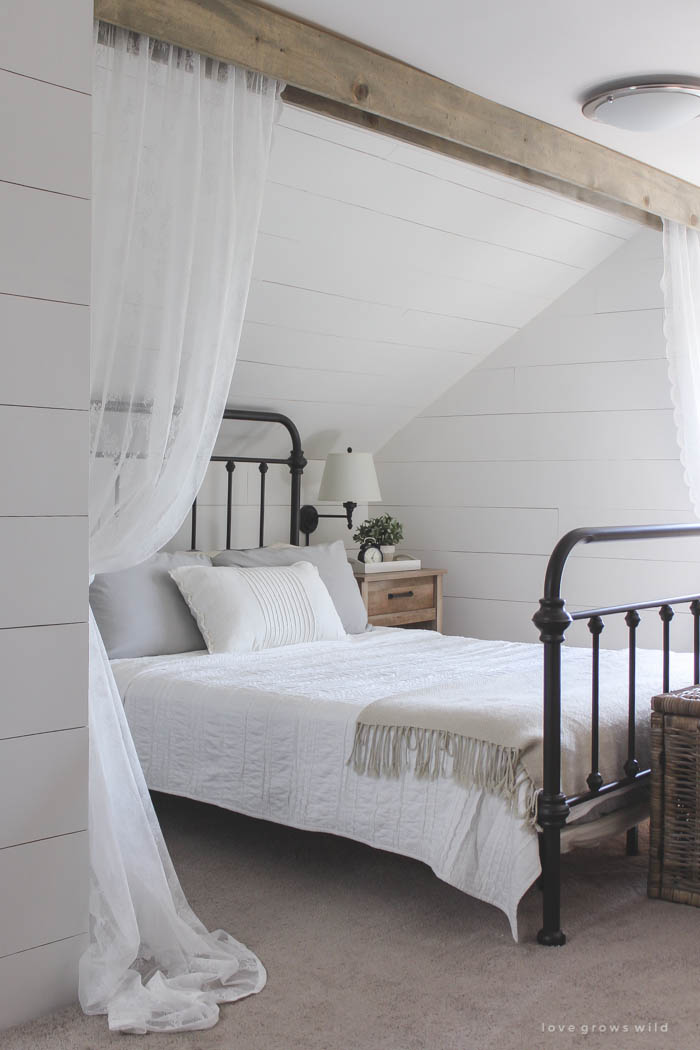
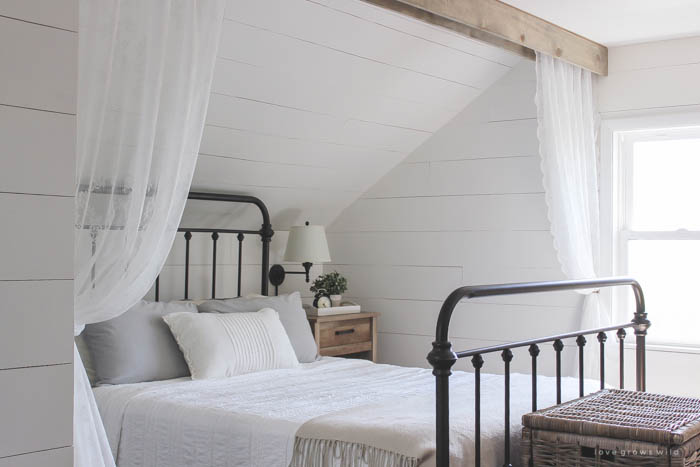
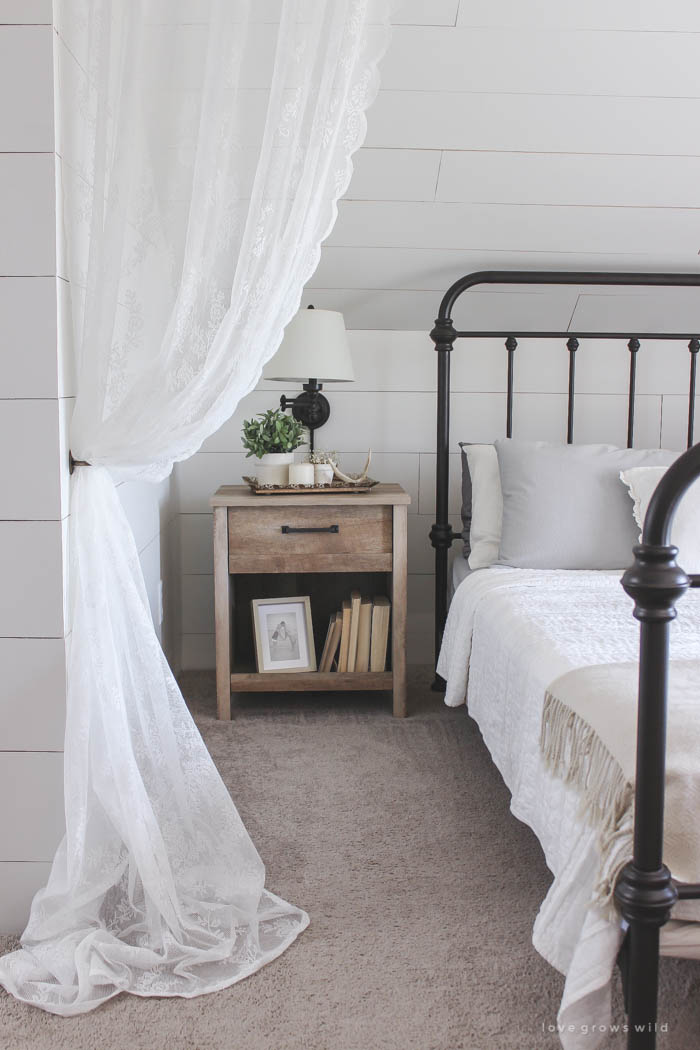
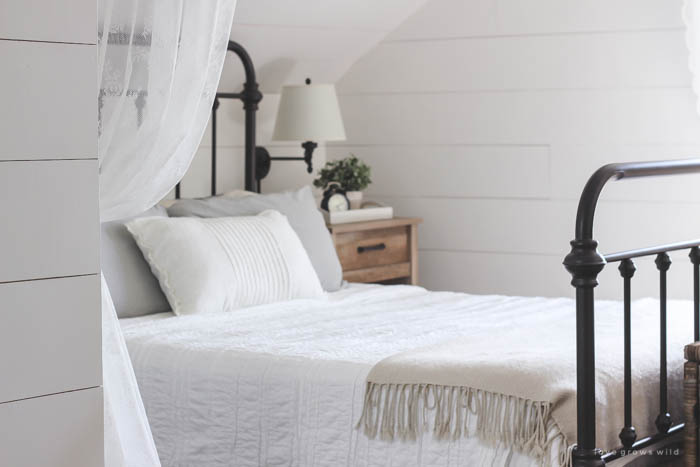
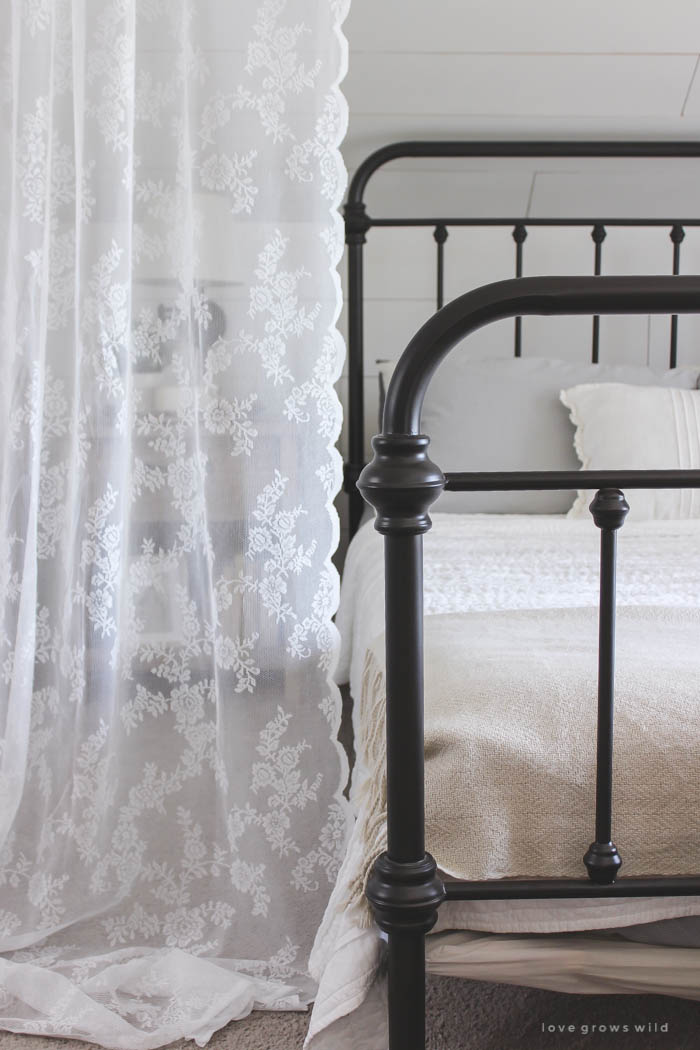
And here’s the finished product! Guys… all I can say is swoon…

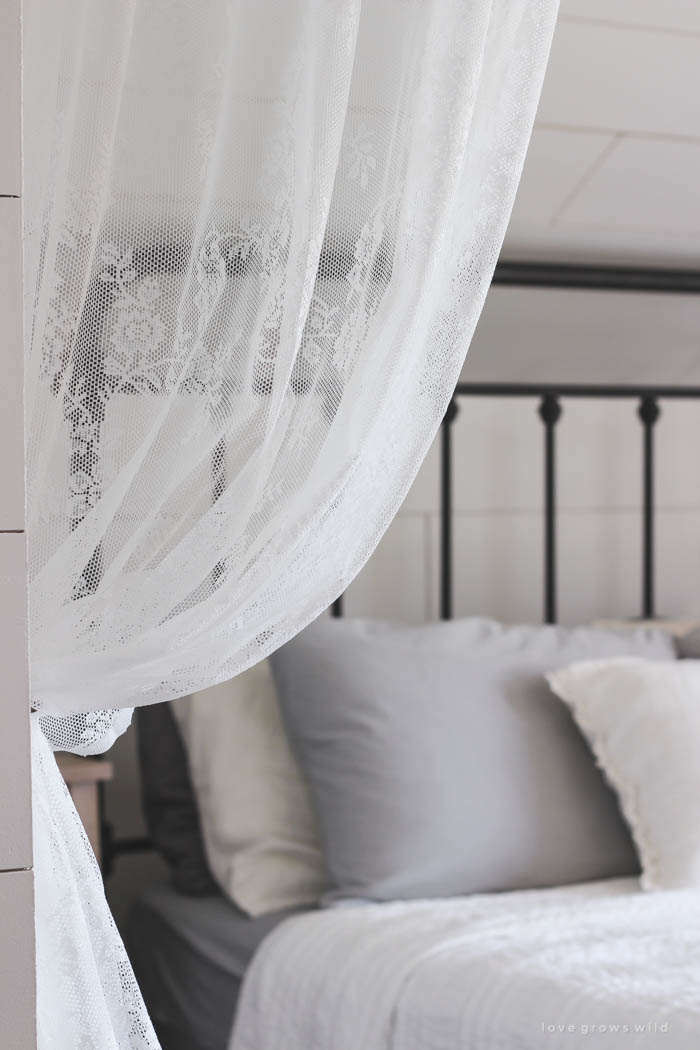
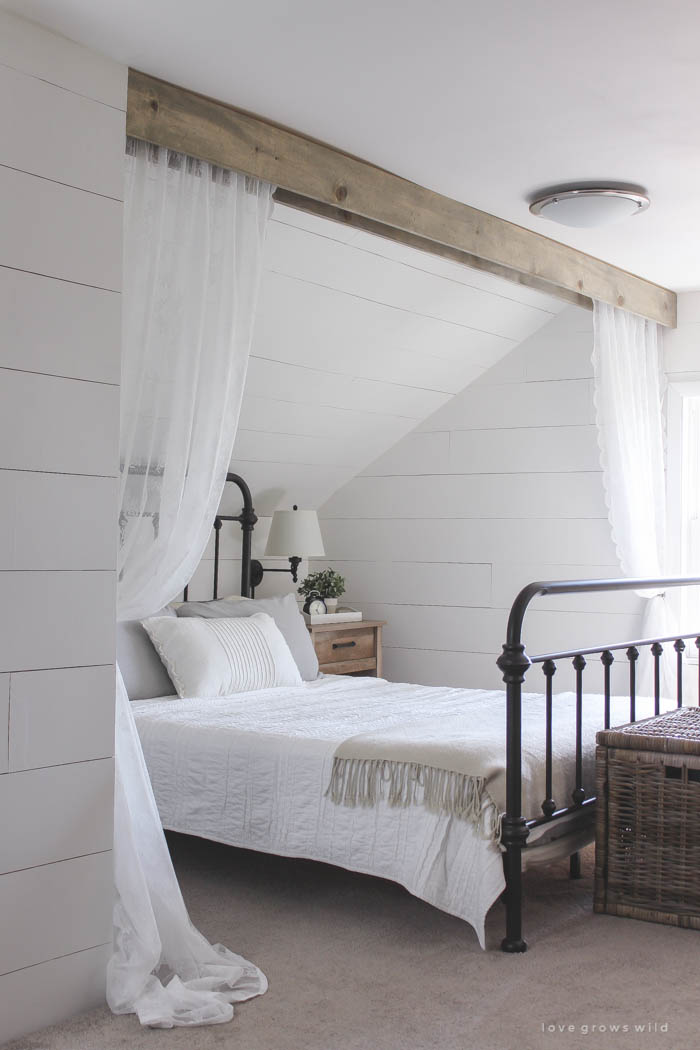
Isn’t it just dreamy? The sunlight from our little window filters through the lace, and it looks like something straight out of a magazine… or maybe a romance novel! It feels so cozy and inviting, and I could honestly spend all day in bed with the hubby catching up on sleep and our plethora of DVR’ed TV shows. It’s hard to make myself roll out of bed every morning now, but at least I can look forward to crashing into those comfy pillow at the end of every day!
Pools of lace at the end of my bed… seriously, does it get any dreamier than this?
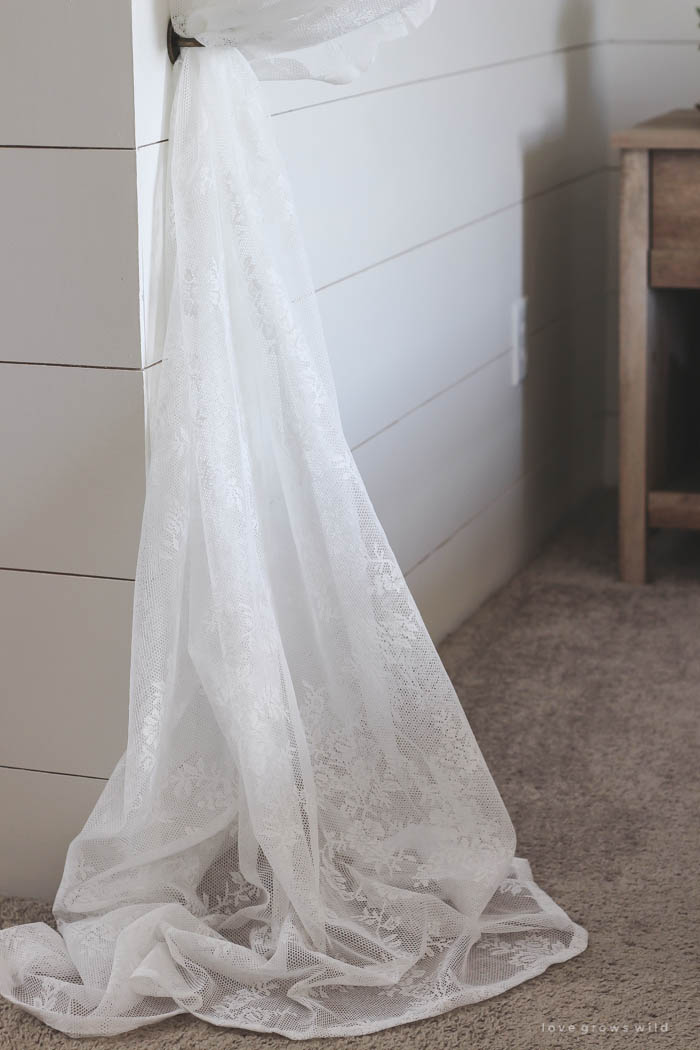

Most of the time we keep the curtains pulled back on the hooks, but when I need a little quality time with my sweet hubby, the curtains can be draped over the bed for a little added romance.
I’ve had a bunch of questions about all the new furniture and decor in our bedroom, so I’ll list the items below for you, but first I have a VERY important question to ask you guys! We obviously need to switch out the light fixtures in here, which currently look more like futuristic flying saucers than a rustic farmhouse light, but do I go with a flush mount fixture over the bed or a more dramatic chandelier? I had a chandy picked out that would fit perfectly with the cozy rustic vibe in here, but I don’t want it to compete too much with the bed and the wood beam… help me decide! Do I make a major focal point over the bed with a chandelier or stuck with something low key that will blend into the ceiling? I can’t wait to hear your suggestions! Leave a comment below and tell me your vote and what you think about the new wood beam and curtains!
bed – Amazon (also found on Overstock)
quilt – Target
gray sheets – Target
cream ruffled pillow – Ikea
lace curtains – Ikea
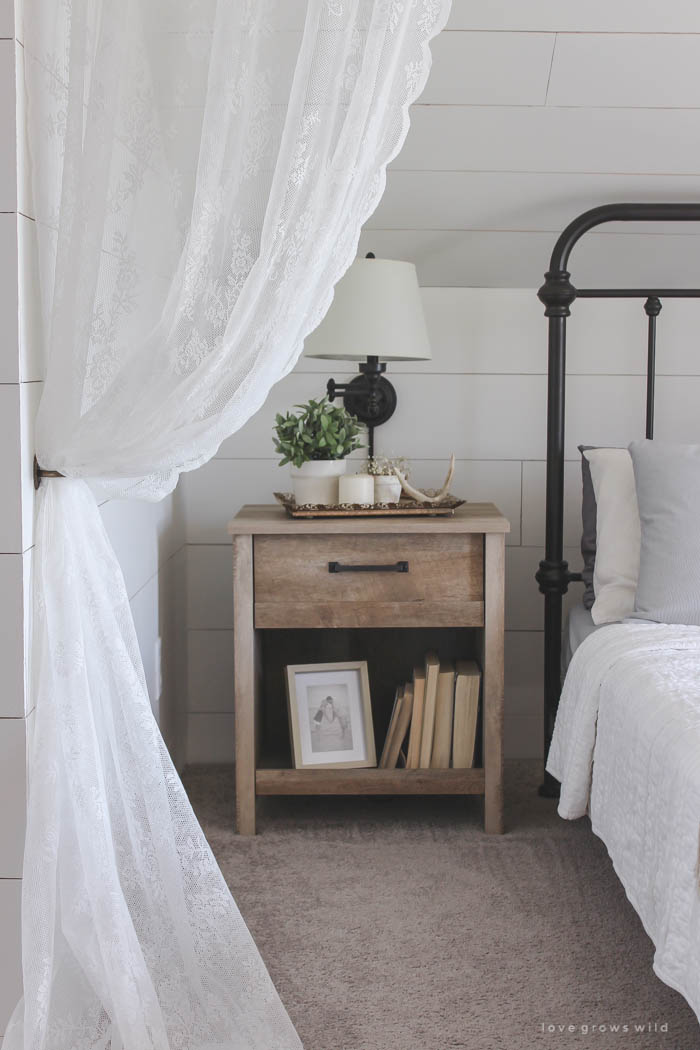
swing arm lamp – Lowe’s
wicker trunk – Ikea
nightstands – Sauder… more on that coming soon!
Check out the rest of our bedroom makeover posts:
Master Bedroom Makeover Plans & Before Photos
Master Bedroom Planked Walls
Farmhouse Window Trim
LET’S KEEP IN TOUCH!
Subscribe to Blog | Browse my Shop | Follow on Facebook | Follow on Twitter
Follow on Google+ | Follow on Pinterest | Follow on Instagram

This is my new favorite project you’ve done! It is STUNNING! If this doesn’t end up in a magazine, I’ll be shocked and sad! Such a great idea and beautifully done! Oh, and I vote chandelier! I think it would go perfectly with the rustic, romantic look you’ve got going on!
Wow!! This is getting sooooo goood!! (as usual) I think a statement light would be oh-so-romantic and I feel that as long as it doesn’t have alot of dark/iron/bronze on it, it shouldn’t compete with the bed and would blend in with the other finishes. Something flushmount but with alot of crystals/glass to keep it light and subtle? Like:
http://www.potterybarn.com/products/clarissa-glass-drop-flush-mount-ceiling-fixture/?pkey=cflushmounts&&cflushmounts
or
http://www.potterybarn.com/products/mia-faceted-crystal-oversized-flush-mount-ceiling-fixture/?pkey=cflushmounts&&cflushmounts
I can’t wait to see more! 🙂
Those lights you suggested… LOVE! That’s exactly what I had in mind if I went with a flush mount fixture, but unfortunately what you haven’t seen yet on the blog is that there are TWO lights that need replaced in this room: one over the bed and one by the door/closet. So I need to find an option with a slightly less painful price tag! Lol! Lighting is one of the main things I’ll splurge on in a space, but I’m not sure I’m ready to take that big of a plunge just yet. Thank you so much for the suggestions, Emily! 🙂
Ok girl… this is every bit as dreamy as you described. I’m so in love with how pretty this made your master bedroom!! I can see why you are so in love with this project, it’s absolutely gorgeous. You go girl!
How about a ceiling fan w/a light kit. Home Depot or Lowe’s both have some that look quite old fashioned and “farmhouse”. I know this because my house is very, very similar to yours in decor & design. ;-))
I’ll have to check that out!! Thanks so much! 🙂
What a wonderful idea! I can’t believe it was so easy to do.
It really is a a beautiful space.
Karen
Hehehehe – we did a bedroom transformation with the same nightstands too – completely different look but I love them. Can’t wait to see your third piece & what you did!!! (our transformation wasn’t quite as dramatic.)
Haha, too funny! I can’t wait to see what they look like in your house!
I love your dreamy bedroom! Great job.
I would put up a chandelier over the bed.
Enjoy.
LOVE! LOVE! LOVE! Just simply divine!
Good Morning Liz,
you both did a great job with the remodeling of your master room above all the makeover with the laze curtains is really lovely. In the before pics you really see that something was missing in your bed area it looked so undone and uncozy.
The actual lamp is very ugly sorry but to hang there a candelier isn’t in my mind not a real farmhouse style I would pick up an unobtrusive lamp that the 1st focus is still to the bed area and not to the ceiling. Maybe you use a similiar lampshade like the swing arm ones. I think you’ll manage it like you did with the other decoration picks before,too.
Beautiful job!!! As for my opinion, I would go with a chandelier. The rest of your “feel” is very soft and low-key. A chandelier would really add some pop and interest. But either way, your room is still gorgeous.
ABSOLUTELY BEAUTIFUL! I wish it was mine….sigh,.
Good job!
Lisa, gorgeous nook! I’d go for tucked up light fixture. Keep it peaceful and quiet in there – a chandelier would take away from the peacefulness of it. Hang that over a sweet chair or in your bathroom – or walk in closet! Poor Jeremy’s going to whack his head on that pitched ceiling at least once! You don’t want him to hit the chandelier, right?!
Just sayin’,
jeane
Kent Island, MD
Your bedroom is gorgeous…I would go with a chandelier…
Oh my goodness ! I love what you have done with your bedroom. I always love the lace curtains hung around things. I have them around a porch swing on my patio and enjoy them so much. If it were me I’d have to have a chandy over the bed. To me it would just make it feel that much more romantic. Y’all have done such a nice job.
Lovely space! It reminds me of a bedroom I saw on the Jenna Sue Design blog, check out under “current house” on her blog. She has planking as well they hung a chandelier from a wooden beam, it looks fabulous. I think it would in your room too. You’ll also adore her bathroom, check it out.
Yes, I love Jenna Sue’s house! Her bathroom was partially what inspired what I did with our bedroom!
Um…..SO good. I really, really love it.
this is just so lovely! and I would definitely go with a chandelier, twinkly crystal drops & lace, how could it not work?
Beautiful! Absolutely love it!
Dreamy! Looks so good it’s hard to believe it’s the same room! Definitely switch the light out…I vote for a semi flush, like a school house light.
Gorgeous! Looks like a bed and breakfast room. So peaceful.
Cyn
WOW!! Your bedroom is just beautiful! You really did a nice job. I am in awe! Great job!!!
I love your room & the curtain is beautiful! I would do a flush mount light with lots of bling! It will look fantastic with the wood beam.
I LOVE this soooo much!! It turned out beautifully!! I think a vintage chandelier would be beautiful in that space 🙂 Can’t wait to see what you do!
Liz!! This is so gorgeous!! I want to live here. What a perfect room!! Totally sharing this everywhere. 😉
It is absolutely dreamy in there! All I can say is can you please come do my house?!?!?!?!
I am seriously dying here over the beauty of this !
How gorgeous and what a genius idea – I’m off to pin this on as many boards as can !
Thanks so much for sharing !
Simply gorgeous and dreamy!
That was just a brilliant way to transform the space! The beam and curtain are perfect!
Bravo!!!!! Great vision and teamwork! What a romantic and relaxing spot.
Mary Ann
What a creative idea, I just love it!!! I like the idea of a chandelier that hangs down, but whatever you pick I know it will be gorgeous!
Love your dreamy room! I can’t wait until we retire and move to a farmhouse in Texas! A chandelier would detract and compete with what you’ve done. Keep it simple with a flush mount light.
This is so lovely……I am completely inspired and thank you for sharing this tutorial!
I am so in love with this idea x
Wow, this is amazing!!!! Your bedroom was already beautiful, but this tiny change made a HUGE difference!!!!!! So inspiring! I’m very glad to have found you, I’ll be spending quite some time around here, and I’m already following you on IG!!!!
By the way, I hope you don’t mind me sharing your bedroom over at my blog. It’s so inspiring!!!!
I don’t mind at all! Thank you so much, sweet friend!
So calm, peaceful and romantic! Your creativity is inspiring. Only one small detail I’d recommend…take down the pvc pipe, sand off the black lettering and spray paint it and the pipe strap to match the beam, at least the visible part.
That’s a great tip, Linda! Honestly, Jeremy and I are the only ones that actually see the pipe right now (and it’s barely visible unless you stand right underneath), so it doesn’t bother me too much. But I like your idea! 🙂
Ingenious! The beam and pvc and curtains! just beautiful and ingenious. Totally stealing this idea. And the whole look of your room!!! :o) Love the bed, swing arm lamps, everything. Thank you for sharing!
Merry Christmas!
Beautiful! My upstairs is very similar to yours in terms of geometry and I’ve been considering doing planked walls for a while. This post finally got my husband on board so thank you!!! I also love your bedside sconces. May I ask are they hard wired into the wall or do they plug in to an outlet? I looked at the link but couldn’t tell from their info.
Also this square glass and oil rubbed bronze flush mount fixture would look great for both of your ceiling fixtures
http://www.lowes.com/pd_574559-41800-25604-030_1z0vgd4Z1z11wi6__?productId=50134708&pl=1#img
I actually have this in my entry and love it. The product images make it look really dark but it’s not really once you get it up!
I’m so happy to hear that, Kimberly!! Our sconces are plug-in, which is fine since the cord hides behind our nightstands. Have fun decorating your bedroom!
Love your room! I was wondering if you would share the paint color you used on the walls.
Of course! We used Dove White by Valspar. It’s a nice creamy white!
WOW!!!! Divine!!!! *Sigh!* If only I had a “nook” space in my bedroom to be able to do the same thing….! 🙁 But I DO want to do something like this in our main bathroom (over the shower, which has a slanted too-tall space above the curtain!), and I must say your idea for pvc pipe and cheap brackets NEVER occurred to me – and I’m the Queen of ingenious and CHEAP over here!! So “Thanks!”, and YAY!!! Also, the paint idea from Linda is a BIG YAY! Lovely, and THANKS!!!
What a beautiful, cozy room! I agree with you, I’d have a difficult time leaving it each morning! I love your iron/metal bed, and I’ve been eyeing that very one on Amazon for a while. Do you like the bed and is it sturdy/not wobbly? Also, is there much room under the bed for storage boxes, and does it take a box spring along with the mattress, or just a matress? I appreciate any info you can give!
Hi Vicky! Yes, we LOVE this bed! Very sturdy and I am able to slide some duffle bags and such underneath. Not a ton of room under the bed, but some! We decided not to use a box spring, just a mattress, but that is a personal preference. If you are thinking about buying it, I definitely give this bed frame my stamp of approval! 🙂
Where did you get the nightstands?
Hey Elaine! They are from Sauder Furniture: http://www.sauder.com/Products/416868.aspx
These curtains looks so amazing and organic, thanks for sharing instructions.
These “WOOD BEAM AND LACE CURTAINS” seems so organic and perfect , gives a perfect finishing .Thanks for sharing this one with us .
Love your room! I was wondering if you would share the paint color you used on the walls.
Your creativity is inspiring. Only one small detail I’d recommend…take down the pvc pipe, sand off the black lettering and spray paint it and the pipe strap to match the beam, at least the visible part.
Love your room! I was wondering if you would share the paint color you used on the walls.
Of course! It’s Dove White by Valspar
Thanks for sharing with us, will love to try this one.