
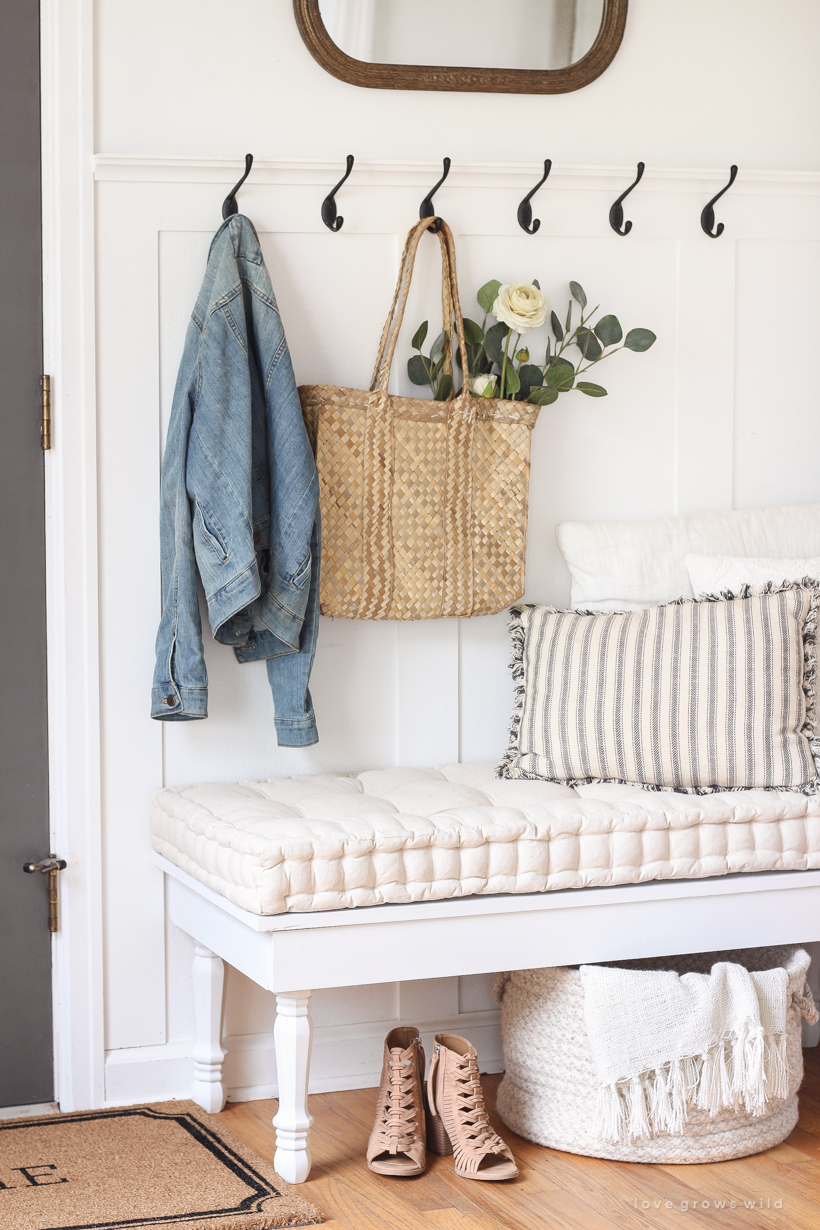
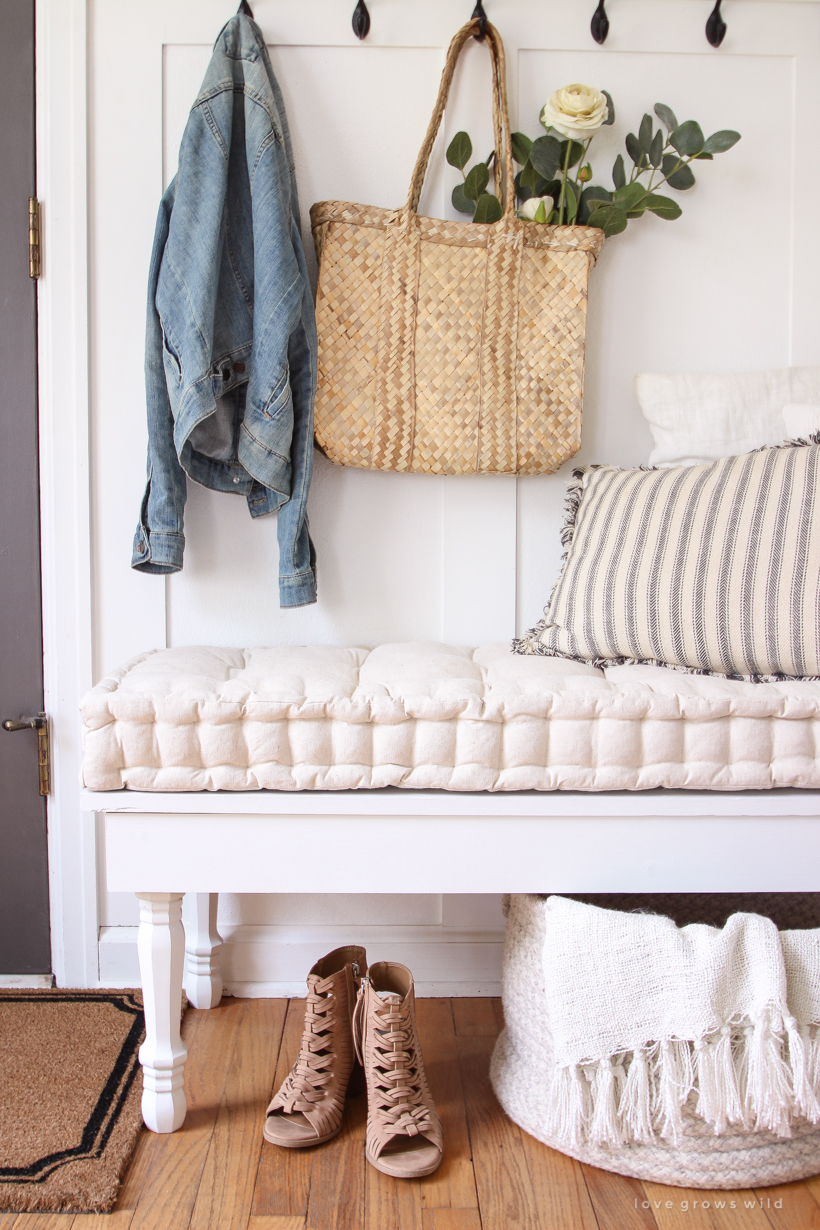
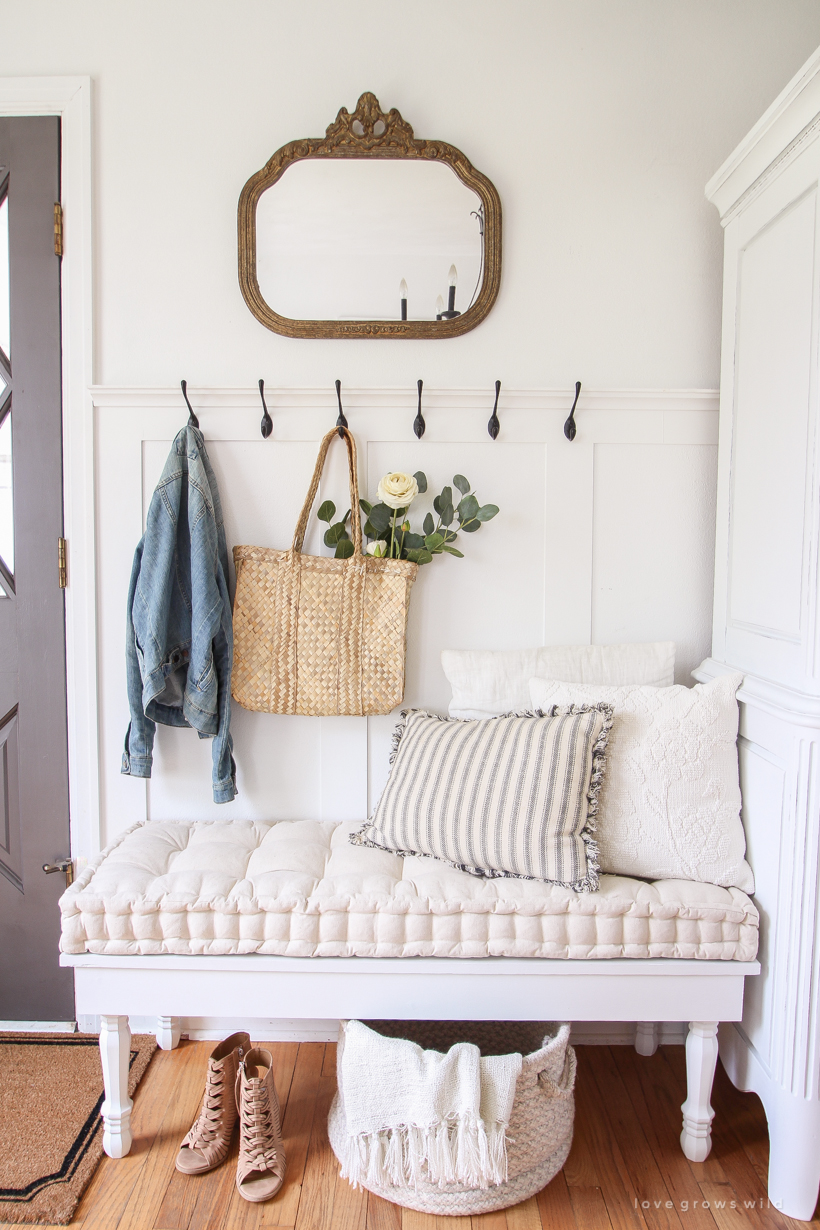
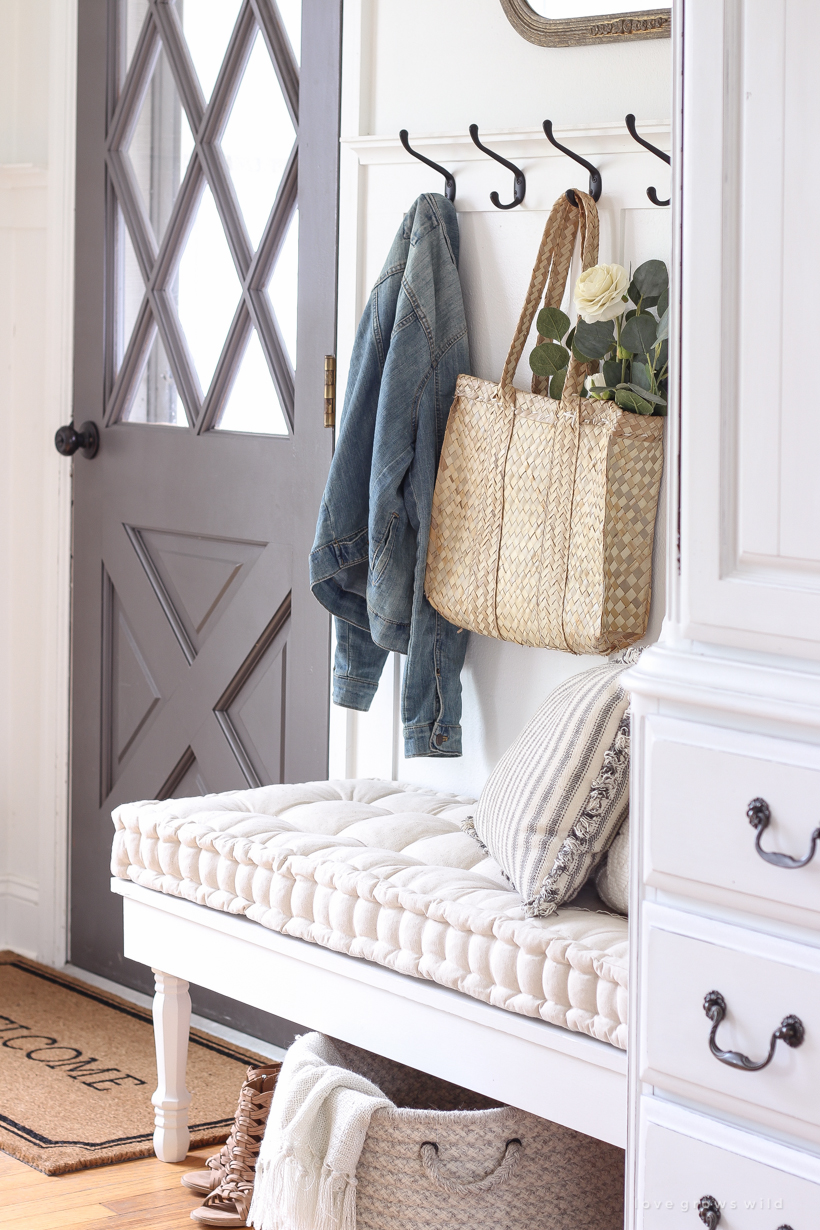
Hi, friends! As promised when I shared the new look in our entryway a few weeks ago, I’m showing you guys how I built this beautiful custom bench today! This tutorial is super simple, and if you are new to woodworking or just starting to work with power tools, this is an easy building project to start with!
As you may remember, I had the hardest time finding the right size bench to fit in our entryway, and I decided it would actually save me both time and money to just build my own bench. That way I could create the exact size I wanted, paint or stain it how I like, and enjoy another handmade piece in our home that I built with my own two hands. I’d say that’s a win-win!
Some links in this post are affiliate links, which allows me to make a small commission from your purchase, but your purchase price stays the same. Thank you for helping support our blog and keep it going!
Before we get to the tutorial, a couple notes…
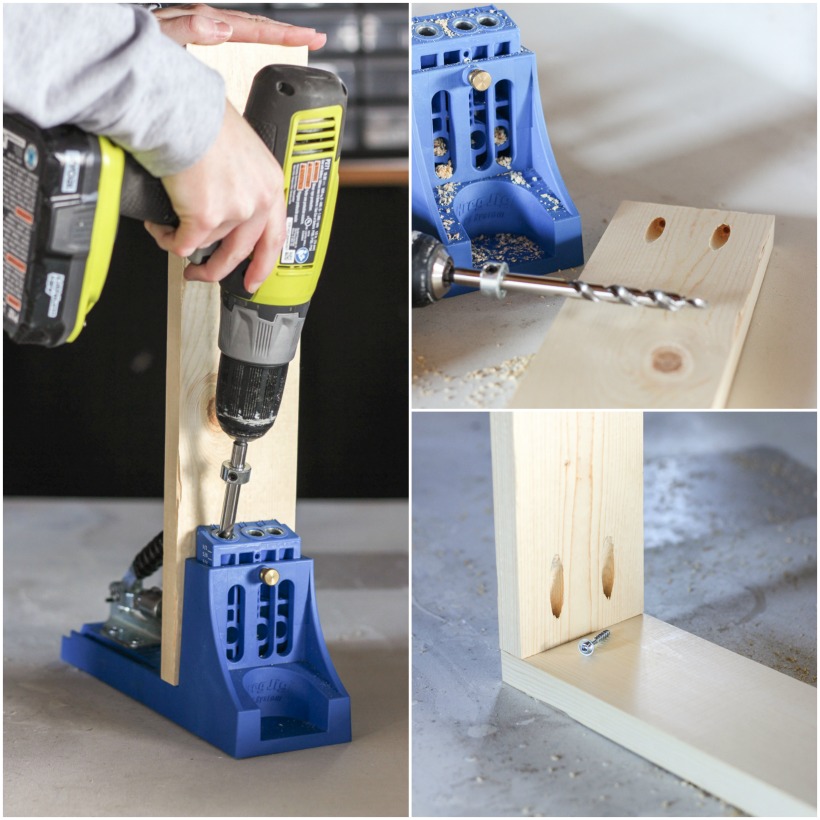
Part of the reason this project is so easy is because I use a tool called a Kreg Jig to attach the wood boards together. This tool was one of the first things I bought when I started trying to build more furniture, and it has helped me tremendously! It creates pocket holes for you where the screws go in, and it really takes the guess work out of how to build a strong, sturdy piece that will stand the test of time. You can see what I’m talking about in some of the photos below where I’m using it, but I highly recommend you add this tool to your collection if you don’t have one already!
Also, this bench only requires two 1 x 10 boards, three 1 x 4 boards, and four table legs with plate hardware to attach them to the bench! I always buy 6 foot boards because that’s all I can fit in my Jeep with the seats laying down! So this really is a project you can tackle in an afternoon with just a couple of boards. I love the way this bench turned out and looks in our entryway!
One last thing… I’ve had SO many questions about where I got the cushion for the bench, and almost immediately after I bought it from here, the cushion sold out! (insert sad face) BUT I just saw that it is finally back in stock, but I don’t know for how long, so if you are thinking about getting a bench cushion like this, I definitely wouldn’t wait! There are options I’ve seen for custom ones on Etsy that run upwards of $200 and up to $400+. This one I have is only $80 plus free shipping!
SUPPLIES:
tape measure
pencil
saw
drill
Kreg Jig pocket hole system
wood glue
1 1/4 inch Kreg pocket hole screws
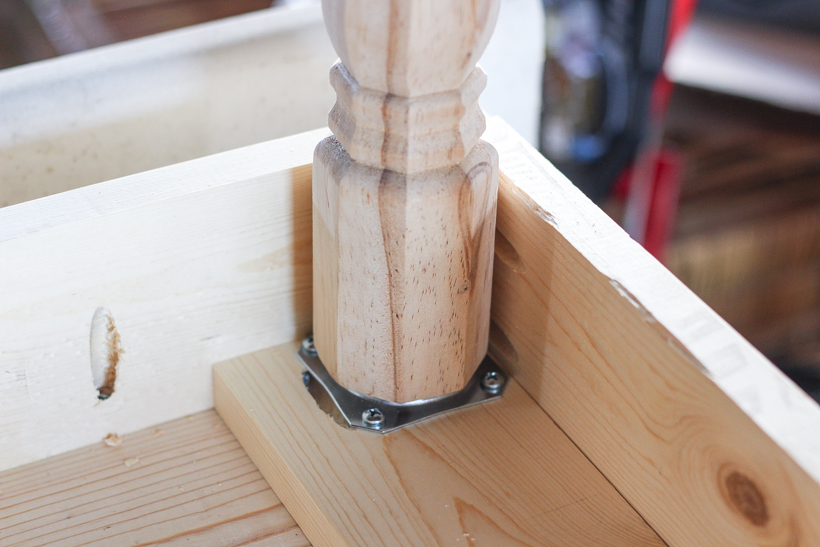
4 – 14″ table leg
4 – table leg top plate
CUT LIST:
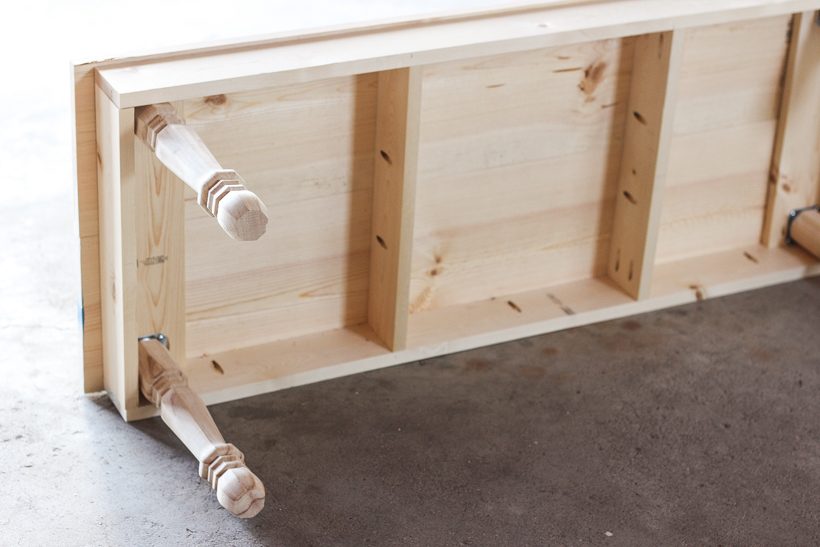
2 – 1 x 4 cut to 46″ (front + back apron)
2 – 1 x 4 cut to 16.5″ (side aprons)
2 – 1 x 4 cut to 16.5″ (leg support)
2 – 1 x 4 cut to 16.5″ (center support)
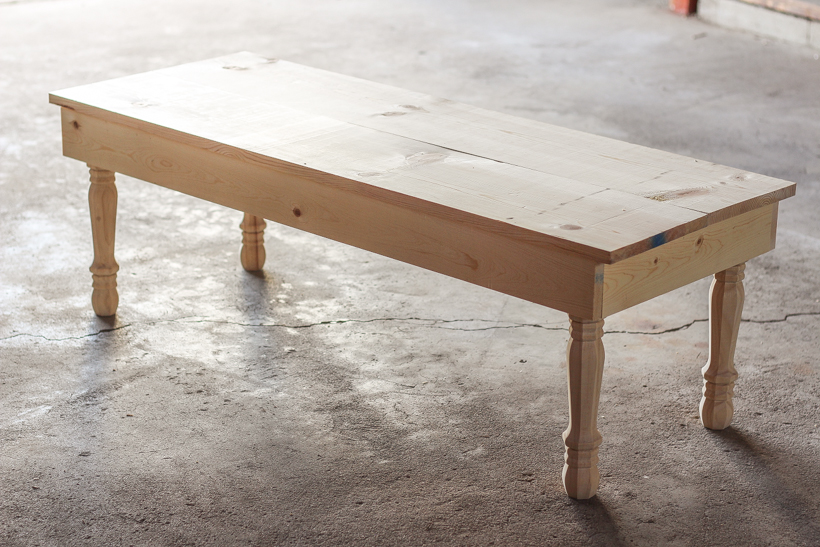
2 – 1 x 10 cut to 48″ (top)
INSTRUCTIONS:
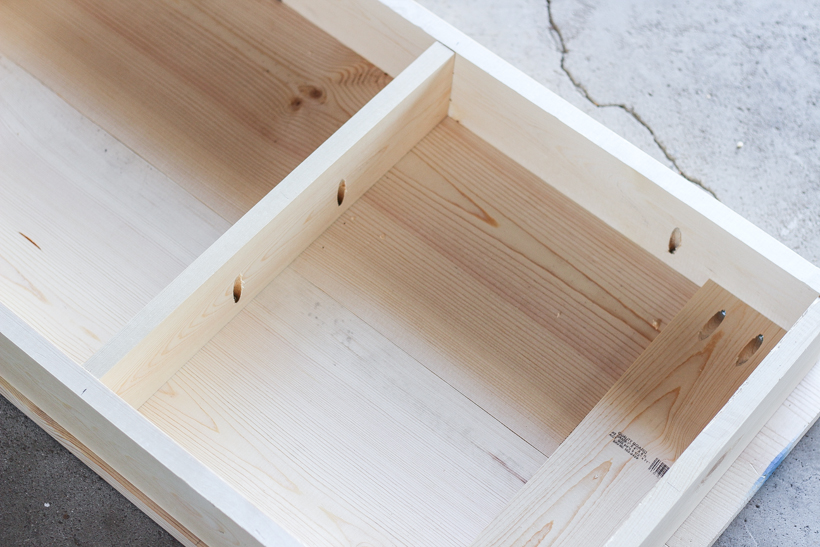
Drill two pocket holes in both ends of all six 16.5″ 1 x 4’s using the Kreg Jig.
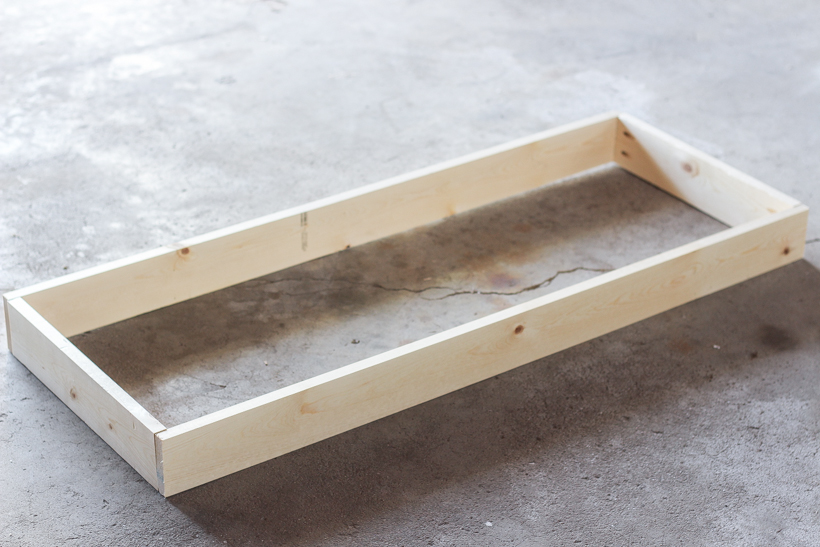
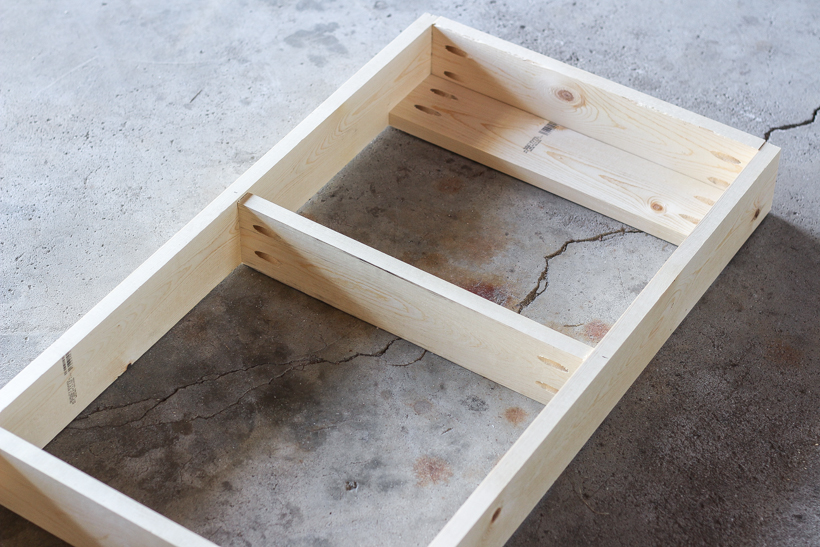
Attach the front and back aprons to the side aprons using wood glue and 1 1/4″ Kreg screws, creating a box.
Place two of the 16.5″ center supports standing up inside the box frame spaced about 15″ apart. Attach to the front and back aprons with Kreg screws.
Place the other two 16.5″ leg supports on the inside corners of the box frame laying flat on the ground. Attach to the front and back aprons with Kreg screws.
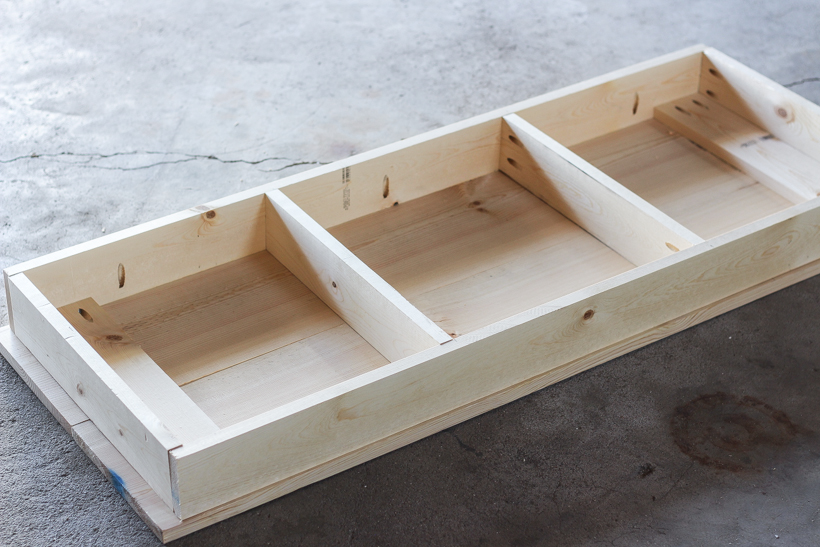
Drill pockets holes along the center supports and front and back aprons to attach the top. (This step can be done either now or before assembly, but I was making this up as I went and added these holes after I started assembling. I did three holes on the front and back aprons and two on both center supports.)
Attach the top 1 x 10 boards using wood glue and Kreg screws.
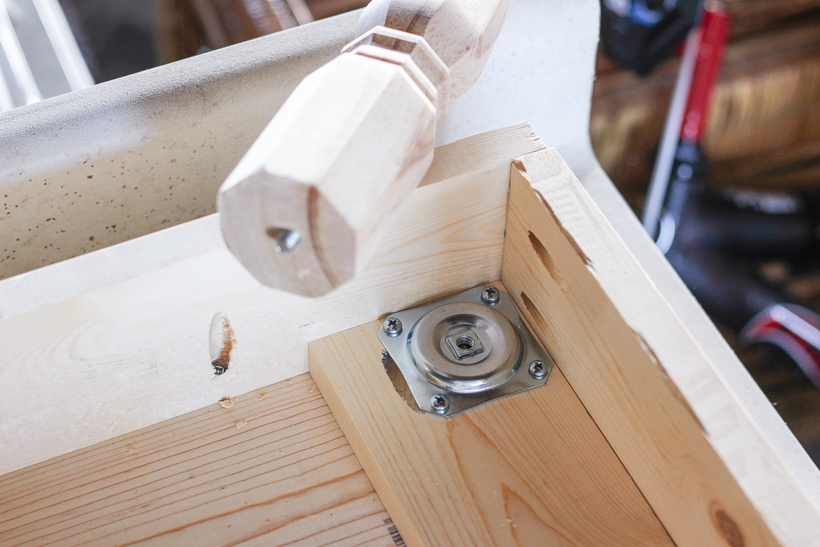
Install the plate hardware to the inside corners of the frame in the leg support boards. Then screw the table legs into the plates.
You built yourself a bench!

I’d love to hear if you try this project yourself! Tag me in a photo on Instagram so I can see your beautiful work!
Thank you so much for stopping by to see how I built this cute, little bench for our entryway, and I hope you’re feeling inspired to get out the power tools and do a little building!
– SHOP THIS POST –

LET’S KEEP IN TOUCH!
Subscribe to Blog | Follow on Instagram
Follow on Pinterest | Follow on Facebook

I am loving this bench so much!! Can’t believe it’s handmade! The basket underneath is really lovely too
I love it, Liz. I admire that you break projects down to from the start, rather than mass produce pieces. I think I saw this on Instagram (I follow you!). I am swooning over the mattress cushion and I’m thinking about a bench at the end of my bed on which it will fit.
Great job!
Jane