
It feels like forever that I’ve been dreaming of a big, pretty gallery wall in my living room. I must have pinned a thousand inspiration ideas before deciding to tackle this big project! And to be honest, I was a little intimidated at the idea of putting together and entire collection of beautifully random, yet artfully cohesive pieces to fill the large wall above our couch. I wanted it to feel just right. The perfect display of our family all wrapped up in wall of frames…
Well guess what ya’ll, I did it!
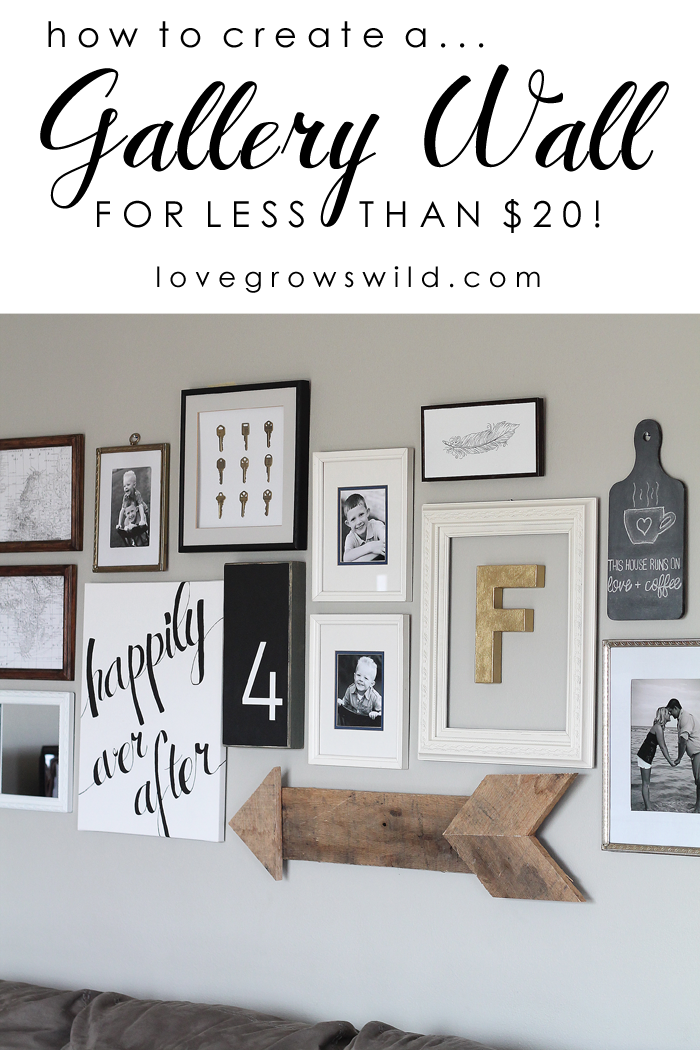
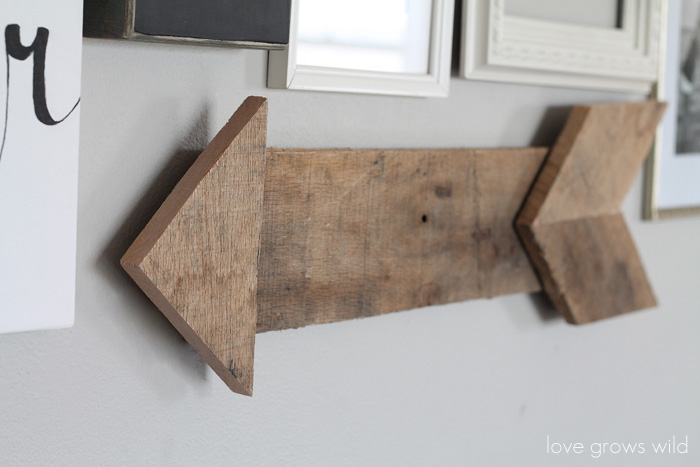
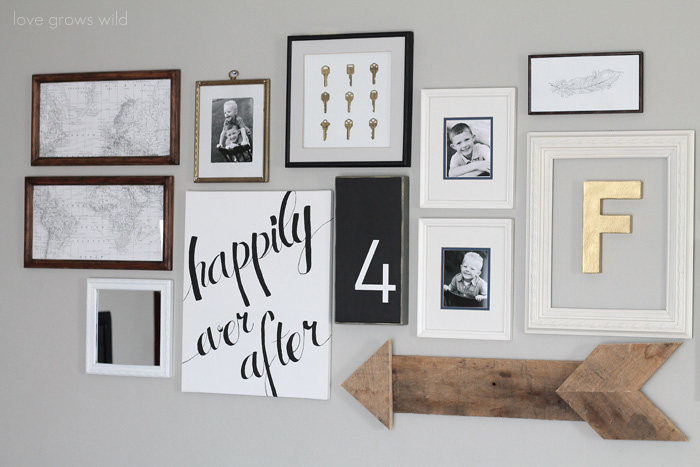
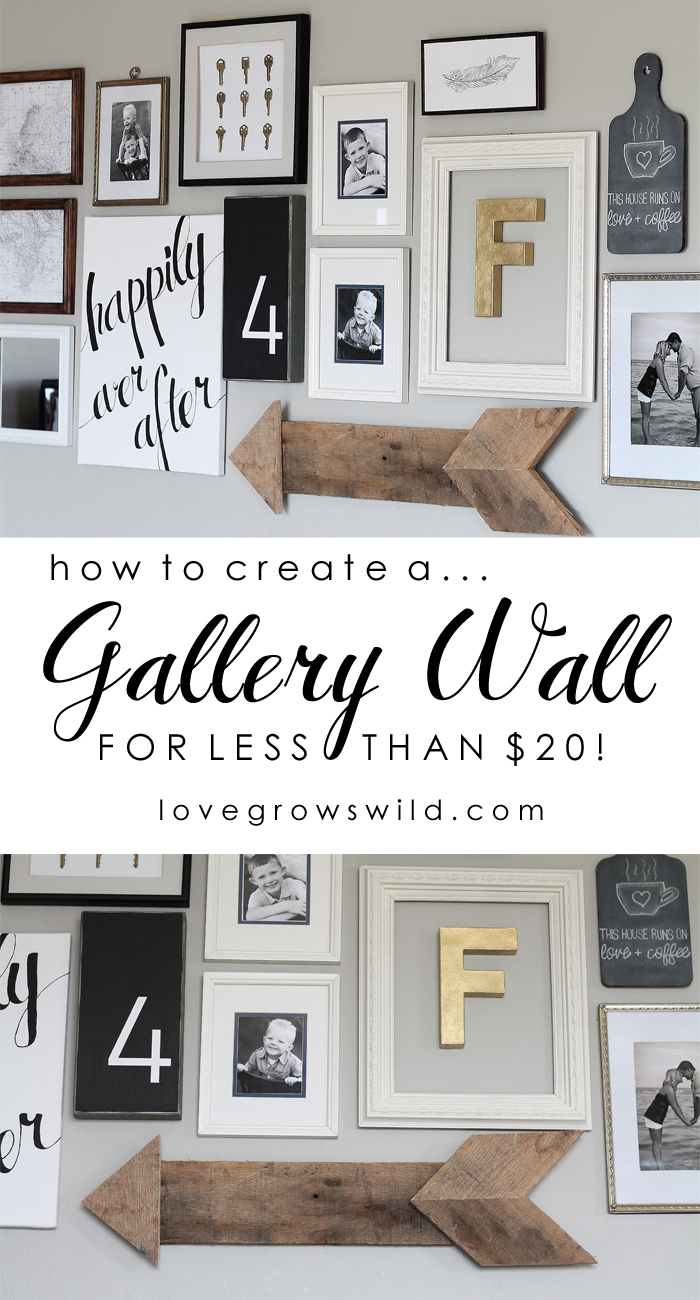
A large, 14-piece gallery wall complete with cherished family photos, unique thrifted finds, DIY artwork, and a pallet wood arrow that I’m BEYOND smitten with… all for UNDER $20!! Yes, I said $20! You definitely don’t want to miss these gallery wall ideas PLUS my easy hanging trick!
Words cannot express how happy I am to finally share this post with you. If you follow me on Instagram (what up Insta-peeps!), you’ve gotten some sneak peeks at a few of the projects I’ve been working on for the gallery wall, and I know you’ve been patiently waiting to see the finished product! So without further adieu, here’s how the gallery wall came to be:
Step 1: Shop, Thrift, Re-use, and Upcycle!
My first task was to shop around at thrift stores for old frames. I hit up Goodwill and scored probably 6 or 7 good size frames for around $20. I made sure to pick a variety of sizes and materials, such as metal and wood, that I knew I would create interest on the wall. When you’re looking for frames, don’t forget that you can easily spray paint them to whatever color you desire!
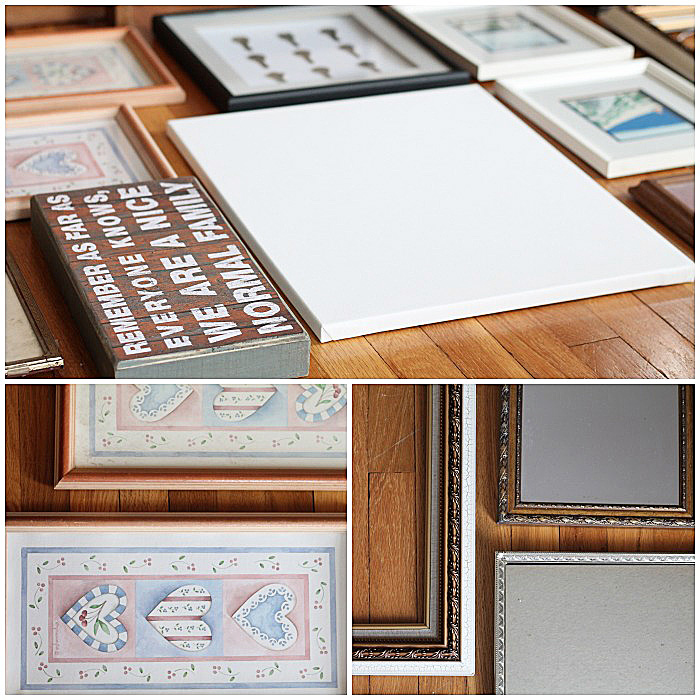
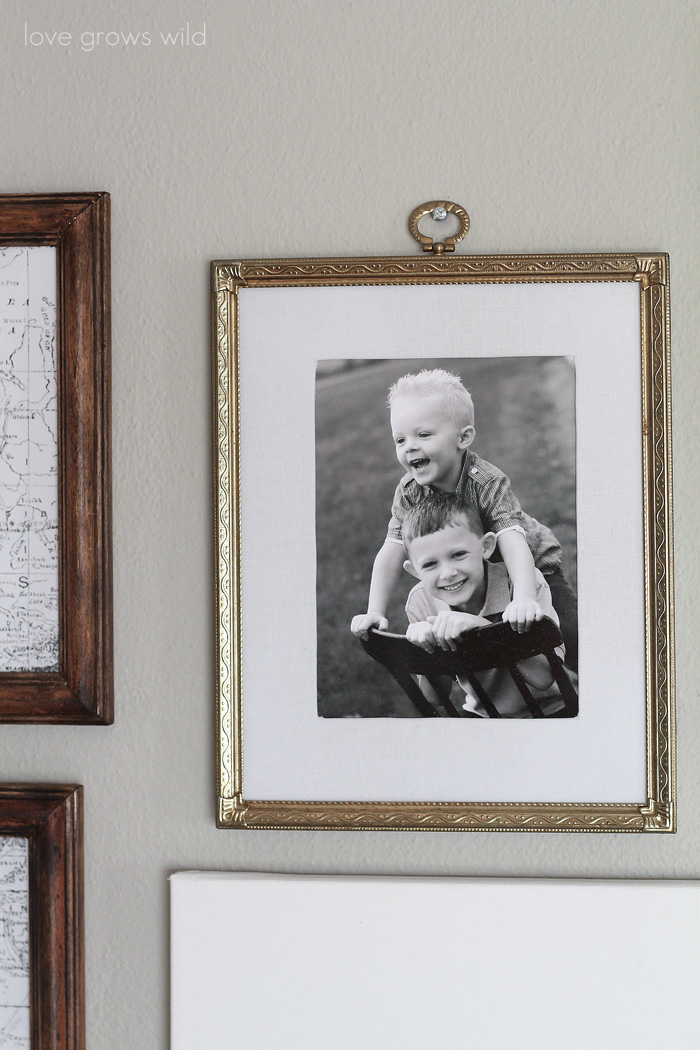
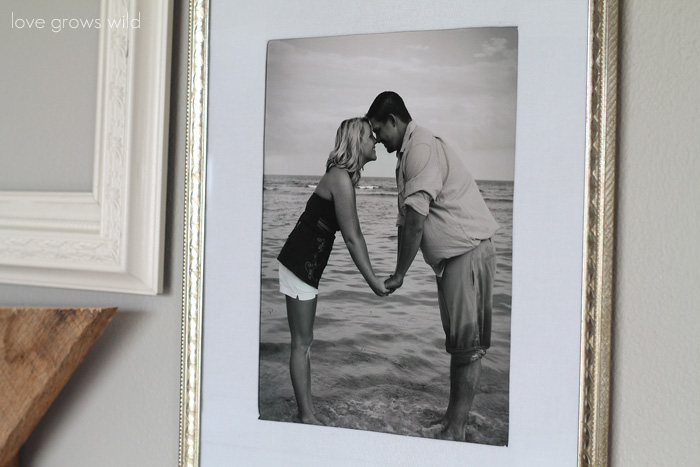
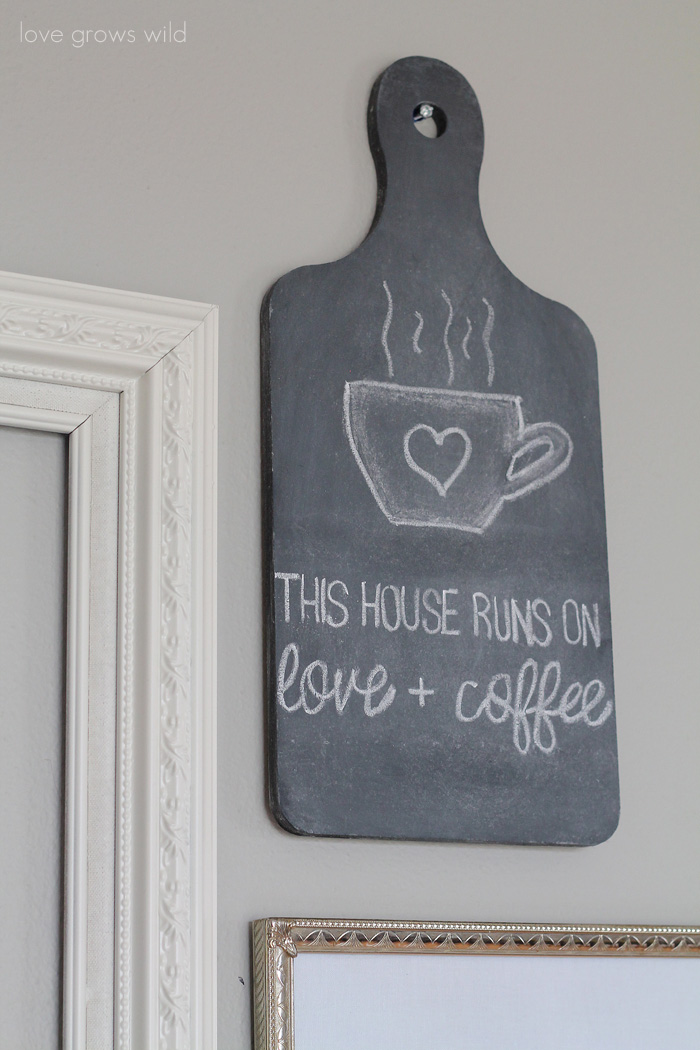
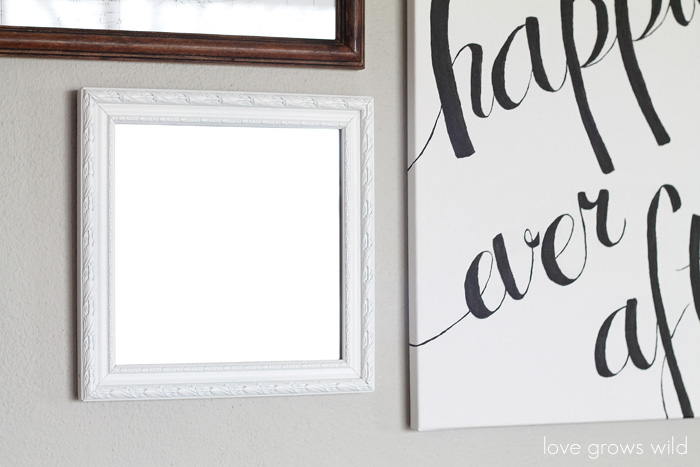
I brought everything home and laid them out on the floor, adding a few pieces I already owned… a blank canvas, my framed key specimen art, a small chalkboard, and a few small signs that needed a makeover. This was a great chance to clean out my closet and use up some of the items that I’ve had sitting around for awhile! I measured the wall above my couch and arranged the frames on the floor to those dimensions. Then I grabbed a piece of notebook paper and sketched out what I wanted to do with each frame. I sprayed a lot of them white to keep the wall light and spread a mixture of black, gold metal, and wood tones throughout the remaining pieces.
Step 2: Hang it up!
(Are you ready for my awesome hanging trick? Seriously, write this one down!)
Once I was ready to hang everything on the wall, I used this simple trick:
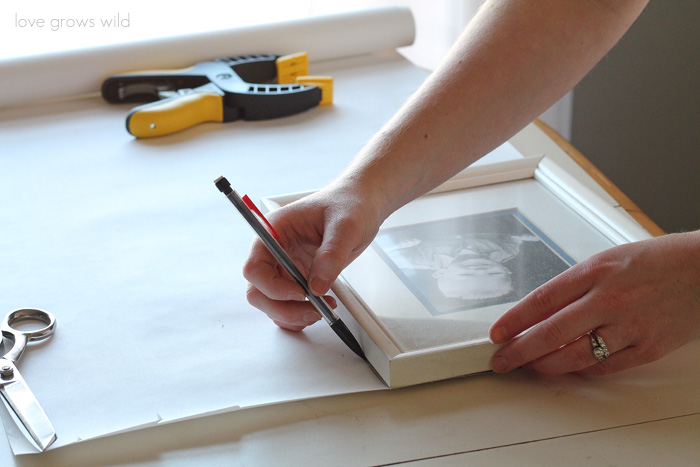
1) First, I traced each frame on paper and cut the shape out. Any scrap paper will do… newspaper, brown paper bags, or even wax paper. I had a roll of white drawing paper, so I went with that.
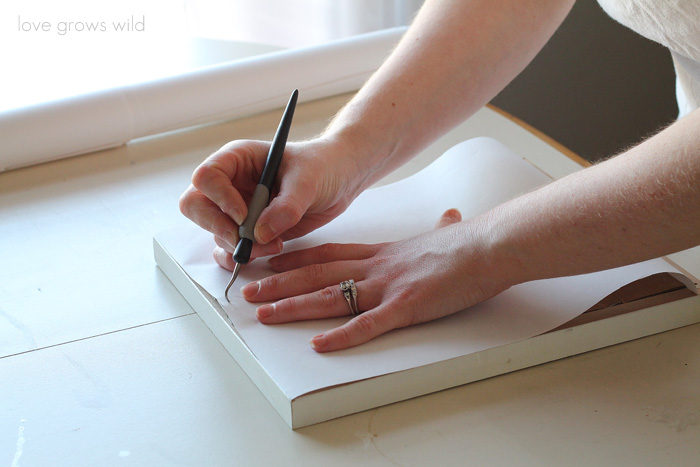
2) Then I placed the paper on the back of the frame and made a hole where the nail should go.
3) Then came the fun part… arranging everything on the wall! The easiest way I’ve found to do this was to first mark off the area where you want your frames to go. My frames took up about a 7′ x 3′ space, so I found the center of the wall and how far above my couch I wanted the frames to start and used masking tape to create a 7′ x 3′ box on the wall. I didn’t have any exact measurements on the spacing of each frame, so I just eyeballed where I wanted each paper to go. I started with a paper from the center and worked my way out from there.
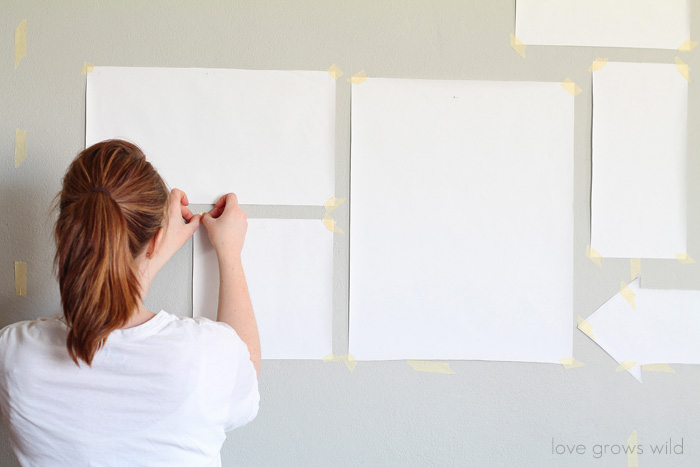
4) Once I had all the papers in place, we drilled through the hole in each paper to add an anchor and screw in the wall. Our house is on the older side, and these walls are TOUGH to drill through. Simple nails either bend or just tear up the wall, so my husband used a masonry bit and wall anchors to make sure everything stays where it’s supposed to. Even though our walls are a pain to drill through, it was SUPER easy to find each screw placement because of the handy templates I made! No guess work, and no 1,000 holes in the wall!

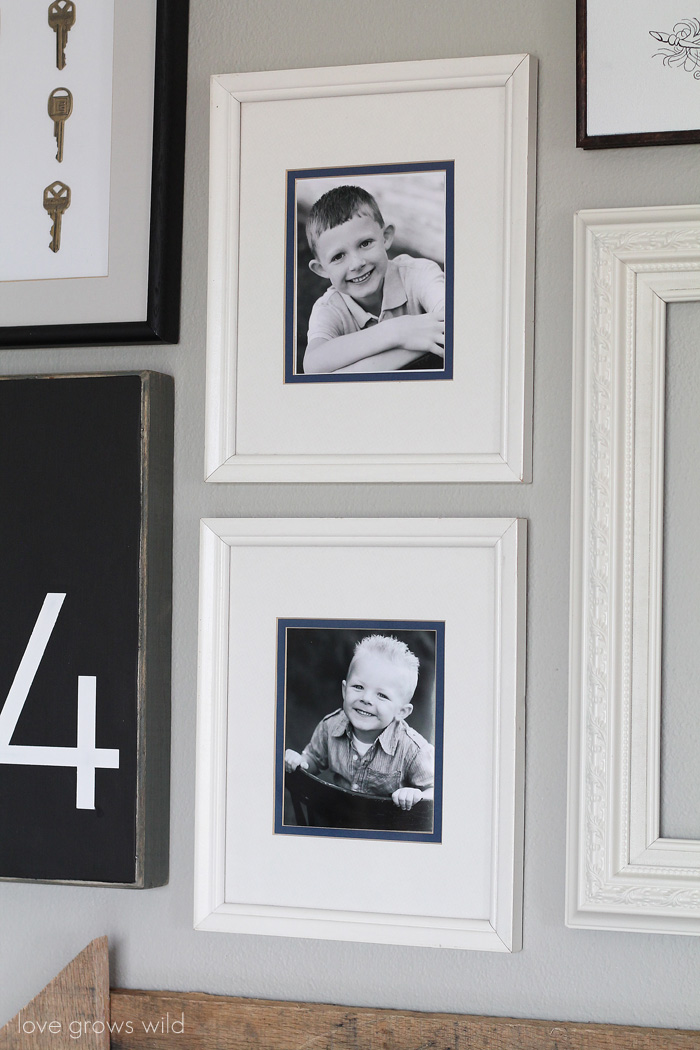
I tore all the tape and paper down and hung my frames on the wall. Now every time I walk into my living room, I get to swoon over this gorgeous gallery wall!
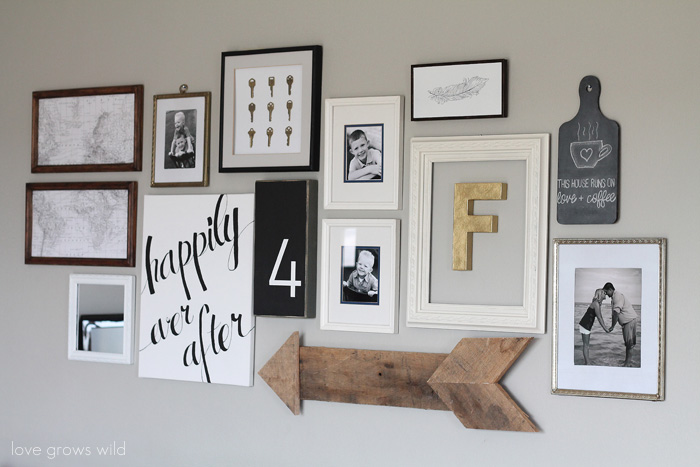
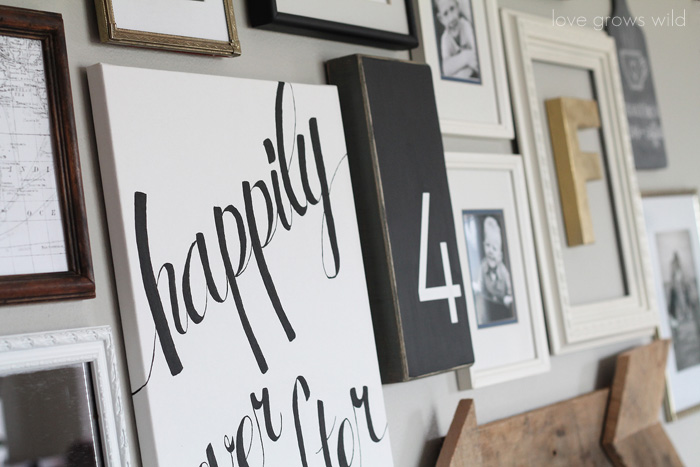
It’s the perfect mix of black and white with just the right amount of rustic wood tones and a bit of gold glam. I love it! Seriously, I cannot stop smiling! Instead of giving you a play by play on each individual piece, I’ll just let the photos do the talking and hopefully spark some inspiration…

So what do you think? I’m dying to know… what’s your favorite piece?? Is there a certain one you’d love to see a tutorial on? I have step-by-step tutorials lined up for a few of the pieces in the next couple weeks, so leave me a comment and let me know which individual projects you’d like to see!
The Cost:
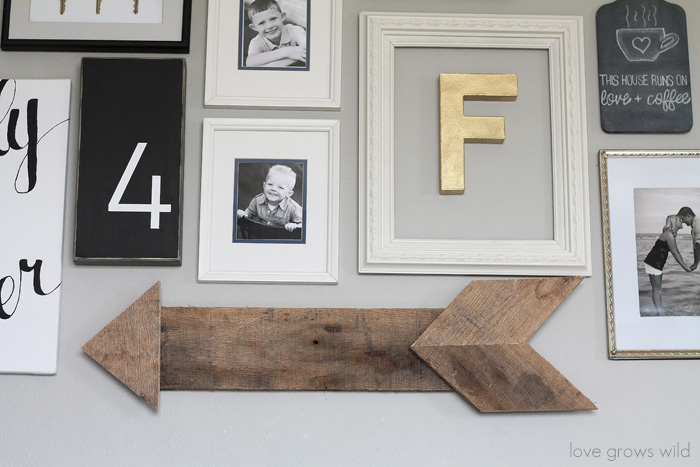
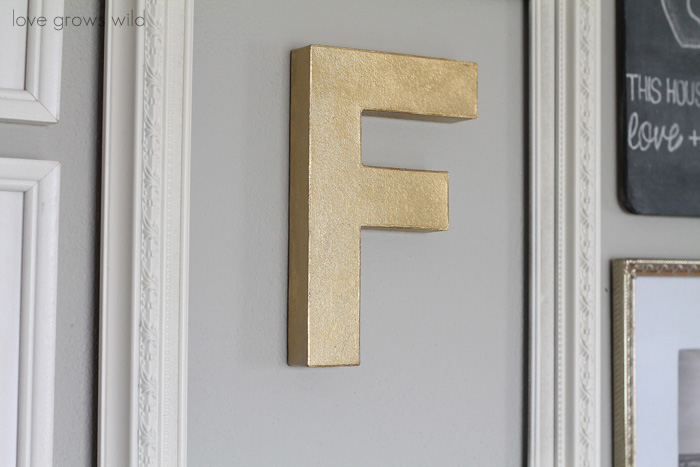
So I told you this gallery wall cost under $20, right? Well here’s a little breakdown on how I kept such a tiny budget to cover a ton of wall space: I mentioned earlier that I spent about $20 in frames at the thrift store. I didn’t end up using all of them so a few will be re-purposed for another project. I already had the big white canvas from a two-pack I bought awhile ago. The small chalkboard I already had from a kitchen project, and I painted over a few small signs that didn’t fit my style anymore. And the wood arrow was made from a pallet that my sweet sister picked up for me. Best. Sister. Ever. I had plenty of spray paint, stain, markers, and those sort of supplies on hand, so the only other thing I purchased for this wall was a paper mache letter F. That’s it! A little spray paint and some thrifted frames can go a LONG way, my friends!
I’ve never shown much of my living room here on the blog before (mostly because there’s so much I want to work on), but I thought I’d give you a little peek at what everything looks like.
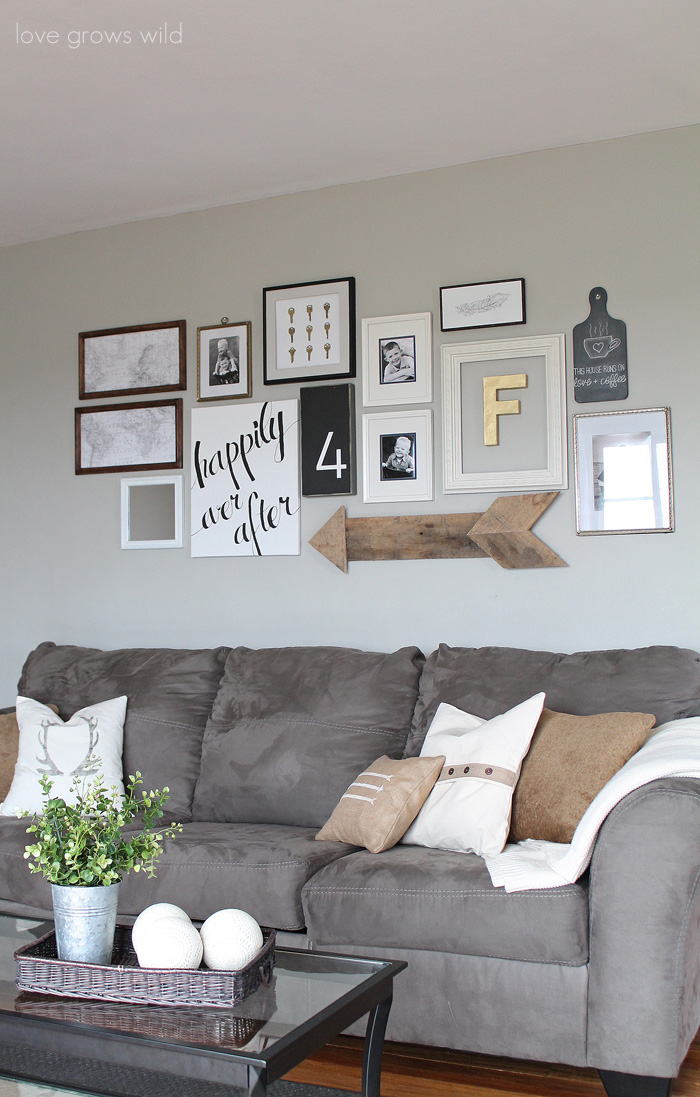
Woodlawn Colonial Gray walls with a simple, darker gray couch and a cream and gray stripe rug. Can you tell what colors I like? Lol! I used to have a big, dark wood coffee table, but it was too much dark furniture for me, so I switched it out for a simple glass coffee table with a black frame from Walmart that I really love. The glass gives an airier feel to the space.
I’m constantly switching out pillows on the couch (chronic re-decorator right here!), but right now I have a few solid color clearance finds, an adorable antler pillow from Parris Chic Boutique, and some of the easy DIY pillows I made awhile back. Click here to check out those tutorials!
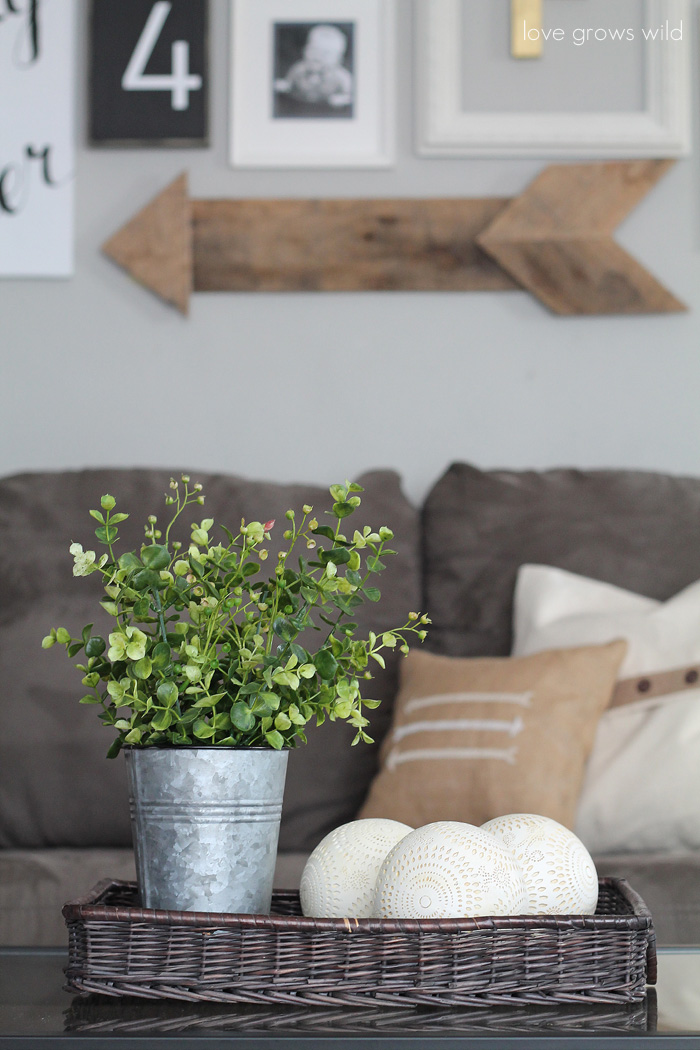
As I said before, I’ll be sharing tutorials for some of the pieces in the gallery wall coming up, plus a few furniture makeovers and more fun living room updates! I just love how my living room is shaping up! If you’re reading this, thank you for sticking around through tons of photos, and I hope you’re inspired to create a gallery wall in your home too!
To see all the project tutorials from our living room gallery wall, click the links below:
DIY Wood Pallet Arrow
Fabric-Covered Frame Mats
DIY Canvas Script Art
Key Specimen Art
Like what you see? Subscribe to Love Grows Wild so you’ll never miss a post!
Follow along on Pinterest, Google+, Instagram, and Facebook for more fun!
More project inspiration:
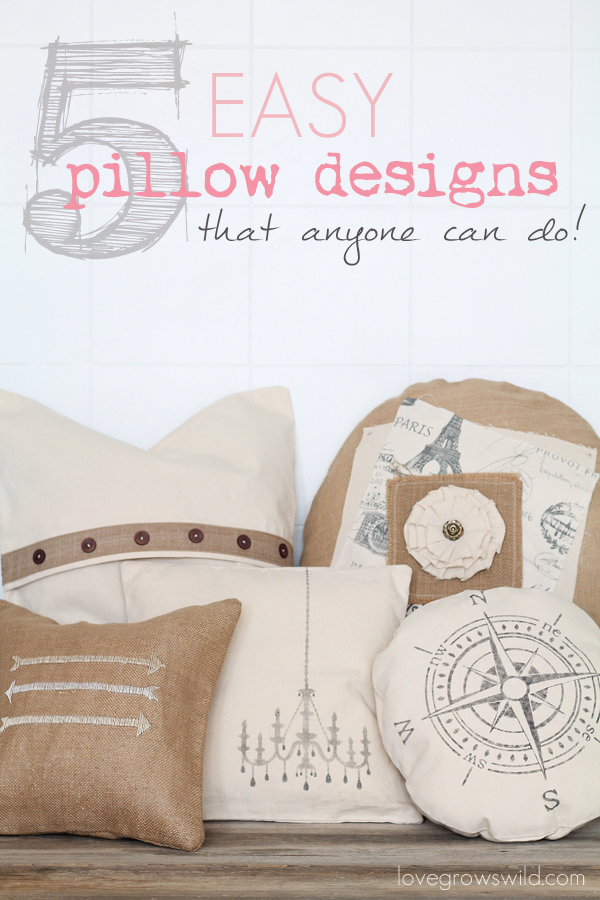
5 Easy Pillow Designs that ANYONE Can Do!
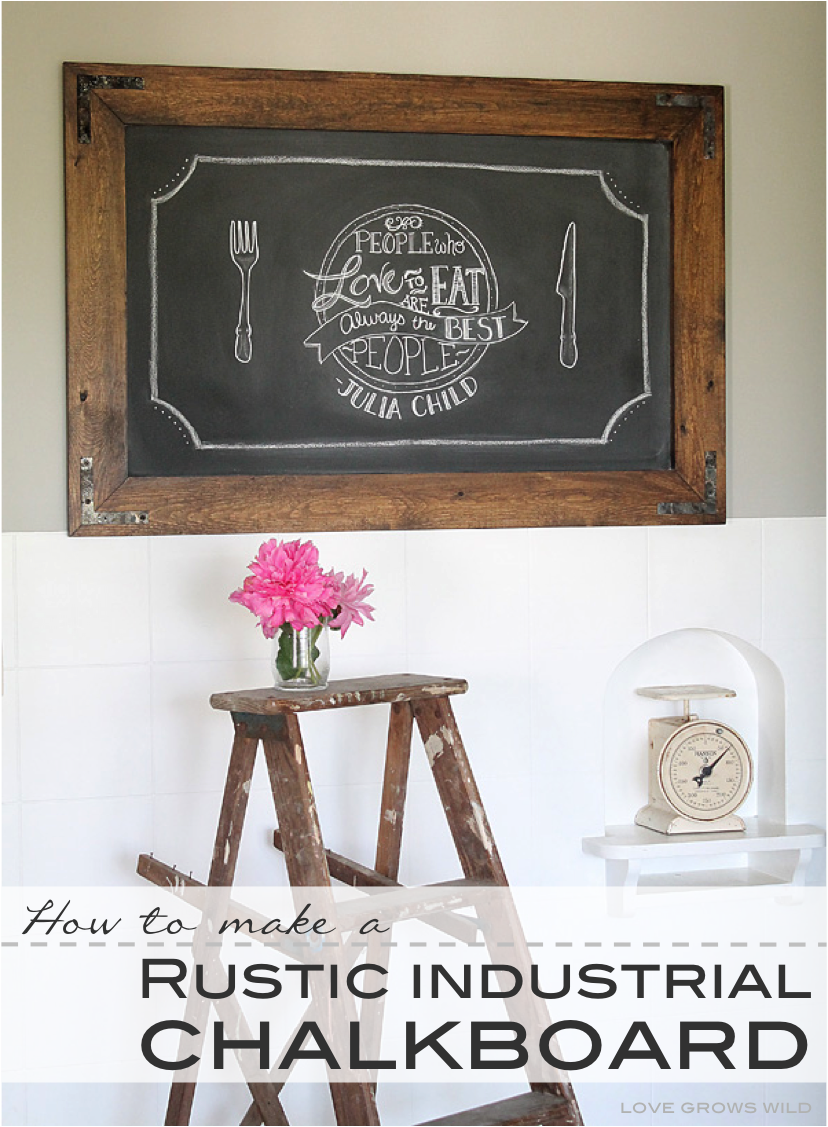
DIY Rustic Industrial Chalkboard
LET’S KEEP IN TOUCH!
Subscribe to Blog | Browse my Shop | Follow on Facebook | Follow on Twitter
Follow on Google+ | Follow on Pinterest | Follow on Instagram

Love it Liz! It’s perfect.
You are the sweetest, Rebecca!! Thank you! 🙂
I love a good gallery wall, Liz, and yours turned out GORGEOUS! It’s a perfect balance of neutrals, textures, and different media. Seriously beautiful…I would smile every time I looked at it, too! 🙂
Thank you, Samantha!! I was so intimidated at first because I wanted it to be the perfect blend all my favorite styles. I’m very, very excited how it all turned out! Mission accomplished. Now to tackle the mess my office has been left in during operation: gallery wall. 🙂
I luv this display as i think i could do a great mural on my wall.!! But im
Actually gonna paint it. The mural is about8ft wide 8ft tall. I believe it is gonna look like a real live painter did it lol. Im also a writer.!! Luv this color scheme.!!
AMAZING!! One of my favorites I’ve seen!! I’m loving the wooden arrow!
YAY! Thank you Selene!! You made my day. 🙂
Did you make the arrow or purchase it ? I’m in love with it and your wall.
Hey Dylan! Thank you so much! I actually made that arrow from an old pallet. Here’s the link to the tutorial: https://lovegrowswild.com/2014/04/diy-wood-pallet-arrow/
I Love your gallery wall! I just did an $8.00 gallery wall for my daughter’s room and did the same letter inside a frame. I also have a similar number 4. We must have the same taste 🙂 My favorite part off your wall is the wooden arrow. I’ve got to make one of those. Great job!
P.S. I found you through Tatertos and Jello!
Great minds think alike, right? Lol! I’m so glad you enjoyed the wall! Don’t you just love putting together a fun displays like this?
Very nice! I love the variety you have going. 🙂
Thank you, Laura! I love the contrast too!
Lovely gallery wall! I love how your simple details when pulled altogether, is so rich! Amazing you were able to complete it for $20! Kari
Thank you so much, Kari!! It’s all about the details. 🙂 So glad you could stop by to see it!
This post is so timely. We moved into our house about 7 months ago. We are wrapping up a lot of the paint projects now. Up next pictures!!
Yay! That’s the fun part!! Have fun decorating!
Love the gallery wall! What a beautiful display – it inspires me to consider something similar for our basement! Visiting from Six Sisters’! Have a lovely weekend!
I’m so glad you stopped by, Abi! I bet a gallery wall would look great in your basement!
Since we just moved into our home last year and some (lots) of our decor/pics are still unpacked, my many many blank walls are screaming ‘make me pretty’! This is amazing inspiration to help me tackle them! Thanks a bunch for sharing Liz!
You are so very welcome, Danielle! I still have SO many things on my decorating to-do list, and we’re almost at 2 years living in this house! Lol 🙂 Have fun tackling those blank walls, girl!
Did you make the “happily ever after sign’?
I did, Erin! How about a tutorial in the next few weeks? 😉
Would love it!!!!! Thanks Liz!!
You’re so welcome, Erin!! 🙂
😉
It’s perfect, Liz 🙂 I have this on my to do list as well for our bedroom! It’s a blank canvas right now. Thanks for the hanging tips! I usually just wing it then I have a mad husband 🙂
The hubs said I’ve reached my “hole in the wall” limit, so I have to be choosy now where I start hammering away! Lol 🙂 I bet you’ll create a gorgeous gallery wall for your bedroom!
I found you on pinterest. This is beautiful! I really love the keys and the arrow! What a cool gift your sister gave you. I have one big gallery wall with thrift store frames and dollar store frames in my kitchen, and I think I’m going to change things up a bit after seeing yours!
I’m so glad you stopped by, Michele! That arrow from the pallet my sister gave me was such a fun project and has a great story too. I love having decor in my home that can make me smile like that! Isn’t it great how you can create a big gallery wall so inexpensively with thrift store frames? Have fun re-decorating! I bet it will turn out fabulous. 🙂
I love your gallery wall! I’m in the process of collecting frames and such to create my own. I use your paper template trick to hang stuff on the walls too!
Isn’t that the greatest trick? Love it! Have fun creating your gallery wall!!
It looks beautiful! I’ve been working on a gallery wall in our family room for a while now, but I’m not loving it yet. I love how you created a balanced grouping without it being symmetrical. That’s my biggest stumbling point. The paper trick is awesome too. That’s how I’ve been hanging pieces too, and it’s so much easier for me and friendlier to my walls. Now they only get one hole per pic instead of the 3 or so I used to make before. 🙂
Lol! I agree, one hole is much better than three! That was one of my main focuses with this wall, balance without complete symmetry. I think it gives it more of a relaxed, natural feel. Keep re-arranging and playing with new pieces, and you’ll get the balance right! So glad you could stop by, Emily! 🙂
Hi Liz, this is such a great way to hang a gallery! I am going to pull my things off the wall and do it properly now. Well… After I patch she paint the walls from the mess of holes behind all the art. Thanks so much!
All those holes are a pain, aren’t they? But so worth it for a gorgeous gallery wall to look at! Good luck with yours, Fran!
Your gallery wall turned out great. I’m currently working on redoing a gallery wall in my hallway and I keep procrastinating. Kudos to keeping your project less than $20. I won’t be able to say that, but I have been getting frames on sale at Hobby Lobby 🙂 Great tips!
Thank you so much, Dawn! Gallery walls are so fun to play with! I’m sure it will just be a matter of time before I start rearranging mine. 🙂
Wow! What an awesome gallery wall. Love it. It really is perfect. You have a great balance of sizes, tones, textures going on there. Very inspiring! Pinned and going to use for inspo… some day…
Thank you so much, Ashley! You’re too sweet!
Please share how you made your arrow!
You got it, Krista! A tutorial should be hitting the blog tomorrow! 🙂
Love this whole wall, everything is perfect!
I keep starring at it for inspiration for my wall I’m neglecting! Lol.
You are seriously the sweetest, Rebecca! I know how crazy creative you are, and I’m sure your wall will turn out beautifully! P.S. can I just say how excited I am to meet you at SNAP??
Hi Liz, stopping by from the Sunday Soiree. I can’t believe how inexpensively you created your gallery wall, and thanks for the great tips too. I am in love with that arrow, so awesome! Thanks for sharing 🙂
Thank you so much, Meg! I really love how that arrow turned out! So glad you could stop by. 🙂
I love your gallery wall! It turned out awesome. Don’t you just love when that happens? I really love the pallet arrow, number 4 and Happily Ever After. Did you make the 4 and Happily Ever After? Really everything looks so great!
I do! I was so intimidated at first about pulling all these thrifted, mismatched pieces together, but I really love the way it all turned out! I did make the 4 and the Happily Ever After sign… I just painted over an old sign and used a stencil to paint on the 4, and I’ll have a tutorial for the other sign on the blog soon! Thanks so much for your sweet comments! 🙂
I am loving your gallery wall. I too am working on my living room and have pinned all kinds of gallery walls for when I finally do one myself. I’ll be pinning yours too! I’d love it if you chose to share this at What We Accomplished Wednesdays. The party is usually up by 6:00 pm Tuesday evenings. I am off to explore some of those other projects of yours. Have a super week! ~Deborah
Gallery walls are so much fun, aren’t they? Thanks for the pin, Deborah!!
IT’s perfect — seriously!! Thank you for sharing & inspiring!
You are so very welcome, Stacy! Your sweet words made my day! 🙂
So basically in order to have it come to under $20, you have to own everything already. Haha If you truely bought everything on your wall, it would come out to quite a bit more and most people don’t have all that stuff lying around. Plus the cost of printing photos, etc. It’s a great wall and you did an awesome job on it, but telling people they can do all of that for under $20 isn’t really true…
Those are all good points, Sharaya. I did have some of the pieces already, but many needed a complete makeover, and I purchased a lot of the frames from the thrift store. The purpose was to show that you don’t have to buy pre-finished, high end artwork from a store, but instead use what you already have re-purposed in a new way. A little spray paint can completely transform a collection of mismatched pieces! I totally understand what you mean, but I wanted to show how I personally created this gallery wall for under $20 and ways you can do the same thing on a small budget. Thanks for the feedback!
I love this! You did such a good job! Thanks for linking up at Sunday Soiree!
You are the sweetest, Marie! Thank you so much! And I agree, that paper trick saves a ton of holes in the wall. 🙂 Thanks for stopping by!
Oh and that is my favorite way of hanging stuff by ‘mapping’ it out with paper first! Saves many holes in the wall!
What a great idea! Love how this gallery wall turned out – so inspiring!
I’m so glad you enjoyed it! Thank you for your sweet comment! 🙂
LOVE!!! I want this on my wall! Totally copying some of your fantastic ideas!
Copy away, Shari! I’m so glad you like it! I bet this would be beautiful in your home too! 🙂
This is an amazing gallery wall. Love the eclectic mix of frames and rustic accessories. My favorite is the happily ever after script art. I’m a strong lover of typography. Again great job!
Me too, Kahli!! I love adding typography in my home decor! Thanks so much for your sweet comments. 🙂
Thanks for linking this up. I LOVE it! I pinned and shared it on FB 🙂
Wow, thank you, Stacy! You’re the best!
This is really well done – I love it – great job!
Thank you so much, Lyndi!!
I love this gallery. I’ve been planning on doing one for a while, just haven’t gotten around to gathering what I really want on the wall. Pinning for inspiration.
Thank you, Christina! It does take a little bit of planning, but gallery walls are easily adaptable and can be switched out easily, which I love. I just get bored with the same decor all the time. Lol 🙂 Thanks so much for stopping by!
Love it! My favorite is the happily ever after sign!! Tutorial?? 🙂
Yes ma’am!! Tutorial coming your way in the next few weeks! I’m so glad you like it! 🙂
I’m just going to copy everything you have, okay? This is so lovely. I wish I had your creativity! <3
Copy away, girlfriend! I’m so glad you like it! And trust me, once you start getting those creative juices going, they’ll flow right out of you. 🙂
Loving this gallery wall so much! We are in the process of building a house so it is fun to gather ideas and dream about the new space! I also love your sofa. Would you mind sharing where you got it?
Sure! I got the couch from Ashley Furniture. And how exciting to be building your own house! So much to look forward to decorating!
Me encantó haré algo así, mil gracias por la inspiración
Hey Liz, I ADORE your gallery wall. I love that arrow so much, I see pallets all the time and think I need to make something, so now I know what I will make. I also love the canvas happily every after board. Did you buy or make it? I will be sharing your gallery wall in a round up.
Have a great day. jen
Thank you SO much, Jen!! I’m super proud how this little wall turned out! I also made the “happily ever after” sign and should have a tutorial up in the next few weeks. Thanks for stopping by and for the feature! 🙂
This wall is beyond perfect! I’m slightly obsessed with gallery walls, both large & small 🙂 your arrow is my favorite… Also, did you paint & stencil the “4” piece? Working on a wall for my baby on the way’s nursery… I definitely have some new inspiration. Thank you 🙂 You have a new follower!!
Thank you so much, Rachael! You are too sweet! I did paint and stencil over an old sign I had for the number 4, and it was such an easy makeover. I bet something like this would look darling in your nursery! Congrats!
Best gallery wall I have seen and pinned 😉 when can we expect the tutorial for the happily ever after canvas and number 4 sign??? I’m anxious can you tell!
You are TOO sweet, Amanda!! Thank you! I’ll have a tutorial for the “happily ever after” canvas in the next few weeks, and the number 4 sign was just done with a little paint and a stencil. I’m so glad you like my gallery wall!
Absolutely fabulous ! You said it right, the perfect balance. You are an inspiration.
You are so sweet, Jackie! Thank you so very much! 🙂
Love the feather print! Can you please send me the file or link as to where you got it?
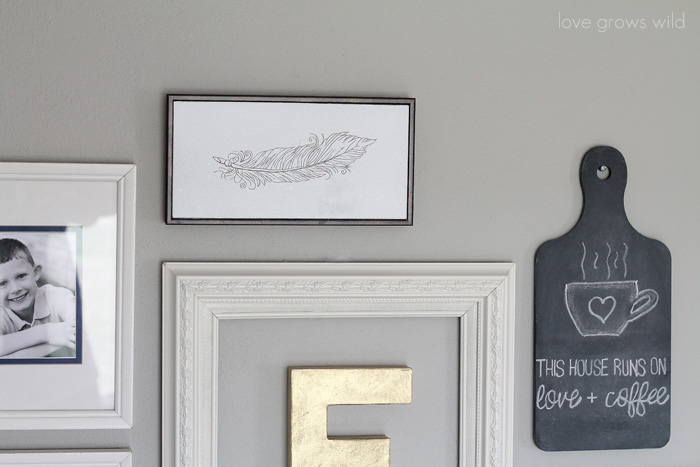
Hi Kim! I actually re-used an old sign I had for the feather art. I first painted over the original print in white, then found a feather image I liked on Google Images and copied that onto the sign using a fine tip Sharpie. I always love when I can re-use old decor to create something new!
I LOVE this!! I might try to copy you, like… a lot!! Where did you get the map prints?? I wish my house looked like this. Gorgeous!
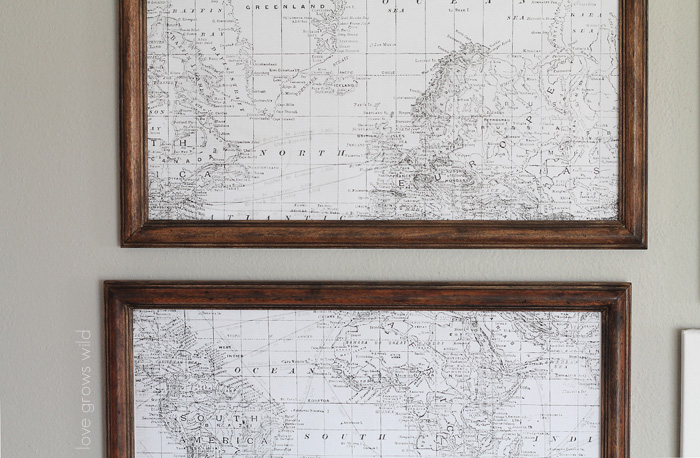
Go for it, Jill! I’m thrilled to have inspired you a little! The map prints are actually images I found from a Google search. I just enlarged them and cut them to fit the frames! Have fun creating some new artwork for your home!!
xoxo Liz
Hi! Where is the grey couch from? I love it. It looks super comfy.
Hi Megan! I purchased our couches from Ashley Furniture. They’re pretty darn comfy, if I do say so myself! 😉
Beautiful and creative! I love the gold paper mach ‘F’! I have had a hard time finding good gold paint, what do you use?
Thank you, Kelly!! I’ve had to trial and error with gold spray paints a bit, and this is the one I’ve been using from Rustoleum: Rust-Oleum Metallic Spray, Gold, 11-Ounce
Thanks for the tutorial on the wall, and the ones to come on its contents. I am sorry if this is redundant; I tried to read through all the comments to find info, but I have three little kids so I have to move fast! I actually pinned this for info on your couch! The wall is awesome, but I’m loving your couch. Can you tell me the details? Thanks!
oh wait, I literally just saw the comment above mine. Ha, ha. Sorry, see…three kids and mama’s brain. Just delete both my comments if you want!
Haha no worries, Lauren! I totally understand having mommy brain! Just let me know if you have any other questions, and I’m happy to help!!
I found this post on Pinterest as I’m planning my own gallery wall and want to say THANK YOU! Great round up of how to keep it simple and look fabulous. Have a great day!
xo Heidi
I’m so thrilled to hear that, Heidi! Best of luck with your gallery wall, and I would love to see how it turns out!
Hello, Liz :D. Congratulations for your beautiful living room. Can you tell me what colour you used for painting the walls? Thank you for the inspiration! 🙂
Hey Elis! Thank you! The color on the walls is Woodlawn Colonial Gray by Valspar. It’s a really pretty combination of beige and gray!
Love it. Great job, but, I have one question, where did you get the maps from? I am wanting to frame some maps, but don’t know where to get them, especially in the black and white you have. Thanks. If you can send it to my email, I would greatly appreciate it.. [email protected]
Have a GREAT day.
Hi Karen! I searched for maps on Google Images and turned them into black and white images with photo editing software. It was pretty simple to do, and I just printed them off my home computer. I hope this helps! Thanks for stopping by. 🙂
What a great combination of family, text and art! And you’ve made it so simple!
Wow, thank you, Emilie! I’m so glad you like it! 🙂
Hi Liz,
I LOVE the colors you chose for your living room. We are moving into our new home soon and I need a new couch. I saw in previous post that your sofa came from Ashley, but I went there today with no luck! The salesperson said it was like trying to find a needle in a haystack trying to use a pinterest photo. Any idea of the style or model number? Thanks for any info!
Hi Christy! Congrats on the new home!! I don’t think I can find a model number for you, but hopefully they’ll be able to find something similar for you from the photo you have! Best of luck shopping! New furniture is always fun. 🙂
I would like to know where you got the nails you used? It looked line a sparkle on the end.
Thanks.
Hey Bonnie! They’re nothing special… just regular nails from the hardware store! Sparkle nails would be fun though, wouldn’t they? 🙂
I found you on pinterest and i LOVE your gallery wall! Now i have so much inspiration to make my own, thank you! I really like the mixed materials and the keys are my favorite! I have to start right away,i am so inspired, haha! Greetings from Finland!
Wow, thank you so much, Rebecka!! Have fun creating your own gallery wall!
I am in love with this gallery wall and am in the process of putting together my own. I searched high and low for a similar ‘happily ever after’ sign, but yours takes the cake. I decides to make it my first DIY project. I have all my supplies together, but have been fighting technology to get the font. Any chance you still have the .jpg file that you can send me? Any help is much appreciated! Thanks for the inspiration!
#technologyimpaired
I think you’re going to love this piece of art, Amy! Sending you an email now. 🙂
Liz,
First of all I love your gallery! I also like the way you made your design, I can’t wait to try that. My dilemma is; we have a man cave/ family place in the basement,With one very long wall, approx 12′ long. I have some of my paintings I have done and a couple that my boys now 30 and 27yrs old did in grammar school that I framed. How do I fillin the rest of the wall with unique things? The other side of basement is philadelphila Eagle town. So I don’t want to use that. Any ideas?
Hey Michelle! I love that you have some original paintings from you and your family! I like using a mix of new and old pieces, plus plenty of family photos and things that have special meaning to your family. I hope this helps!
I LOVE you gallery wall! I am going to do something similar to go above our couch in the loft, and I definitely love how you incorporated different materials and medias–it makes things more visually appealing. I have a question though: did you center the gallery above the couch or did you center it on the wall? I keep going back and forth over how it would look on the wall because our couch isn’t centered. Any help would be greatly appreciated.
Thanks!
Hey Melissa! That’s a really good question. In my living room, the couch is pretty much centered on the wall, so that made it easy to know where to start the design. But if your couch isn’t centered on the wall, I might suggest keeping the gallery wall right above the couch. It probably depends on what else you have on that wall, maybe an end table or something, but I think centered on the couch is best. That’s my two cents, anyway! 🙂 Hope this helps!
Hi Liz –
Love your gallery wall! I’m planning on doing something similar in our entry hallway.
I love your mixture of photography, art and text – so creative and interesting to look at! I’m curious about the significance of the keys? We recently moved into an older home and the previous owner left a pile of old skeleton keys. To honor the history of the house, I was going to mount them in a shadowbox, similar to yours.
Thanks for the inspiration!
I totally agree, Karen. I love mixing photos, art, and other odds and ends together! The keys are all ones we’ve collected over the years… cars, homes, random ones we have no clue where they came from. 🙂 What a lucky find… I love old skeleton keys! I think a shadowbox would be the perfect place for them.
how nice, it’s really inspiring hope you posted more of this so we can also apply it in our on home 🙂 kip it up and God bless
Hi Liz,
I loved your gallery so much, I pinned it! I also used your fabulous hanging tip for a recent project and thought you might like to know that I linked to your wonderful gallery in my latest blog post: http://suzy-homemaker.co.uk/blog/entry/upcycled-charity-shop-art.html
Thanks for sharing 🙂
Sue
I’m so glad that the hanging trick worked for you! Love your new artwork. 🙂 Thanks for stopping by, Sue!
This is a fabulous post! After paying full price for frames, I’ve begun getting what I can used instead. Thank you for the great ideas, especially about how to arrange the frames with paper. Genius 🙂
You’re so welcome, Maryam! I can always find a huge assortment of frames at the thrift store, so why not save a little cash? I’m glad you like the paper trick! 🙂
Hey!
I love this. Just wondering if you could tell me the dimensions of a few of the frames/pieces? That would help me a lot in trying to start my own wall 🙂
Thanks!
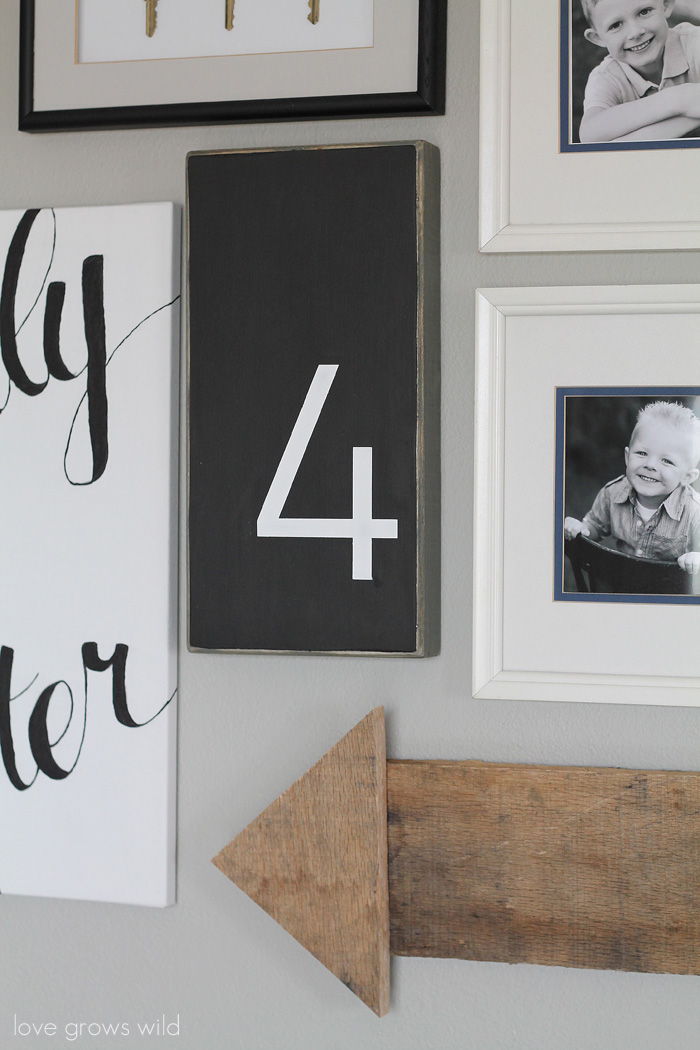
Hey Lindsey! I totally understand. 🙂 The script art canvas is 16″ x 20″ and the wood arrow measures 33″ x 8.5″. I hope this helps! Have fun putting your gallery wall together!
Hey! I know someone asked about the maps, but I’m having a hard time finding some that I like on Google, and I have no skills in a photo editing software. I was wondering if you have considered sharing those images ? I just LOVE the black and white map prints, and am trying to find some that will work on my wall.
Thank you for the inspiration! This is by far my favorite gallery wall I’ve seen!
Hey Kari! I totally understand. 🙂 I honestly just printed those maps off and never saved them to my computer, otherwise I’d be happy to share them! I’m so glad you like how the gallery wall turned out!
Hey there! Loved your style and the couch goes perfect with it!! Where is your couch from I’ve been looking for some gray ones!!!!
Hey Adriana! I purchased these couches from Ashley Furniture a few years ago. Not sure if they still carry them, but they have a pretty good selection!
May I ask what paint color is on your wall?
Absolutely! The color is Woodlawn Colonial Gray by Valspar. It’s a great warm gray!
I absolutely love it. It matches your couch so perfectly!
I’m thinking of doing something similar for ourselves. There are so many pics we never see because they are stacked somewhere in the closet. It must be a great conversation piece, to have them all on the wall!
Thanks for the inspiration!
Yes, exactly! I was tired of all my photos being shoved in a closet never to be seen. Have fun finding ways to display your precious photos… there are so many neat ways you could do it!
This is exactly the inspiration that I needed. I have a very similar wall that has a large mirror and needs something else. I love the layout you chose and plan to use your wall for my inspiration. Thank you so much for sharing your talent!!
That’s wonderful, Jo-Lynn! Have fun designing your gallery wall!! 🙂
i love this! where is your couch from? i have been looking for a gray couch.
Hey Julie! Our couches came from Ashley Furniture about 3-4 years ago. I’m a big fan of the gray!
i love that “happily ever after” sign. where is it from?
I actually made it! You can find the tutorial here: https://lovegrowswild.com/2014/05/diy-canvas-script-art/
I love your wall! I’ve been wanting to fix a wall in my living room as well. I have a question, on my wall now I have a huge casual senior portrait of my daughter in a sage green scalloped frame (I think is 14×17), a ceramic state my daughter made that’s about a portrait 8×10 size and one of my son’s wedding pics landscaped 8×10. These are all in color. My question is will it look ok to hang black and white photos with color? Will it look ok to have a the big portrait still in the collage? I’m nervous about making a mess!
Hey LeAnn! I think it would look beautiful to mix color with black and white portraits. To me, there is no right or wrong way to do a gallery wall! If you’re worried about it looking messy, I’d recommend using all the same or similar color frames and mats. That will give some continuity to the wall while letting each photo shine individually. I hope this helps!
I absolutely ADORE it!! I rarely comment on blogs, but I simply had to! Thank you so much for sharing. I just bought my first home and I’m beyond intimidated with so many possibilities. This will definitely be a great source of inspiration.
Congratulations on your first home!! That’s so exciting! Have fun decorating. 🙂
I love this wall! What’s the meaning behind the keys and the 4?
Thank you so much, Holly!! The keys we have collected over the years… old car keys, house keys, some we have no clue where they came from… lol! And the 4 stands for the four people in our family. 🙂
Love your ideas! The palette arrow was clever and I love the paper mâché letter in the middle of the frame! I think I will be stealing some of these ideas!
Please, do! I bet these would look fantastic in your home. Thanks so much for stopping by, Karen! 🙂
I absolutely love this gallery,color tones and its so simple! everything matches in an un match-y way. If that makes sense. I have been searching for a couch in that color and can’t seem to find The “right” one. Do you mind telling me where or what brand it is? I really enjoy your website 🙂
Couch shopping is hard, so I completely understand! This one came from Ashley Furniture a few years back. Hope you find what you’re looking for! 🙂
Awesome!!! Thanks!!
Love it all!! What color of paint is on the wall? It looks fab!
Thank you, Julie!! It’s Woodlawn Colonial Gray by Valspar.
I just love your gallery wall. Thank you so very much for making it seem WAY less intimidating. I can’t wait to try out my own!
This has given me inspiration to finish a wall over my mantle that ha been in the planning stage for quite sometime.
The wall looks great! I also LOVE your couch, where did you get it?
Hey Shannon! The couch came from Ashley Furniture probably 5 years ago. Sorry I can’t be more help! 🙂
This is beautiful!!! Thank you for sharing. Using your instructions and wall layout for my next project above our couch!.. Genius hanging tricks!..Horsehair plaster stinks, we have it too! Thanks again!!!
Can you tell me where that couch is from? I love it!
Thanks.
It came from Ashley Furniture quite a few years ago. Not sure if they’d still have it available or not!
Hello! I pinned this gallery wall a while ago and just now getting to one in my own house. I love the #4 wall art. Do you have a tutorial on that one?
Thanks!
Hey Kelly! I don’t actually have a tutorial for the #4. It was an old sign from the dollar store that I painted over in black and added the 4 with paint and a stencil. So it’s really easy to reproduce!
i love this, thank you for the inspiration! I also love the little plant you have, is it real? If so, what type of plant?
Thanks!
Thank you, Rachel! The plant on my coffee table is actual fake… much easier to keep alive! 🙂 I think I got the stems from Hobby Lobby, maybe?
Nice job! What’s the color of that beautiful grey paint on the wall? I’m looking for a color like that for my living room 🙂
It’s called Woodlawn Colonial Gray by Valspar. A great warm gray paint!
I hope you don’t mind me asking this . . . Where did you get your couch? I really love it! I’m looking for one just like it.
I don’t mind at all! It came from an Ashley Furniture store a few years ago (before I started the blog). I’m not sure if they’d still have this exact set, but I liked a lot of the selection they had. I hope this helps!
Hey Liz!
I love your wall! I was curious where you found your “number four” piece. I was looking for something similar! Thanks!
Hey Katie! Thank you so much! I actually painted that piece myself. I had an old sign from the dollar store that I bought years ago, so I just painted over it in black and used a stencil to paint on the number 4. I hope this helps!
I LOVE your wall!!! Just finished painting my entire house and I’m going to copy your artistic flair on my hallway wall.
Great website!
Hi love this idea! Where is your couch from? I love it!
Hi Brianna! It came from Ashley Furniture a few years ago. 🙂
This wall is beautiful! Can you please tell how you made the framed F? Thanks so much!
Beth
Hi Beth! Thank you so much! I grabbed an old frame from the thrift store and spray painted it first. Then I took a cardboard “F” from the craft store, painted it gold, and punched a small hole in the back so I could hang it on a nail. Easy and quick!
I really enjoyed reading this article! hopefully will have the time to do it myself! thanks!
Oh my goodness, this is perfect for my living room, I absolutely love it! Can you please tell me the size of each item in your gallery wall?
Hi Stacy, I’m so glad you like my gallery wall! We took down the gallery when we repainted our living room recently, so I’m not able to give you sizes on anything. I apologize that I can’t be more help! The best thing to do would be to measure your own space that you have to work with and find items that will fit into that. Lay everything out on the floor until you like the placement of it all!
Hi Liz!
I know you mentioned, in a previous comment, that you have recently redone this room, but I wanted to ask you what you did for curtains and an area rug? This is practically identical to the color scheme I am going with for our new living room ( bit more chalkboard though so the kids can “redecorate” them whenever they want, but I am having the HARDEST time deciding on curtains and an area rug. We also have grey furniture, however, our walls are just a little more on the beige/cream side. I don’t plan to paint till at least summer, but am trying to get the living room finished elsewise before our daughter’s bday party in April. Thank you for any help you can offer!! And please! Any pictures if you can!!
Hey Heather! Curtains and rugs can be hard to pick, can’t they? Here’s a little living room tour post I did when our living room still had this color scheme: https://lovegrowswild.com/2014/07/living-room-tour/
The rug was beige with gray stripes to match the couches, and I used sheer white curtains on the windows. I hope this helps! Best of luck getting the house ready! 🙂
Can I ask where you got your couch? I love everything about your living room! It’s beautiful!
Hey Abbie! We bought our couches from Ashley Furniture a few years ago now. Not sure if they still have them, but it’s worth a try!
I have a few questions on my living room if anyone is willing to help a gal out !!
Thank you !!
Hi, where did you get that couch from? I know it has nothing to do with your gallery wall but I am looking so long for exactly such a Couch *_*
Thanks, Nina
Hey Nina! We bought the couch from Ashley Furniture quite a few years ago. Good luck couch shopping! I know how tough it can be! 🙂
Great way to lay out the gallery wall first. I am sharing this on Pinterest.
Hi. Love your work classy and beautiful. I have been looking for the same style as that sofa grey. Can you please tell me from where did get it? Thanks