
Transform your yard by creating a beautiful new flower bed with this easy-to-follow tutorial. In just 6 simple steps, you’ll learn everything from choosing the perfect location to preparing the soil for planting. Grab your gardening gloves, and let’s get started!
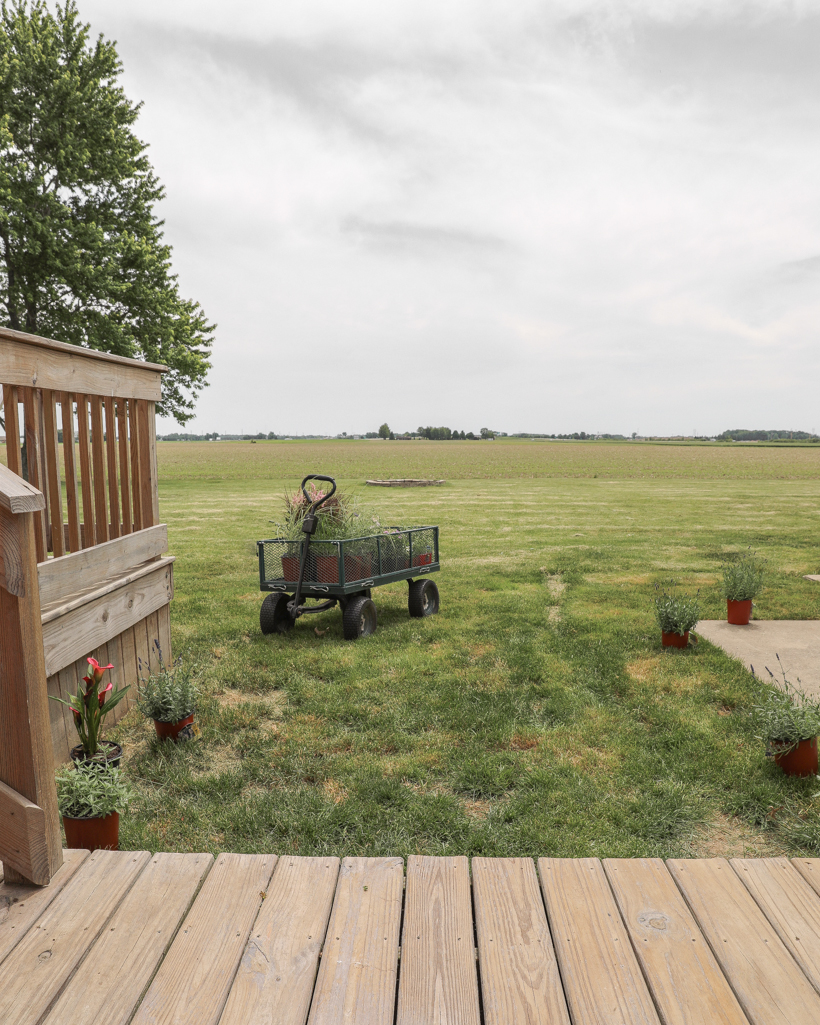
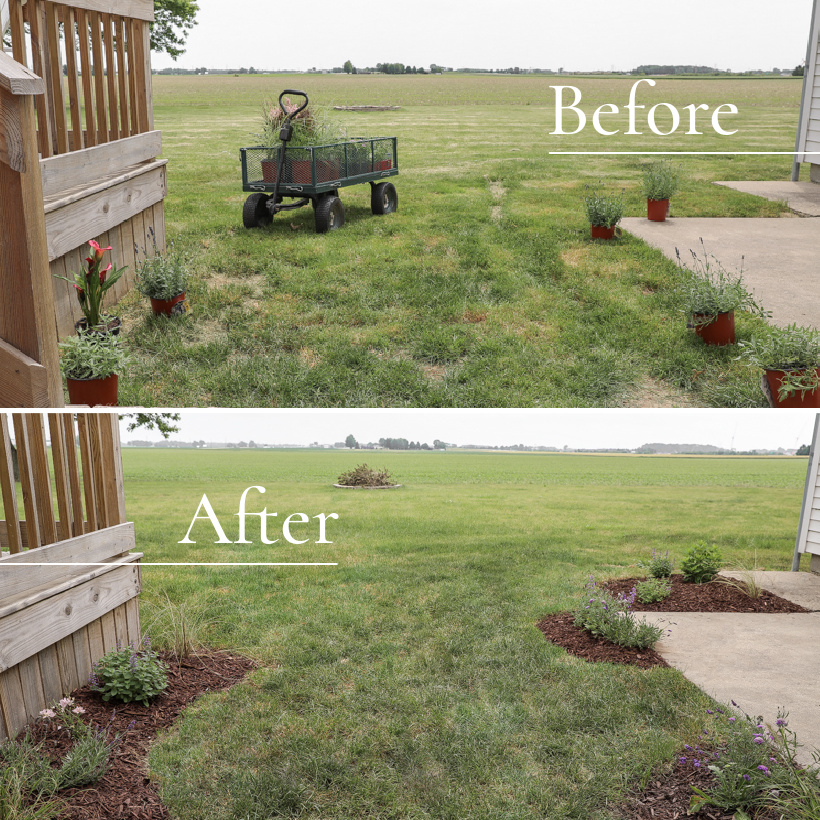
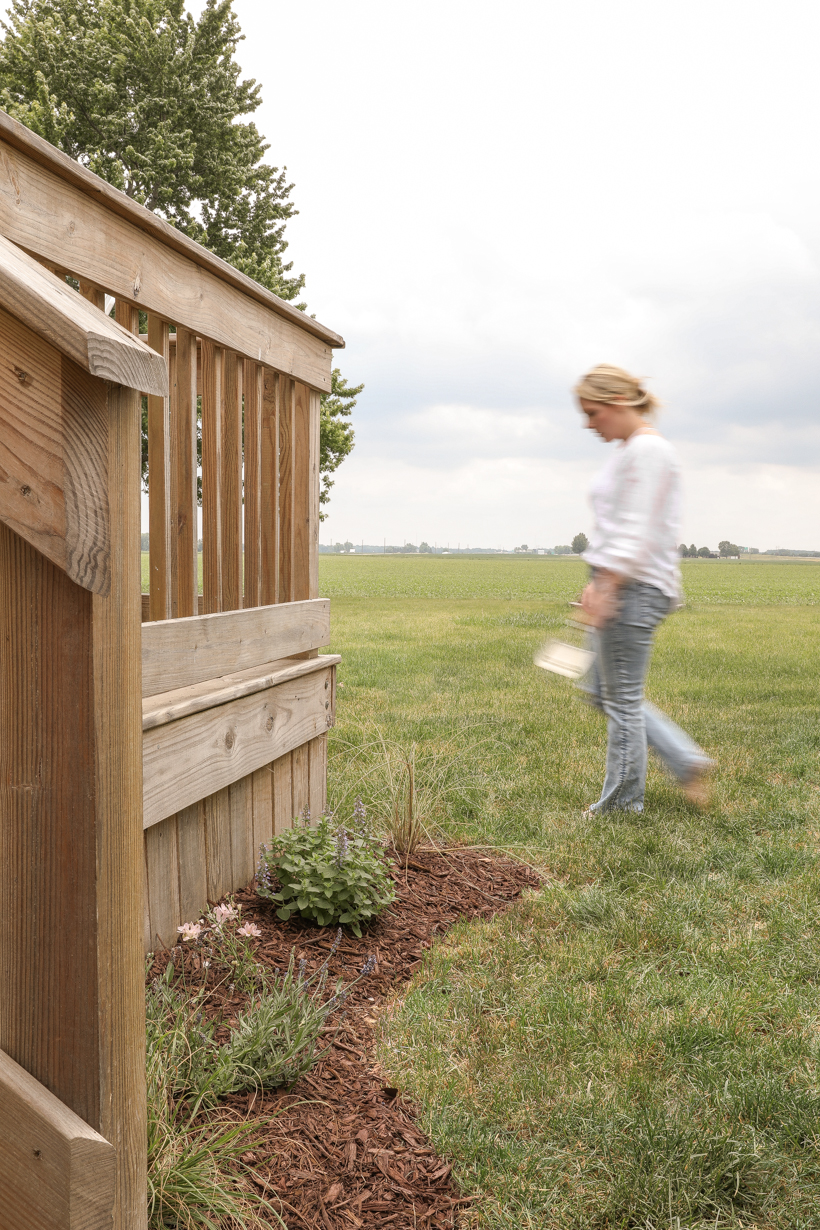
In our backyard, we have a small patch of grass between the deck and patio that has been a trouble spot ever since the deck was built. It’s hard to mow such a tiny area, and there is so much foot traffic here between us and the dogs that the grass is getting more and more bare each year. This spring I had a vision of flower beds lining the perimeter with large organic-shaped stepping stones leading out to the yard, and I wanted to show you the progress over the last few weeks.
I know tearing up your lawn to create something from scratch can be a daunting project, but I’ve found a few tips and tools that make it fairly simple and totally doable without having to fork out a ton of money to a landscaper. I believe in you!
CHOOSING A LOCATION
There are two main things to consider when deciding where to create a new flower bed or garden – sunlight and proximity to a water source. Most plants and flowers require 6-8 hours of direct sunlight daily, so you’ll want to choose an area that gets plenty of sun throughout the day. If the area you want to work on is part or mostly shade, there are plants that don’t require as much light, but the options are definitely limited compared to full sun. Also, make sure you have a hose long enough to reach the area because your new plants will need to be watered frequently until they get established.
CREATING A NEW FLOWER BED
SUPPLIES:
edger tool
round point shovel
hose with sprayer attachment
hand tiller or electric tiller
plants
mulch

STEP 1:
Plan the layout of your bed, and mark the border with twine/stakes, spray paint, or a hose. Curved borders can help accent existing structures and landscape, but make your curves subtle enough to easily mow around. I may have made mine too curvy, but we will see how mowing goes this summer and make needed adjustments next spring.
STEP 2:
Cut the border of your bed with a straight edge perpendicular to the ground. This is where a half-moon edger tool comes in handy to easily cut through grass and roots. Push the edger straight down into the soil along your border and rock back and forth to create a sharp edge. If the ground is dry and hard, spray water over the area about an hour before you plan to start digging. This will help soften the soil, but if you water it too much, you’ll end up working with mud.
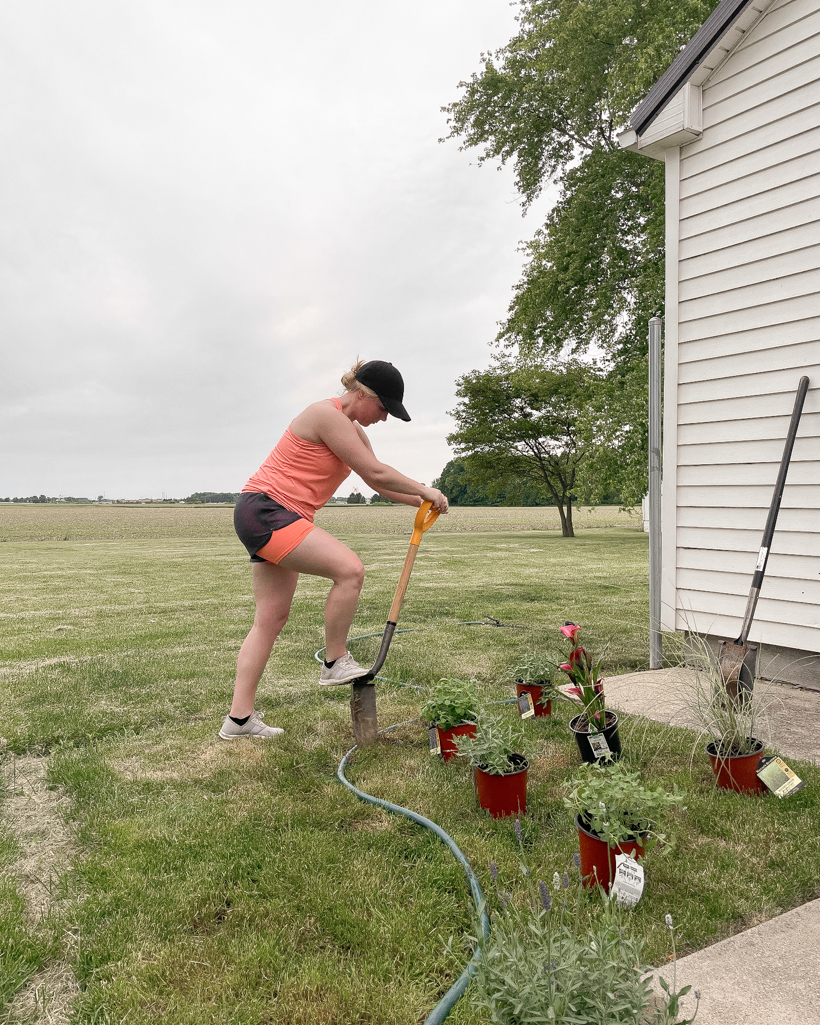
Next, stand inside the flower bed and use a shovel to dig at a 45º angle towards the cut edge. This will create a trench just inside the border – remove the chunk of sod and set aside.

STEP 3:
Remove the remaining grass from the flower bed with a shovel, making sure to dig deep enough to remove all the roots. There are alternative methods for killing the grass that are less labor-intensive, but they take time to work – sometimes weeks or even months. Removing the sod manually is the only way to complete this project in a day.
STEP 4:
Till and loosen the soil 8-12″ deep to prepare for planting. Add organic matter such as compost, manure, or peat moss for better nutrients and drainage, and work it into the soil. You can use a hand tilling tool (great for small areas such as borders) or an electric tiller that can quickly work a large flower bed.
Optional step: Install weed barrier and add edging material, if desired. I did neither.
STEP 5:
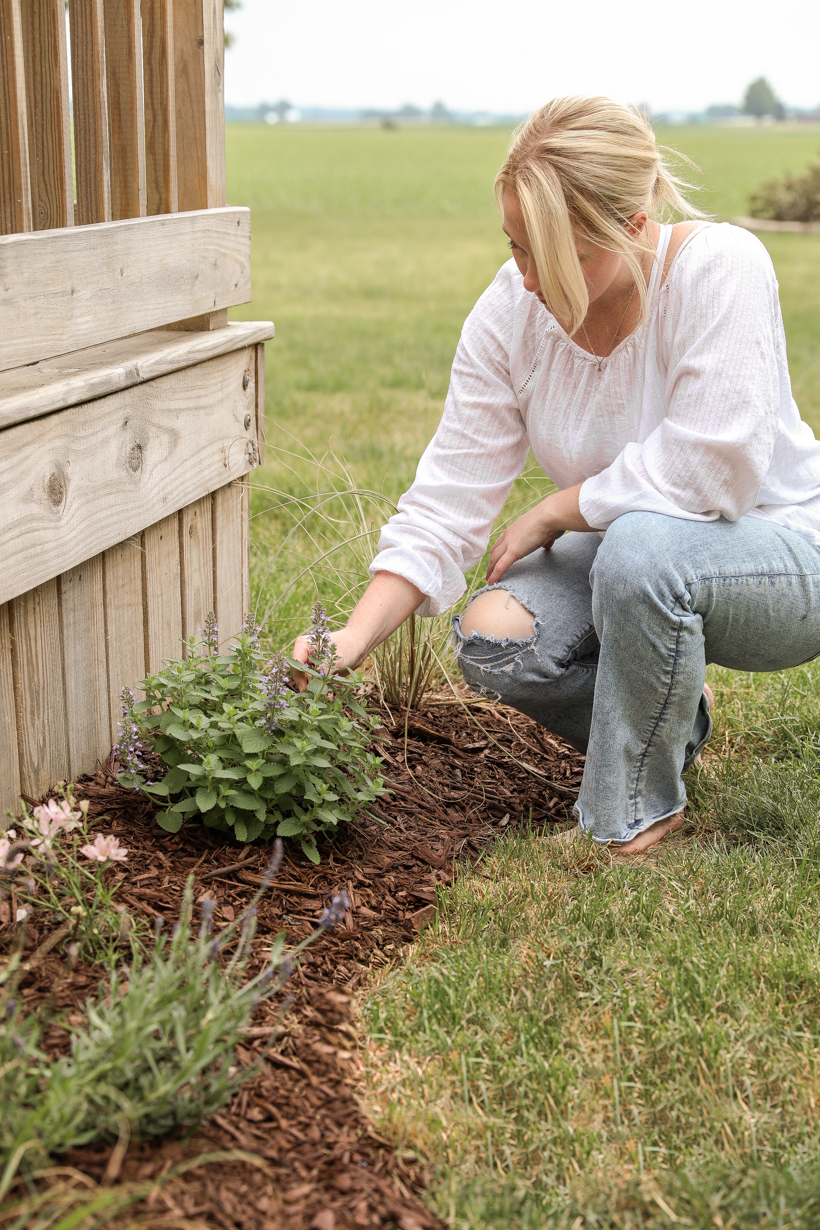
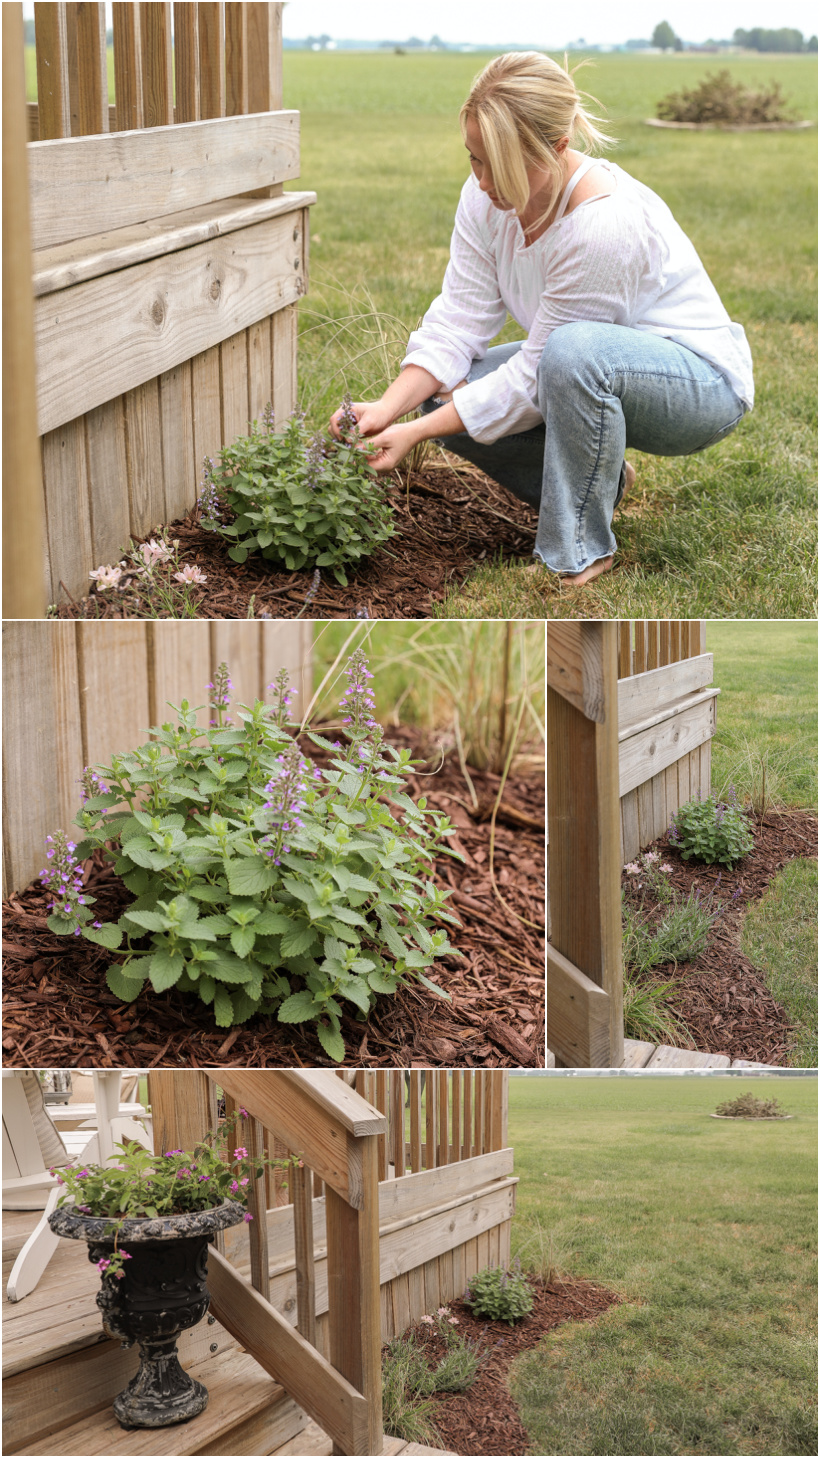
Add plants to your freshly tilled flower bed that correspond with the amount of sunlight you determined for this location earlier. Perennials will continue to grow year after year and are best for creating larger foundational parts of your flower bed. Annuals will need to be planted each spring and can add some variety to your flower bed as it fills in. Typically the perennials you plant will be small the first few years until they grow into maturity. Annuals are a great way to fill in any bare spots, but won’t overcrowd your flower bed long term. Pay attention to the heights of your plants, and place the tallest ones in the back of your flower bed. Be sure to include some kind of low, mounding ground cover that will eventually fill in the space between your larger plants.
STEP 6:
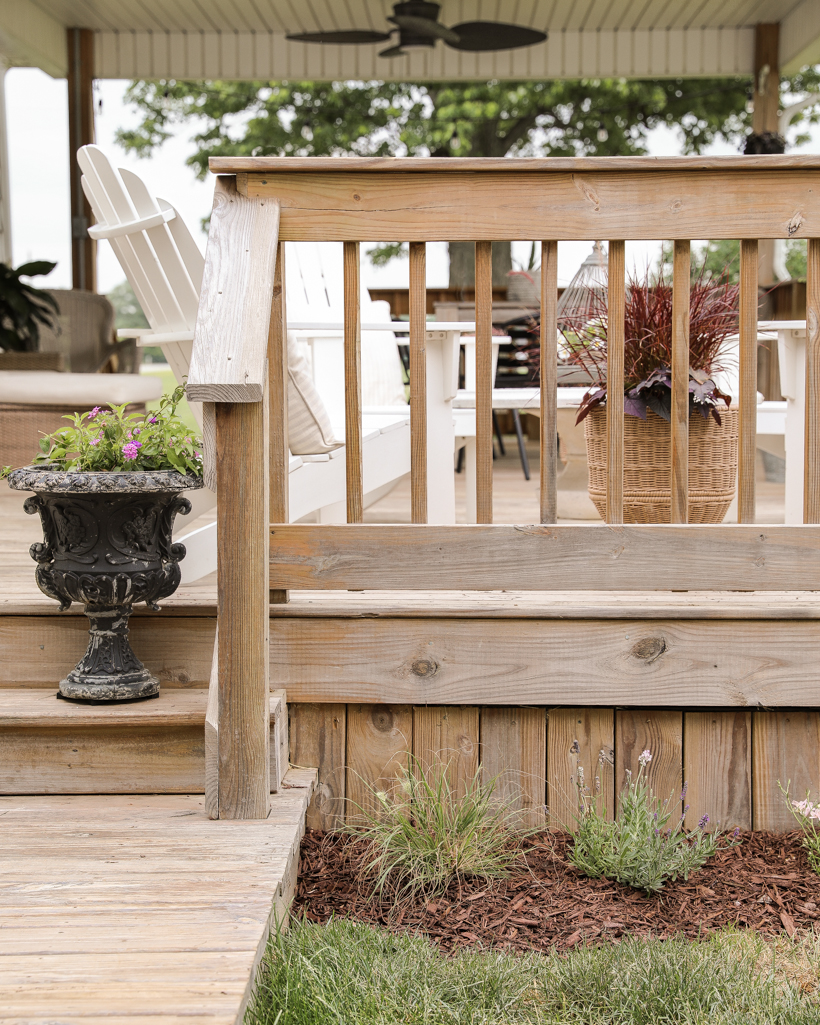
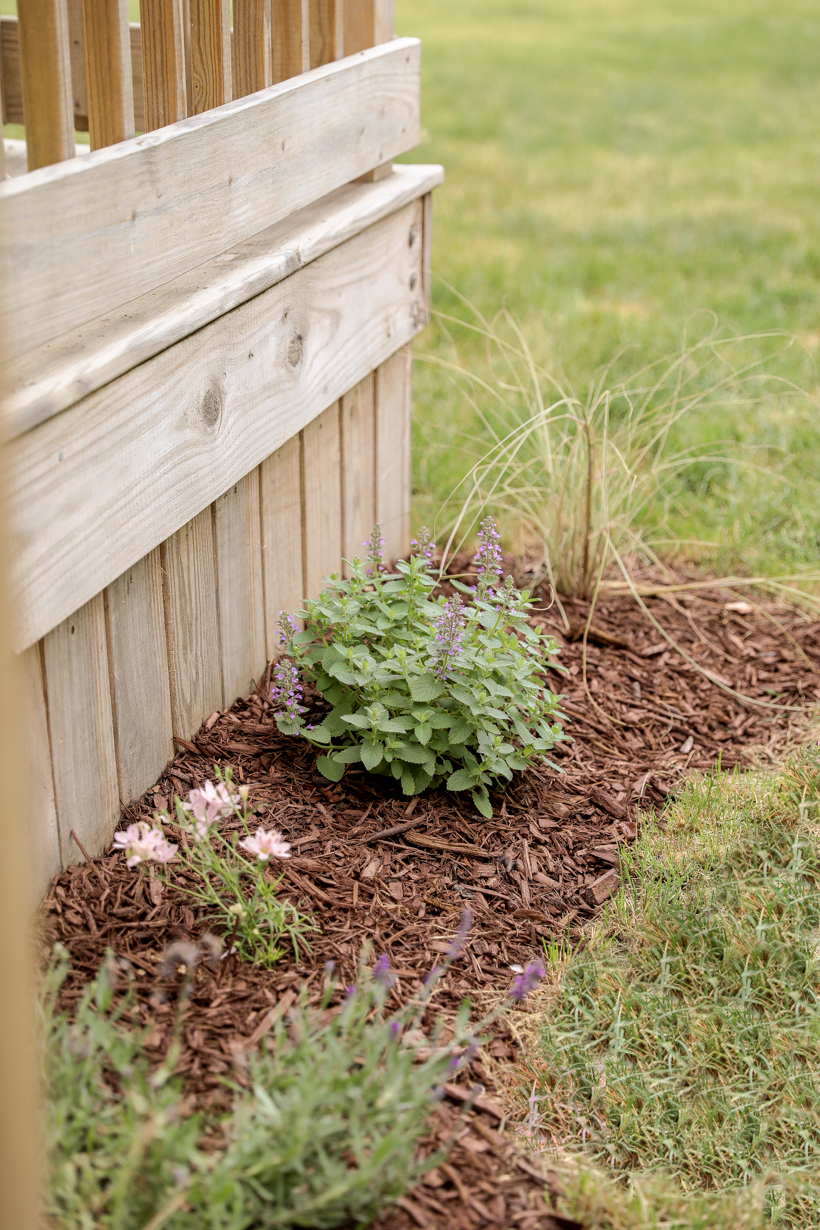
Add 2-3 inches of mulch on top of the soil all around your plants to help them retain moisture and protect them from harsh heat. This also helps with erosion that can happen as it rains and as you water your plants throughout the season.
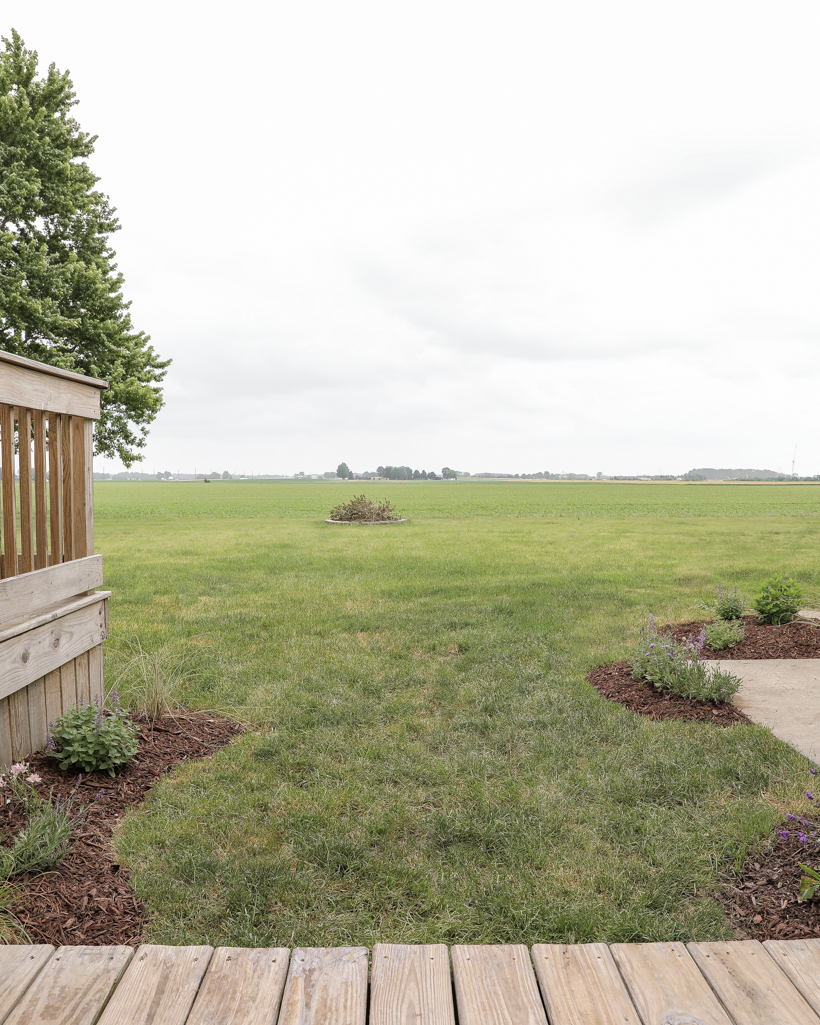
I’m so happy with how this little project turned out and am excited to see these plants grow and fill out in the years to come.
Here is what I planted:
Two types of tall grass – Morning Light Maiden Grass and Piglet Fountain Grass
Two varieties of lavender – Ellagance Purple English Lavender and Early Blue and White English Lavender
Two types of catmint – Whispurr Blue and Walker’s Low
Sweet Summer Hydrangea
Russian Sage
Summer Morning Delphinium
Blue Note Scabiosa

I still need to figure out a stepping stone walkway, but I’m having a hard time finding exactly what I want. That may be a project that waits till later this fall or next spring. All good things take time, and I’m learning to embrace that.
I hope this tutorial is helpful, and I want to see photos of your beautiful new flower beds! Nothing better than a proud plant momma. 🥰 Tag me on Instagram @lizlovegrowswild
As always, I sincerely appreciate you shopping through the links I share, which allows me to make a small commission from your purchase while your purchase price remains the same. When you use my affiliate links, I’m better able to create content for this blog as well as support my family, and I thank you from the bottom of my heart for supporting what I do!

Love the tips! Can you share what stain color you used on your deck?
Of course! The “stain” I used is actually clear so the beauty of the natural wood could shine through. Here is a blog post explaining everything I used: https://lovegrowswild.com/2021/05/how-to-stain-a-deck-everything-you-need-to-know-from-prep-to-finish/
I didn’t think it could look any better out by your deck – but – wow!